How to Make Money Selling Homemade Soap and Candles
We’ve noticed a lot of people are interested in making their own soap and candles lately. It seems like a fun way to get creative and maybe even make a little extra cash. We thought we’d put together a guide to help anyone thinking about selling homemade soap and candles get started. It’s not as complicated as it might seem, and with a few tips, you can be on your way to creating products people will love.
Key Takeaways
- Start by choosing the right soap base and wax for your candles. Simple choices are best when you’re beginning.
- Learn the basics of melting, mixing scents and colors, and pouring your creations. Practice makes perfect here.
- Properly curing your soap and allowing your candles to set is important for quality and how long they last.
- Think about where you want to sell your items, whether it’s local markets or online platforms like Etsy.
- Pricing your products involves looking at your costs and what others are charging, so you can make a profit.
Getting Started With Selling Homemade Soap
So, you’re thinking about making and selling your own soap? That’s awesome! It’s a really rewarding hobby that can actually turn into a nice little business. We’ve been there, and it’s totally doable. Let’s break down how we got started.
Choosing Your Soap Base
First things first, you need to pick a soap base. This is like the foundation of your soap. There are a few popular options, and each has its own vibe. Glycerin bases are great if you want a clear, shimmery soap. They’re also really moisturizing. Then there are bases made with things like shea butter or goat’s milk, which add extra creamy goodness and are super popular for their skin-loving properties. We started with a simple melt-and-pour glycerin base because it’s super forgiving and easy to work with, especially when you’re just learning the ropes.
Melting and Mixing Your Soap
Once you’ve got your base, it’s time to melt it down. You can do this in a microwave or a double boiler. We prefer using a double boiler because it gives us more control over the temperature, and we don’t have to worry about accidentally scorching the soap. Just cut your base into small cubes, pop it in the top of the double boiler, and let it melt slowly. While it’s melting, you can get your scents and colors ready. We like to use essential oils for a natural fragrance, but there are also great fragrance oils specifically made for soap. For color, there are liquid dyes, micas, and even natural colorants like clays. Remember to add your fragrance and color after the soap base is fully melted and slightly cooled – adding them when it’s too hot can make the scent fade.
Pouring and Cooling Your Creations
When your soap base is melted and you’ve mixed in your chosen scents and colors, it’s time to pour! Carefully pour the liquid soap into your molds. We use silicone molds because they make it super easy to pop the finished bars out. If you see any air bubbles on the surface after pouring, a quick spritz of rubbing alcohol can help them disappear. Then, just let them sit and cool. This can take a few hours, depending on the size of your molds and the type of soap base you used. Patience is key here; you don’t want to try unmolding them too early.
The Importance of Curing Your Soap
This is a step that a lot of beginners skip, but it’s super important for making good soap. After you’ve unmolded your bars, they need to cure. Curing is basically letting the soap sit in a well-ventilated area for about 4 to 6 weeks. During this time, excess water evaporates, which makes the bar harder and last longer when you use it. It also makes the lather better. We learned this the hard way when our first batch of soap got mushy really fast. Curing really does make a difference in the final product, and it’s a key part of the handmade soap making process.
Don’t rush the curing process. It might seem like a long time to wait, but it’s what transforms your poured soap into a long-lasting, quality bar that your customers will appreciate.
Crafting Candles That Customers Will Love
Alright, let’s talk about making candles. It’s a really fun way to get creative and, hey, make a little extra cash on the side. With a bit of practice, we can totally make some gorgeous candles that people will want to buy.
Essential Materials for Candle Making
First things first, we need our supplies. Think of this as our candle-making toolkit. We’ll need:
- Wax: Soy wax is a popular choice because it’s made from soybeans, burns cleaner, and lasts longer. You can also look into paraffin or beeswax, depending on what you want to achieve.
- Wicks: Pre-tabbed wicks are super handy, meaning they already have that little metal base attached.
- Fragrance Oils or Essential Oils: This is where we get to play with scents! We’ll talk more about this in a bit.
- Dye (Optional): If you want colored candles, you’ll need some special dye made for wax.
- Melting Pot: A double boiler setup works best, or you can use a heat-safe container placed over a pot of simmering water.
- Thermometer: Keeping an eye on the wax temperature is important for a good pour.
- Stirring Utensil: Something to mix everything with, like a metal spoon or a wooden stick.
- Containers or Molds: This is what your candle will take shape in. Jars, tins, or silicone molds all work.
- Wick Holder/Centering Tool: This helps keep the wick straight while the wax cools. A pencil or chopsticks can work in a pinch!
- Scale: For measuring your wax and fragrance accurately, especially when you start getting serious.
Melting Wax and Adding Scents
Okay, time to melt some wax! We’ll take our wax and put it in our double boiler. We want to melt it slowly over medium heat, stirring occasionally. While that’s happening, let’s get our containers ready. If you’re using jars, you can glue the wick to the bottom center now and let it set. This keeps it from moving around.
Once the wax is fully melted, we need to let it cool down a bit before adding our scent. The ideal temperature depends on the type of wax, but usually, it’s somewhere between 130°F and 140°F. This is where the thermometer comes in handy. Adding fragrance at the right temperature makes a huge difference in how strong the scent will be. For scent, we usually add about one ounce of fragrance oil for every pound of wax. Give it a good stir to make sure it’s all mixed in. If you’re adding color, now’s the time to stir that in too.
Pouring and Finishing Your Candles
Now for the fun part – pouring! We want to pour the wax slowly into our prepared containers. Try to keep the wick centered. You can use a wick holder or just rest a pencil across the top of the jar to keep the wick upright. Fill the container, but leave a little space at the top.
Sometimes, after the wax cools, you might see a little dip or sinkhole form around the wick. Don’t worry! This is pretty normal. You can just melt a little more wax and do a second, smaller pour to fill in that dip and make the top smooth. Once the candle is completely cool and solid, trim the wick so it’s about a quarter-inch long. This helps it burn better and prevents too much flame.
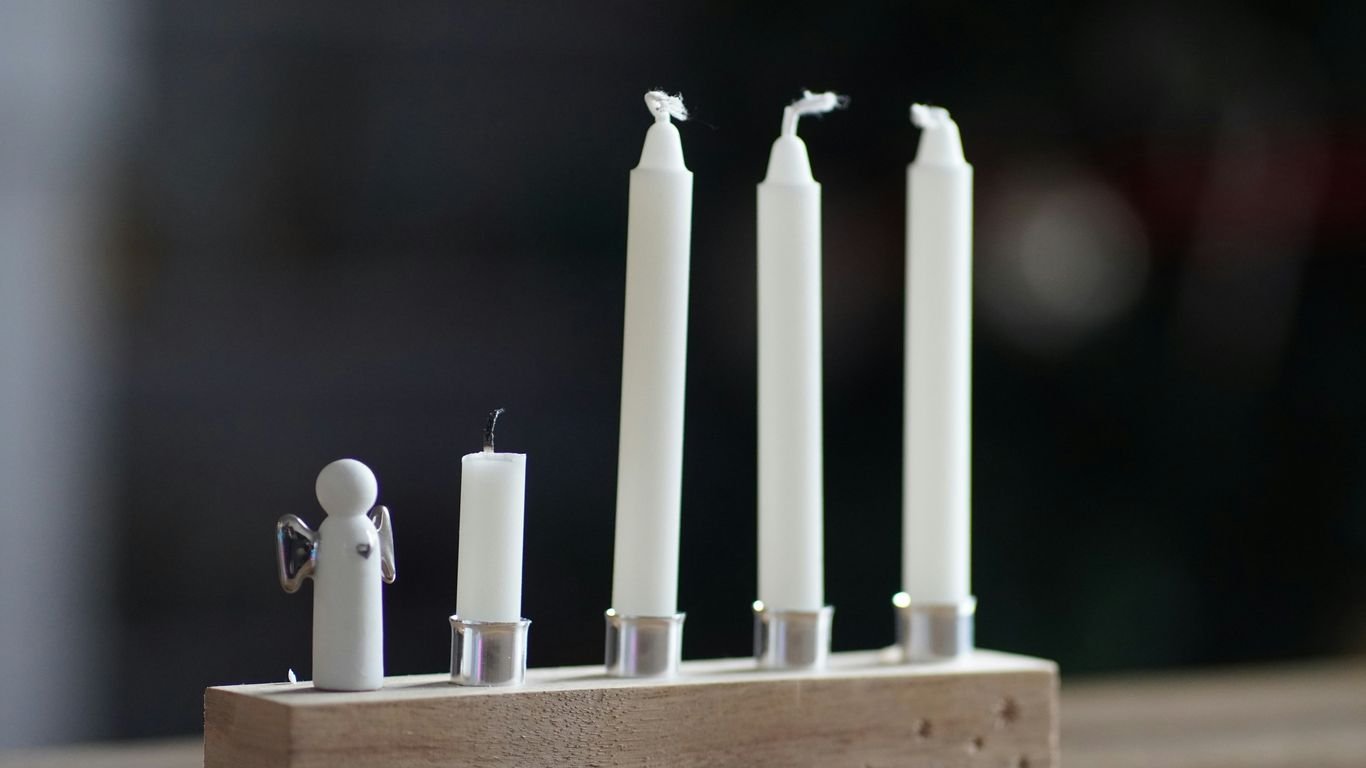
Understanding Candle Curing Times
So, your candle looks great, right? But we’re not quite done yet. Candles need a little time to cure. This isn’t like soap curing, which takes weeks. For most candles, especially soy ones, letting them sit for a few days to a week is usually enough. This curing time lets the fragrance oil bind properly with the wax. If you burn it too soon, the scent might not be as strong as it could be. So, be patient! Let them sit for at least 24-48 hours, but a week is even better for a really good scent throw when they’re burned.
Patience is key when it comes to candle making. Rushing the process, especially the curing stage, can impact the final scent and burn quality of your creations. Give your candles the time they need to set and mature.
Setting Up Your Workspace and Supplies
Alright, let’s talk about getting your crafting space ready and what you’ll need to actually make these soaps and candles. It might seem like a lot at first, but once you get organized, it’s pretty straightforward. We want a spot where we can work without too much fuss and have everything we need right at our fingertips.
Preparing Your Crafting Area
First things first, we need a dedicated spot to make our magic happen. It doesn’t have to be a huge room, but a clean, well-lit area is key. Think about ventilation too, especially when you’re working with fragrances and melting wax. A kitchen counter can work in a pinch, but if you can swing a separate table or workbench, that’s even better. We want to keep things tidy so nothing gets contaminated and we don’t have a big mess to clean up later. A clear workspace leads to clear thinking and better products.
Gathering Necessary Equipment
So, what tools do we actually need? It depends a bit on whether you’re focusing on soap or candles, or doing both. For melting wax or soap bases, a double boiler setup is pretty standard. You can buy one, or just use a heat-safe bowl over a pot of simmering water. We’ll also need pouring pitchers, stirring utensils (silicone or stainless steel are good), thermometers to keep an eye on temperatures, and of course, molds. For soap, you might need cutters, and for candles, wick holders or centering tools are super helpful. Don’t forget safety gear like gloves and maybe some safety glasses, especially when handling lye for cold-process soap (though we’re focusing on melt-and-pour for now, which is much simpler!).
Here’s a quick rundown of some common equipment:
- Melting Pot/Double Boiler: For gently heating your soap base or wax.
- Pouring Pitchers: To safely transfer melted soap or wax.
- Stirring Utensils: Silicone or stainless steel spoons/spatulas.
- Thermometer: An essential tool for precise temperature control.
- Molds: Silicone molds are popular for both soap and candles due to their flexibility.
- Safety Gear: Gloves and eye protection.
Sourcing Quality Ingredients
This is where the heart of your product comes from. For soap, we’ll be looking at different melt-and-pour bases like glycerin, shea butter, or goat’s milk. Each gives a different feel and lather. Then there are the scents – essential oils or fragrance oils. This is where you can really get creative and develop your signature smells. For candles, soy wax is a popular choice because it burns cleaner and longer. Paraffin and beeswax are other options. Again, fragrance oils and essential oils are key for scent. Colorants are also important, whether you’re going for vibrant hues or subtle pastels. We want to find reliable suppliers who offer good quality ingredients. Sometimes, buying in bulk can save money, but start small to test things out first. We’ll also need wicks, which come in different sizes depending on your candle diameter, and wick stickers or glue dots to secure them.
Marketing Your Homemade Soap and Candles
Okay, so we’ve got our amazing soaps and candles made, and they look and smell fantastic. Now, how do we get people to actually buy them? This is where marketing comes in, and honestly, it doesn’t have to be super complicated. We just need to get the word out there!
Building an Online Presence
First things first, we need to make sure people can find us online. Think of it like setting up a little shop on the internet. A good place to start is by creating a dedicated business page on platforms like Facebook. This is where we can share photos of our products, announce new scents or designs, and generally let people know we exist. It’s also a great way to connect with customers directly. We can answer questions, take custom orders, and build a community around our brand. Having a consistent online presence is key to reaching a wider audience.
Leveraging Social Media Platforms
Social media is our best friend here. Platforms like Instagram and TikTok are perfect for showing off our beautiful handmade goods. We can post eye-catching photos and short videos of our soap-making or candle-pouring process. People love seeing how things are made – it adds a personal touch and builds trust. We can also share customer testimonials, run little contests, or even go live to chat with our followers and answer questions in real-time. It’s all about creating engagement and making our brand feel approachable. We can even explore creative marketing strategies to make our posts stand out.
Creating an Engaging Brand Story
What makes our soap and candles special? It’s not just the product; it’s the story behind it. We should think about why we started making these items. Was it a passion for natural ingredients? A desire to create cozy home scents? Sharing our personal journey and the values behind our brand can really connect with customers. People like to support small businesses with a heart. We can weave this story into our website’s ‘About Us’ page, our social media posts, and even the little notes we include with orders. It helps customers feel like they’re part of something bigger than just a transaction.
Where to Sell Your Handmade Goods
So, you’ve poured your heart into making beautiful soaps and candles. Now comes the exciting part: getting them into the hands of people who will love them! We’ve found that there are a few main avenues we can explore, each with its own perks.
Selling at Local Markets and Fairs
This is where we can really connect with our customers. Think farmers’ markets, craft fairs, and local festivals. Setting up a booth lets people see, smell, and touch our products. It’s a fantastic way to get immediate feedback and build a loyal local following. Remember to make your display inviting and easy to browse. We want people to feel comfortable stopping by and asking questions. Having your prices clearly marked is a good idea too; most folks don’t want to have to hunt down a price.
- Be visible: Set up your booth so you’re easily seen. If you need to sit, use a higher chair or arrange yourself at the front.
- Engage: Greet people with a smile and be ready to chat about your creations.
- Payment: Have a simple way to take payments, like a mobile card reader or cash.
Utilizing Online Marketplaces
For reaching a wider audience, the internet is our best friend. Platforms like Etsy are specifically designed for handmade goods and have a built-in customer base looking for unique items. We can also consider places like Facebook Marketplace for local sales or even setting up our own simple online store.
- Etsy: Great for reaching a global audience interested in handmade items.
- Facebook Marketplace: Good for local sales and reaching people in our community.
- Your Own Website: Offers the most control over branding and customer experience.
Taking great photos is super important for selling online. People can’t smell or touch your products through a screen, so clear, attractive pictures are key.
Developing a Direct-to-Consumer Strategy
This is all about building a direct relationship with our buyers. It can involve selling through our own website, using email marketing to keep customers updated on new products or sales, and even offering subscription boxes. This approach gives us the most control over our brand and allows us to build strong, lasting connections with our customers. It might take a bit more effort upfront, but it can be really rewarding.
Building a direct connection means we can gather feedback easily and tailor our products to what our customers truly want. It’s a win-win situation.
Pricing Your Products for Profit

Okay, let’s talk about the money part. It’s easy to get caught up in the fun of making soap and candles, but if we want this to be more than just a hobby, we’ve got to price things right. We don’t want to end up working ourselves to the bone for pennies, right? Figuring out your pricing is one of the most important steps to building a sustainable business.
Calculating Your Cost of Goods
First things first, we need to know exactly what it costs us to make each item. This isn’t just about the wax or the lye; it’s everything that goes into that finished product. We need to add up:
- The cost of all your raw materials (oils, lye, fragrance oils, dyes, wicks, jars, labels, etc.).
- The cost of your packaging.
- A portion of the cost of your equipment (think of it as depreciation).
- And don’t forget your time! We need to assign a realistic hourly wage to ourselves for the time spent making, pouring, labeling, and packaging.
It might seem like a lot, but knowing your true cost of goods sold (COGS) is the foundation for everything else. If you’re selling a candle, for example, you’ll want to factor in things like the wax, wick, fragrance, jar, and label. For soap, it’s the oils, lye, additives, and molds.
Setting Competitive Retail Prices
Once we know our COGS, we can start thinking about retail price. A common way to do this is to take your COGS and multiply it by a certain number to get your retail price. A good starting point for many handmade businesses is to multiply COGS by 2.5 or 3. This gives us a gross profit margin that allows for business expenses and profit. For instance, if your candle costs $8 to make, a retail price of $20-$24 might be a good starting point. We also need to look around at what similar products are selling for, but we shouldn’t just copy others. Remember, if we compete on price alone, it’s tough to make a real profit. We’re making unique items, and there’s a market for quality handmade goods.
We need to be confident in our pricing. If we price too low, people might think our products aren’t as good. If we price too high, we might scare customers away. Finding that sweet spot is key, and it often means understanding who our ideal customer is and what they’re willing to pay for quality and uniqueness.
Understanding Wholesale Pricing
If we plan to sell our products to other shops or at larger events, we’ll need to think about wholesale pricing. Wholesale prices are always lower than retail prices because we’re selling in larger quantities and the retailer needs to make a profit too. A common wholesale price is about half of the retail price. So, if our candle retails for $24, a wholesale price of $12 might be appropriate. This is where selling in volume can really help our business grow. It’s a different strategy, but it can open up a lot of new opportunities for selling your handmade goods.
Here’s a quick look at how it might break down for a candle:
| Item | Cost of Goods Sold (COGS) | Retail Price | Wholesale Price | Profit Margin (Retail) | Profit Margin (Wholesale) |
|---|---|---|---|---|---|
| Standard Candle | $7.50 | $24.00 | $12.00 | ~68% | ~41% |
| Premium Candle | $11.10 | $38.00 | $19.00 | ~70% | ~41% |
Remember, these are just examples. Your actual costs and pricing will depend on your specific materials, time, and market.
Expanding Your Homemade Soap Business
So, you’ve got a good handle on making soap and candles, and maybe you’re even selling them at local markets or online. That’s awesome! But what’s next? How do we take this from a fun hobby that makes a little extra cash to something bigger, if that’s what we want? It’s all about thinking ahead and making smart moves.
Developing Unique Product Lines
We all know there are tons of soap and candle makers out there. To really stand out, we need to offer something special. This doesn’t mean we have to invent a whole new type of soap, but we can get creative. Think about unique scent combinations that aren’t everywhere else. Maybe we can focus on a specific type of ingredient, like using locally sourced botanicals or a particular kind of oil. We could also develop themed collections – like a "cozy autumn" line or a "spa day at home" set. The goal is to create products that people can’t find just anywhere, making them want our stuff specifically.
It’s also smart to think about what else our customers might like. If they love our lavender soap, maybe they’d also appreciate a matching lavender-scented lotion or bath bomb. Expanding into related products can give customers more reasons to buy from us and can increase the average sale amount. Just remember, don’t go too wild too fast. Adding too many products, especially complicated ones, can quickly become overwhelming and eat up all our time.
Considering Insurance for Your Business
This is a big one that a lot of makers skip, but we really shouldn’t. When we sell products, especially things people put on their skin like soap, there’s always a chance someone could have a reaction. It’s rare, but it happens. Getting product liability insurance is like a safety net. It protects us if someone were to claim our product caused them harm. It might seem like an extra cost, but compared to the potential cost of a lawsuit, it’s a small price to pay for peace of mind. We should also make sure our labels are super clear about all the ingredients used, so customers know exactly what they’re getting.
Focusing on Customer Relationships
We’ve probably all heard that it’s cheaper to keep an existing customer than to find a new one, and it’s true. Building good relationships with the people who buy our products is key to long-term success. This means great customer service – responding quickly to questions, handling any issues with kindness, and maybe even sending a little thank-you note with orders. We can also encourage reviews and feedback. Happy customers often become repeat customers and will tell their friends about us. Building a community around our brand, maybe through a newsletter or a social media group, can make people feel more connected to us and our products. Ultimately, people buy from people they like and trust.
Ready to Start Your Own Craft Business?
So, we’ve gone over how to make some really nice soaps and candles, and even how to get them out there for people to buy. It might seem like a lot at first, but honestly, it’s totally doable. We’ve seen how you can start small, maybe even use some of that survey money we talked about to get your first supplies. Whether you’re selling at a local market or setting up an online shop, the key is just to get started and keep learning. Don’t be afraid to try new scents or designs, and definitely connect with other makers online. We think you’ve got this!
Frequently Asked Questions
How do we start making our own soap?
To begin making soap, we need to pick a soap base, like glycerin or shea butter, depending on what we want our soap to be like. Then, we cut the base into small pieces and melt it down using a microwave or a double boiler. After that, we can add our favorite scents and colors. Once everything is mixed, we carefully pour it into molds and let it cool completely. Finally, we take the soap out of the molds and let it sit for a few weeks to cure, which makes it last longer and lather better.
What are the basic steps for making candles?
Making candles involves a few key steps. First, we gather our supplies like wax, wicks, and scents. We then melt the wax using a double boiler or microwave, keeping an eye on the temperature. Once melted, we add any desired fragrance oils or dyes and stir gently. We secure a wick in our chosen container and slowly pour the melted wax around it. After the wax cools and hardens, we trim the wick. It’s also a good idea to let the candles cure for a day or two to improve how they smell when burned.
Where can we sell the handmade soaps and candles we make?
We have several options for selling our creations. We can start by setting up a booth at local farmers’ markets, craft fairs, or festivals to connect with customers directly. For a wider reach, we can sell our products online through platforms like Etsy or even use local online marketplaces like Facebook Marketplace. Building our own website is also a great way to reach even more people.
How do we figure out the right price for our products?
To price our soaps and candles, we first need to calculate the cost of everything that goes into making them, including materials and how much time we spend. We also need to think about other costs like supplies for packaging and any marketing expenses. Once we know our total costs, we can add a profit margin to make sure we’re earning money. We should also look at what similar products sell for to make sure our prices are competitive but still allow us to make a good profit.
What’s important when creating a brand for our business?
Creating a strong brand means telling our unique story and showing what makes our products special. We should think about a name and logo that represent us. Using social media is key to sharing our story, showing our making process, and talking with our customers. We want people to connect with us and remember our brand for its quality and personality.
Should we consider insurance for our soap and candle business?
Yes, it’s a smart idea to think about insurance, especially if we plan to sell our products. Insurance can help protect us if something unexpected happens, like a customer having a reaction to an ingredient. It’s also crucial to always label our products clearly with all the ingredients used so customers know exactly what they are buying.


