We’re going to talk about something pretty important today: canning water. It might sound a bit odd at first, like, why would you even do that? But trust us, having a supply of clean, safe water on hand for a long time can be a real lifesaver. We’ll walk you through why it’s a good idea, how to do it right, and what you’ll need to make sure your stored water is good to go when you need it most. It’s all about being ready, just in case.
Key Takeaways
- Canning water helps it last for many years, way longer than regular bottled water.
- You need to make sure your water is clean and pure before you can it.
- Using the right jars and new lids is super important for a good seal.
- You can use either a water bath or pressure canner, depending on what you prefer.
- Testing your water quality with sensors can give you extra peace of mind.
Why Bother Canning Water?
The Shelf Life of Bottled Water
Okay, so you might be thinking, “Why even bother with all this canning fuss?” I mean, bottled water is everywhere, right? Well, here’s the thing: bottled water doesn’t last forever. In fact, most bottled water has a shelf life of only about a year. After that, the plastic starts to break down, and you risk chemicals leaching into the water. Not exactly what you want in an emergency situation, is it?
The Benefits of Glass Storage
Glass, on the other hand, is a totally different story. When you can water in glass jars, you’re essentially creating a time capsule of freshness. Properly canned water in glass can last for decades! Think about it: decades of safe, clean drinking water, ready whenever you need it. Plus, there’s no risk of plastic contamination. It’s a win-win.
Cutting Down on Waste
Let’s be real, those single-use plastic water bottles create a ton of waste. By canning your own water, you’re not only ensuring a long-term water supply, but you’re also doing your part to reduce plastic pollution. It’s a small step, but every little bit helps. Plus, you can reuse those canning tutorials over and over again!
Is Canning Water Really Necessary?
Wait a minute, you might be thinking. Is all this canning business really necessary? Can’t we just store water in other ways? Well, let’s consider a few things.
Why Stored Water Can Go Bad
Believe it or not, water can actually spoil, even if it’s just sitting there in a jar. Over time, even in a sealed container, things like mold and algae can start to grow. You might notice an “off” flavor after a while. That’s why simply storing water in jars without proper sterilization isn’t the best long-term solution.
The Sailor’s Secret
There’s a reason sailors of old drank so much grog (water mixed with alcohol). They knew that plain water stored on long voyages could go bad. The alcohol helped to prevent spoilage. It’s the same principle here – we need to do something to ensure our stored water stays safe to drink. Think of canned bread as another example of long-lasting food.
The Importance of Sterilization
Sterilizing and properly sealing your water is key to long-term storage. Canning provides that sterilization, ensuring that your water remains safe and palatable for years to come. Without it, you’re essentially just hoping for the best, and hoping isn’t a great strategy when it comes to emergency preparedness.
Here’s a quick comparison of water storage methods:
| Method | Shelf Life | Sterilization | Pros | Cons |
|---|---|---|---|---|
| Bottled Water | ~1 Year | Yes | Convenient, readily available | Plastic degradation, potential for leaks |
| Uncanned Jarred Water | ~Few Months | No | Easy to prepare | Spoilage risk, shorter shelf life |
| Canned Water | Decades (if sealed) | Yes | Longest shelf life, reliable storage | Requires canning equipment and effort |
Can You Actually Can Water?
Okay, so you might be wondering, can you really can water? It sounds a little strange, right? We’re so used to canning fruits, veggies, and jams, but water? Absolutely! It’s a totally viable way to store water long-term, and honestly, it’s not as complicated as it sounds. Let’s get into the nitty-gritty.
Water Bath vs. Pressure Canning
Most of us know that high-acid foods, like pickles and jellies, are safe to process in a water bath canner. Low-acid foods, such as meats, need the higher temperatures achieved in a pressure canner. So, where does water fit in? Well, the good news is, plain water can be safely processed using either method! The choice really comes down to personal preference and what equipment you have available. Some people find pressure canning faster overall, while others prefer the simplicity of a water bath. We’ll walk you through both so you can decide what works best for you.
Keeping it Plain and Simple
Here’s a crucial point: when canning water, you need to keep it pure. That means no added sugar, flavorings, or anything else. We’re talking straight-up, unadulterated H2O. Adding anything changes the properties of the water and could create an environment where botulism can thrive. Think of it like this: we’re not making a beverage; we’re preserving a vital resource.
It’s important to remember that canning water is about long-term storage for emergencies. We’re not trying to create a fancy drink; we’re ensuring access to safe drinking water when we need it most.
Choosing Your Canning Method
So, how do you decide which canning method to use? Here’s a quick breakdown:
- Water Bath Canning: This method is great if you’re new to canning or prefer a simpler process. You’ll need a large pot with a rack, canning jars, and lids. The jars are submerged in boiling water for a set amount of time to create a seal.
- Pressure Canning: This method uses a specialized pressure canner to reach higher temperatures. It can be a bit faster than water bath canning, but it requires more specialized equipment and a bit more attention to detail.
- Consider your equipment: Do you already have a pressure canner? Is your stove big enough for a large water bath canner? These practical considerations can help you make your decision.
Ultimately, the best method is the one you’re most comfortable with and that fits your setup. Both will give you safe, long-term water storage.
Getting Your Water Ready for Canning
Before we even think about touching those jars, we need to talk about the water itself. Not all water is created equal, and when you’re planning on storing it for the long haul, a little prep work goes a long way. We want to make sure we’re canning the cleanest, purest water possible. Think of it as giving your future self the best possible hydration experience during an emergency!
Boiling for Safety
First things first: boiling. Boiling is a simple yet effective way to kill off any unwanted bacteria or microorganisms that might be lurking in your water. Even if your water source seems clean, boiling acts as a safety net. We usually bring the water to a rolling boil for at least 10 minutes. This ensures that pretty much anything nasty is neutralized. Let it cool down before moving on to the next step – we don’t want to handle scalding water!
Filtering for Purity
Boiling takes care of the biological stuff, but what about sediment, chemicals, or other impurities? That’s where filtering comes in. Filtering your water before canning can significantly improve its taste and clarity. There are a few ways to go about this:
- Basic Pitcher Filters: These are great for everyday use and can remove some of the more common impurities.
- Faucet Filters: A step up from pitcher filters, they attach directly to your faucet for on-demand filtered water.
- Whole-House Filters: If you’re really serious about water quality, a whole-house filter will purify all the water coming into your home.
We’ve found that using a combination of boiling and filtering gives us the best results. It’s like a double layer of protection, ensuring that our canned water is as clean and refreshing as possible, and ready for long term storage.
Ensuring No Nutrients
This might sound counterintuitive, but we actually don’t want any nutrients in our canning water. Why? Because nutrients can provide food for any sneaky microorganisms that might survive the boiling process. Distilled water is a great option because it’s essentially pure H2O. If you’re not using distilled water, make sure your filtering process removes as many minerals and other additives as possible. The goal is to create an environment where nothing can grow, ensuring the water stays fresh and safe for years to come.

Essential Supplies for Canning Water
Canning water isn’t complicated, but having the right gear makes the process much smoother and safer. Let’s walk through the must-have items to ensure your canned water is ready for long-term storage.
Must-Have Canning Gear
First, you’ll need a canning rack. This keeps the jars from directly touching the bottom of the pot, which can cause them to break. A jar lifter is also essential for safely moving hot jars in and out of the canner. Don’t even think about using tongs – trust us, it’s not worth the risk! A wide-mouth funnel will help you fill the jars without making a mess. Finally, a large stockpot or water bath canner is needed to submerge the jars in boiling water.
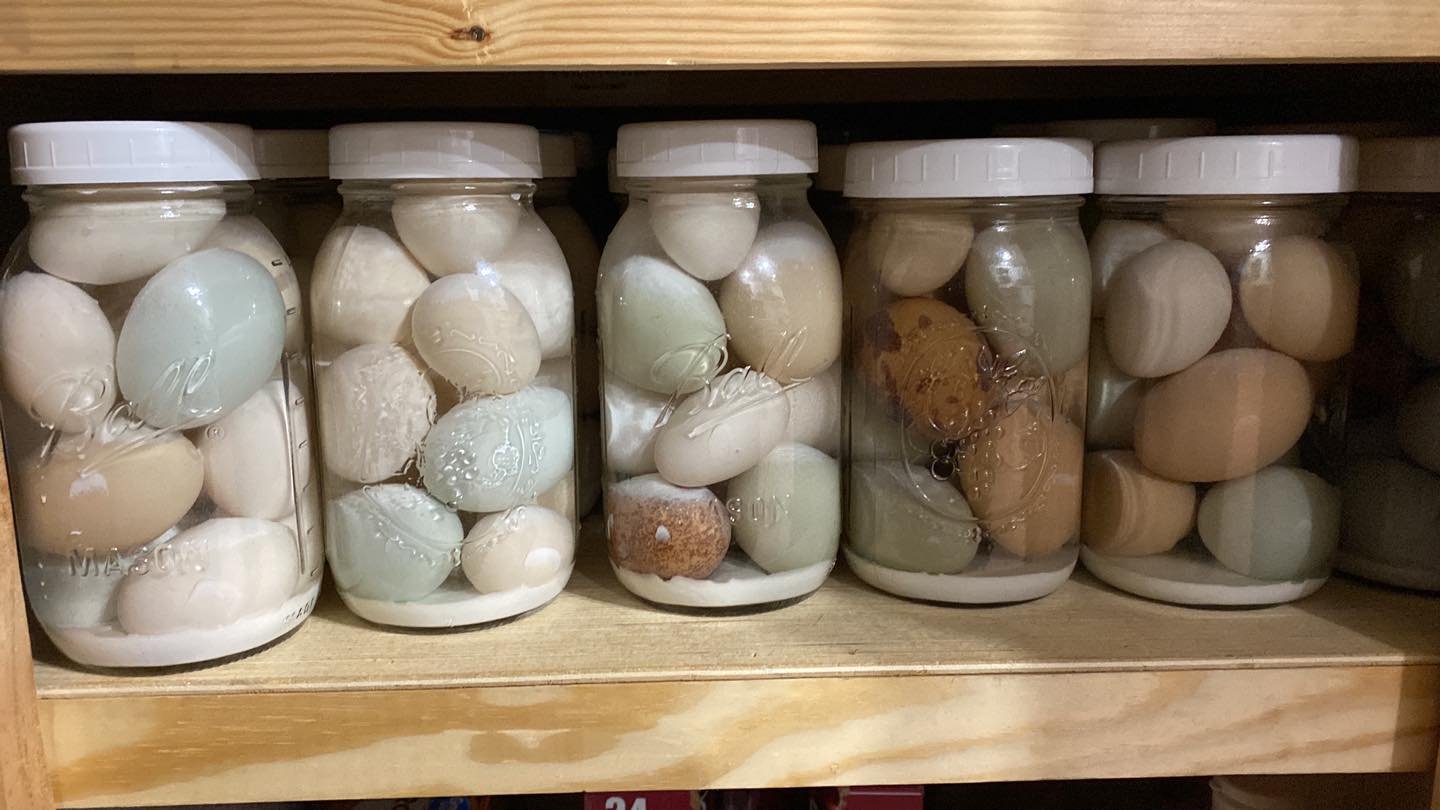
Choosing the Right Jars
Not all jars are created equal. You need to use jars specifically designed for canning, like Mason or Ball jars. These jars are made to withstand the high temperatures and pressure of the canning process. Inspect each jar for chips or cracks before using it; any imperfections can compromise the seal. We prefer using quart-sized jars because they’re a manageable size for individual use, but pint or half-gallon jars work too. Just make sure they fit in your canner!
The Importance of New Lids
Always use new lids for canning. The sealing compound on used lids may not create a proper seal, which can lead to spoilage. While the metal bands can be reused if they’re in good condition (no rust or dents), the lids themselves are single-use only. We recommend having a good supply of lids on hand before you start canning. It’s incredibly frustrating to run out mid-process!
Canning is a skill that requires patience and attention to detail. Taking the time to gather the right supplies and follow proper procedures will ensure that your canned water is safe and ready to drink whenever you need it. Don’t cut corners – your health and safety are worth the investment.
Using Water Quality Sensors for Peace of Mind
Why Test Your Water?
When canning water for long-term storage, we want to be absolutely certain that what we’re putting away is safe to drink years down the line. Municipal water is generally safe, but it can still contain trace contaminants or undergo changes in quality over time. Well water? That’s a whole different ballgame, as its quality can vary wildly depending on location and environmental factors. Using water quality sensors gives us a clear picture of what’s actually in our water, providing peace of mind before we even start the canning process.
Types of Sensors to Consider
There’s a whole array of sensors out there that can help us assess water quality. Here are a few to think about:
- pH Sensors: These measure the acidity or alkalinity of the water. Ideally, we want a pH of 7.0 for canning, as this indicates neutrality.
- ORP (Oxidation-Reduction Potential) Sensors: These tell us about the water’s ability to oxidize or reduce other substances, which can be an indicator of contamination.
- TDS (Total Dissolved Solids) Meters: These measure the total amount of dissolved minerals, salts, metals, etc., in the water. Lower TDS is generally better for canning.
- Conductivity Sensors: These measure how well water conducts electricity, which is related to the concentration of ions in the water. High conductivity can suggest the presence of unwanted substances.
Investing in a few of these sensors can seem like a big upfront cost, but it’s a small price to pay for the assurance that our emergency water supply is truly safe and pure. Plus, we can use them for testing our regular drinking water too!
Ensuring Pure Water for Canning
Once we’ve tested our water, we can take steps to purify it if needed. If the pH is off, we might need to use a pH sensor to adjust it. If the TDS is high, we might consider using a water filter or even distilled water for canning. The goal is to start with the purest water possible, free from any contaminants or minerals that could affect its taste or safety over time. By taking these extra precautions, we’re setting ourselves up for decades of worry-free hydration.
How Long Does Canned Water Last?
Decades of Freshness
Properly canned water can last for an incredibly long time – we’re talking decades. Unlike bottled water, which can degrade over time, canned water offers a stable and secure environment. The key is ensuring a proper seal during the canning process. Think of it as a time capsule for hydration! We’ve heard stories of people finding canned water from years ago that was still perfectly good. It’s pretty amazing when you think about it. This is why mastering water bath canning is so important.
Checking the Seal
Before you even think about using your canned water, give that seal a good look. Here’s what we do:
- Visual Inspection: Is the lid flat or concave? A bulging lid is a big no-no.
- Press Test: Press down on the center of the lid. It shouldn’t flex or give.
- Sound Check: Tap the lid. A dull thud suggests a bad seal, while a high-pitched sound is what you want.
If you have any doubts about the seal, it’s better to err on the side of caution. Don’t risk drinking potentially contaminated water. It’s just not worth it.
When to Re-Can Your Water
Even with the best canning practices, things can happen. Here are some signs it’s time to re-can your water:
- Broken Seal: If the seal is broken, compromised, or you’re just not sure, re-can it.
- Rust or Corrosion: Any signs of rust on the jar or lid mean the water might be compromised.
- Cloudiness or Sediment: If the water looks cloudy or has sediment at the bottom, don’t drink it. Re-can it after filtering and re-boiling. Remember, ORP sensor can help you measure water quality.
It’s a good idea to rotate your canned water supply every few years, even if the seals seem fine. This ensures you’re always using the freshest water possible and gives you a chance to inspect the jars for any issues. Plus, it’s a good excuse to practice your canning skills!
Wrapping Things Up
So, there you have it! Canning water might seem a little out there at first, but it’s actually a pretty smart move for making sure you’ve got clean water when you really need it. We’ve talked about how plastic bottles just don’t cut it for long-term storage, and how glass jars are way better. Plus, we went over the whole process, from getting your jars ready to sealing them up tight. It’s not super hard, and knowing you have a stash of good water can really help you feel more prepared for whatever life throws your way. Give it a try, and you’ll see it’s a simple step that makes a big difference.
Frequently Asked Questions
Why should we can water instead of just buying bottled water?
We often wonder why we should bother canning water when bottled water is so easy to find. The truth is, bottled water doesn’t last forever. After about a year, the plastic can start to break down and get into the water, which isn’t good. Canning water in glass jars, however, keeps it safe and clean for many, many years. Plus, it helps us use fewer plastic bottles, which is great for our planet!
Does water really go bad if we just store it in jars?
You might think water can’t go bad, but it actually can! Even in glass jars, if water isn’t properly cleaned and sealed, things like mold or weird tastes can show up after a few months. That’s why sailors long ago would add alcohol to their water – to keep it from spoiling. To make sure our stored water stays fresh and safe, we need to sterilize it and seal it up tight.
Can we actually can water?
Yes, you absolutely can! For plain, clean drinking water, using a water bath canner works just fine. This is the same way we might can jams or pickles. Some folks, like us, prefer to use a pressure canner because it can be quicker, even though it’s not strictly needed for water. The most important thing is that the water is pure and doesn’t have anything extra added to it.
How do we get our water ready for canning?
Before we can water, we need to make sure it’s super clean and safe. Boiling the water for a few minutes kills off any germs, like bacteria or viruses. We also suggest filtering it to get rid of dirt and make it taste better. The goal is to have really pure water, without any added stuff, so it stays good for a long time in the jars.
What supplies do we need to can water?
To can water, you’ll need a few key items. A water bath canner is essential, along with a canning rack to hold your jars. You’ll also need glass canning jars, and it’s super important to use brand new lids every time you can. Reusing old lids can cause problems with the seal, which means your water won’t stay fresh. Having the right supplies makes the whole process easy and safe.
How long does canned water typically last?
Canned water, when done right, can last for many, many years – even decades! The main thing to check is that the seal on your jar is still good. If the lid is still sucked down and doesn’t pop up, your water should be fine. While it can last a very long time, some people like to re-can their water every few years, just to be extra sure.