Making your own dandelion wine recipe can seem like a big project, but it’s actually pretty simple and rewarding. We’re going to walk you through each step, from picking those sunny yellow flowers to bottling your very own homemade wine. You’ll see that turning something many folks call a weed into a delicious drink is a fun process, and the end result is something truly special to share.
Key Takeaways
- Pick dandelions when they’re fully open, ideally on a dry, sunny day after the morning dew is gone.
- Only use the yellow petals for your dandelion wine; green parts can make it taste bitter.
- Clean your dandelion petals well to get rid of any dirt or bugs.
- Make sure you have the right tools, like a fermentation vessel and airlock, before you start.
- Let your wine age for a bit after bottling; this helps the flavors get better.
Gathering Your Dandelions
Alright, so you’re ready to make some dandelion wine! The first step, and arguably the most important, is gathering your dandelions. It’s more than just picking a bunch of yellow flowers; it’s about timing, location, and preparation. Let’s get into it.
When to Pick Dandelions
Timing is everything when it comes to dandelions. You want to pick them when they are fully open, usually on a dry, sunny day. This is when the petals contain the most flavorful nectar. Avoid picking them after it rains, as the rain can wash away some of the good stuff. Mid-morning to early afternoon is generally the sweet spot. We usually aim for a time when the dew has evaporated, but the sun isn’t so intense that the flowers start to wilt. If you don’t have enough dandelion petals from one picking, freeze the petals until you have enough.
Where to Find the Best Dandelions
Location, location, location! Not all dandelions are created equal. You want to find a spot that’s free from pesticides, herbicides, and other contaminants. Think about it: you’re going to be drinking this stuff! Avoid areas near roadsides, industrial sites, or places where pets frequent. Your own backyard, if it’s untreated, can be a great option. Fields and meadows away from potential pollutants are ideal. We always make sure to ask permission if we’re picking on someone else’s property. Remember, starter kit is important for beekeepers, but for us, it’s clean dandelions!
Cleaning Your Dandelion Harvest
Once you’ve gathered your dandelions, it’s time to clean them. This is a crucial step to remove any dirt, bugs, or other unwanted guests.
Here’s our method:
- First, gently shake off any loose debris.
- Next, inspect each flower head and remove any visible bugs or dirt.
- Finally, you can rinse the blossoms if they are dusty, but we usually don’t. They are sterilized during the first part of brewing anyway.
The real work in making dandelion wine is not collecting the dandelions. It’s in splitting apart the dandelions and removing the green leaves from each blossom. The green leaves have a milky sap that will ruin the taste of dandelion wine, and a good batch only uses the petals.
Now, the tedious part: separating the petals from the green parts. This is where the bitterness comes from, so be thorough! We usually sit down with a big bowl and pick the petals off one by one. It’s a bit time-consuming, but trust us, it’s worth it in the end. If you are working alone, it may be best to pick some of the flowers needed, remove petals, then pick more flowers and repeat. That way, you won’t have trouble with the flower heads closing before you have time to clean them. It’ll also give you a chance to get up and stretch.
Essential Equipment for Dandelion Wine
Okay, so you’re ready to make some dandelion wine! Awesome. Before we get started, let’s talk about the gear you’ll need. Having the right equipment makes the whole process smoother and helps ensure a tasty final product. Trust us, a little preparation goes a long way.
Must-Have Fermentation Tools
First off, you absolutely need something to ferment your wine in. A 1-gallon glass fermenting jar is ideal – think a demijohn or carboy. We like glass because it’s easy to clean and doesn’t impart any weird flavors. You’ll also need an airlock and a rubber stopper (or bung) to keep air out while letting carbon dioxide escape. This is super important to prevent spoilage.
Here’s a quick list:
- 1-gallon glass carboy or demijohn
- Airlock
- Rubber stopper (bung)
- A large stainless steel or food-grade plastic spoon for stirring
Bottling and Storage Essentials
Once your wine is fermented, you’ll need to bottle it. You can reuse old wine bottles (make sure they’re clean!), or buy new ones. You’ll also need corks and a corker to seal the bottles. A siphon is really helpful for transferring the wine from the fermenter to the bottles without disturbing the sediment at the bottom.
- Wine bottles (750ml is standard)
- Corks
- Corker
- Siphon with tubing
Optional Gear for the Serious Winemaker
If you’re planning on making dandelion wine regularly, there are a few extra gadgets that can make your life easier. A hydrometer is great for measuring the sugar content of your wine before and during fermentation – this helps you track the process and estimate the alcohol content. A long, thin bottle brush is super handy for cleaning those wine bottles. And if you want to get really fancy, you can invest in a wine thief for taking samples without disturbing the wine.
Having a dedicated space for fermentation and aging can also be a game-changer. A cool, dark place with a consistent temperature is ideal. This could be a basement, a closet, or even a spare room. Just make sure it’s out of direct sunlight and away from major temperature fluctuations.
Here’s a list of optional equipment:
- Hydrometer
- Test jar for hydrometer readings
- Bottle brush
- Wine thief

Key Ingredients for a Delicious Batch
Okay, let’s talk about what you’ll actually need to make some seriously good dandelion wine. It’s not just about grabbing a bunch of yellow flowers; the right ingredients, in the right amounts, are what separate a decent batch from a truly memorable one. We’ll break down the essentials, so you know exactly what to gather before you even think about picking those dandelions.
The Dandelion Petal Base
Obviously, dandelions are the star here! But it’s not the whole flower we’re after – just the petals. The yellow petals are what give the wine its unique flavor and color. You’ll need a surprising amount, so get ready for some petal-picking! Aim for about a gallon of loosely packed dandelion petals for a standard 1-gallon batch of wine. Remember, the fresher the petals, the better the flavor. We usually pick ours and start the process the same day to capture that vibrant, sunny essence. It’s also worth noting that the white ‘milk’ from the stem can impart bitterness, so try to avoid including too much of that when you’re separating the petals.
Sweeteners and Acidity Balancers
Now, dandelions alone won’t make a balanced wine. You’ll need to add some sweetness and acidity to get it just right. Sugar is the obvious choice for sweetness – plain white sugar works perfectly well, but you could also experiment with honey for a different flavor profile. As for acidity, lemon juice or citric acid are your friends. They brighten the flavor and help preserve the wine. Here’s a general guideline, but feel free to adjust to your taste:
- Sugar: About 2-3 pounds per gallon of wine
- Lemon Juice: Juice of 2-3 lemons per gallon, or 1-2 teaspoons of citric acid
Getting the sugar and acidity right is key. Too little sugar, and your wine will be dry and potentially tart. Too much, and it’ll be overly sweet and syrupy. Acidity balances the sweetness and gives the wine a refreshing zing. It’s a bit of an art, so don’t be afraid to experiment and adjust to your liking.
Yeast and Nutrients
Finally, you can’t make wine without yeast! Wine yeast is different from bread yeast; it’s specifically cultivated to produce alcohol and impart certain flavors. We recommend a good quality wine yeast like Lalvin EC-1118 or a similar champagne yeast. These are reliable and produce a clean, crisp wine. Yeast nutrient is also important. It provides the yeast with the nitrogen and other compounds they need to thrive during fermentation. Without it, your fermentation might stall, or the yeast could produce off-flavors. A teaspoon or two of yeast nutrient per gallon is usually sufficient. If you’re interested in water bath canning your wine, make sure to check the acidity levels first!
Preparing Your Dandelion Wine Base
Alright, we’ve got our dandelions, and now it’s time to get down to the nitty-gritty: creating the base for our wine. This is where the magic really starts to happen. We’re going to transform those sunny petals into something truly special. Let’s get started!
Cleaning and Preparing Dandelion Heads
First things first: cleaning. You absolutely have to get rid of any little critters or dirt that might be hiding in those flowers. Nobody wants a crunchy wine! This step is super important to avoid any off-flavors later on. We want the pure, floral taste of dandelion, not the taste of lawn.
Here’s what we do:
- Gently pull the yellow petals from the green parts (calyx). The green parts are bitter, and we want to avoid that bitterness in our wine. This is probably the most tedious part, but trust us, it’s worth it.
- Give the petals a good rinse in cold water. Swirl them around to dislodge any dirt or bugs. You might want to do this in batches to make sure you get everything.
- Let the petals drain in a colander. We don’t want them soaking wet, just clean.
Extracting the Dandelion Essence
Now for the fun part! We’re going to extract all that lovely dandelion flavor. This is basically like making a strong dandelion tea, which will form the base of our wine. Think of it as brewing compost tea for your garden, but instead, it’s for your wine!
Here’s how we do it:
- Place your cleaned dandelion petals in a large, non-reactive pot (stainless steel or enamel is best). We usually use about 3 quarts of loosely packed petals.
- Boil water. You’ll need enough to completely cover the petals. A good rule of thumb is about a gallon of water for every 3 quarts of petals.
- Pour the boiling water over the petals. Stir well to make sure all the petals are submerged.
- Cover the pot with a clean towel or lid. This will keep out any dust or bugs while the petals steep.
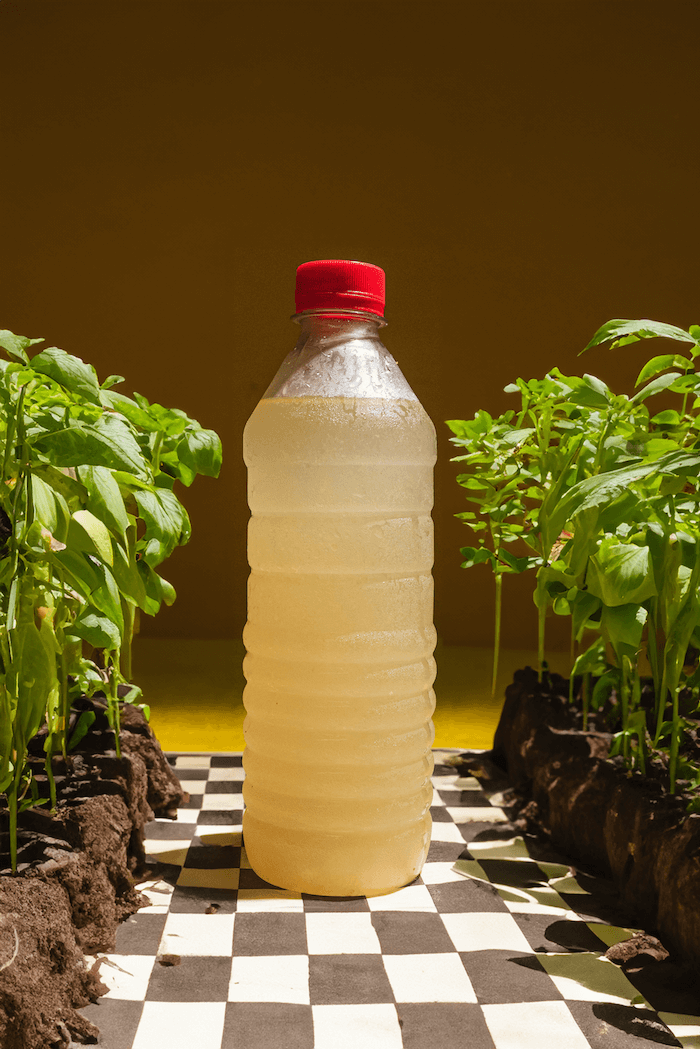
- Let the mixture steep for at least three days, stirring daily. This allows the water to extract all the flavor and color from the petals. You’ll notice the water turning a beautiful golden color. Don’t worry if it starts to smell a little musty; that’s normal.
This steeping process is crucial for extracting the maximum flavor from the dandelions. Don’t rush it! The longer you steep, the more flavorful your wine will be. We usually steep for a full week for a really intense flavor.
Adding Citric Acid and Campden Tablets
Okay, almost there! Now we need to add a couple of ingredients that will help preserve our wine and give it a nice, tart flavor. Citric acid adds acidity, which is important for balancing the sweetness of the wine and preventing spoilage. Campden tablets (potassium metabisulfite) help to sterilize the mixture and kill any unwanted bacteria or wild yeast that might be present. Think of it as a wine bottles pre-emptive strike against anything that could ruin our wine.
Here’s what we do:
- After the steeping period, add citric acid to the dandelion tea. We usually use about 3 teaspoons for a gallon of wine. You can adjust this to taste, but it’s better to start with less and add more later if needed.
- Crush a Campden tablet and add it to the mixture. Stir well to dissolve. This will release sulfur dioxide, which will kill any unwanted microorganisms. Don’t worry, the sulfur dioxide will dissipate during fermentation.
- Let the mixture sit for 24 hours after adding the Campden tablet before moving on to the next step. This gives the sulfur dioxide time to do its job. This is a good time to make sure you have your must-have fermentation tools ready.
And that’s it! Our dandelion wine base is ready to go. Next up: fermentation!

Fermentation: The Magic Begins
Now comes the really fun part – watching our dandelion wine actually become wine! It’s like a science experiment you can drink (responsibly, of course!). We’ll guide you through the process, step by step.
Straining and Discarding Petals
Okay, so remember all those lovely dandelion petals we worked so hard to collect? Well, their job is mostly done. After about three to five days, it’s time to strain them out. We usually use a cheesecloth-lined colander for this. Make sure you squeeze every last drop of that precious liquid out of the petals! We don’t want to waste any of that dandelion goodness. Discard the spent petals – they’ve given all they can give. This step is important to remove solids that can cause off-flavors during long-term fermentation.
Pitching the Yeast
This is where the magic really happens. “Pitching” just means adding the yeast to our dandelion mixture (now called “must”). Make sure your must has cooled down to the temperature recommended on your yeast packet – usually somewhere between 65-75°F (18-24°C). Sprinkle the yeast over the surface of the must; there’s no need to stir it in right away. Just let it sit for a few minutes, and then gently stir it in. Now, seal up your fermentation vessel with an airlock. This lets the carbon dioxide escape while preventing unwanted bacteria from getting in. If you’re looking to get started with a Sourdough Baking Starter Kit, this is a similar process to activating your starter!
Monitoring Fermentation Progress
Once the yeast is in, fermentation can take anywhere from one to three weeks, maybe even longer. Keep the fermentation vessel in a dark, temperature-controlled place. We aim for a consistent temperature, ideally in the range of 65-75°F (18-24°C). You’ll know fermentation is happening when you see bubbles in the airlock – that’s the carbon dioxide being released. Also, you might notice a frothy layer forming on top of the must. Don’t worry; that’s perfectly normal.
It’s a good idea to take hydrometer readings at the beginning and end of fermentation. This tells you the specific gravity of the liquid, which helps you calculate the alcohol content of your finished wine. We usually aim for a final gravity of around 1.000 or slightly below.
Here’s a rough timeline of what to expect:
- Days 1-3: Active fermentation (lots of bubbling).
- Days 4-7: Fermentation slows down.
- Days 7-21: Fermentation continues at a slower pace, sediment starts to settle.
Don’t be alarmed if things take a little longer. Every batch is different, and patience is key to making great dandelion wine.
Bottling and Aging Your Wine
Preparing for Bottling
Alright, fermentation is slowing down – exciting times! Before we get too carried away, let’s talk bottling. First, make sure you have enough bottles. Standard wine bottles are great, but you can also use flip top bottles if you’re into that rustic look. Give them a good cleaning and sanitize them. We don’t want any unwanted guests crashing our wine party. It’s also a good idea to have a bottling wand and some new corks ready to go. Trust us, being prepared makes the whole process way smoother.
Siphoning and Bottling Techniques
Time to move the wine! We want to avoid disturbing the sediment (lees) at the bottom of your fermentation vessel. Siphoning is the way to go here. Place your sanitized bottles below the level of your wine, and use a siphon to gently transfer the liquid. Fill each bottle, leaving a little headspace at the top. If you’re using corks, now’s the time to get them in there nice and tight. If you’re using bottles with a swing-top closure, make sure the rubber gasket is in good condition to ensure a proper seal.
The Importance of Aging
Patience is key when it comes to aging dandelion wine. While you could technically drink it right away, letting it age for a few months (or even longer!) will really improve the flavor. Store your bottles in a cool, dark place – a basement or closet works well. Aging allows the flavors to mellow and meld together, creating a more complex and enjoyable wine. Some people even let their dandelion wine age for a year or more! Here’s a rough timeline:
- 1-2 Months: Noticeable improvement in flavor.
- 6 Months: Wine becomes smoother and more balanced.
- 1 Year+: Flavors continue to develop and deepen.
Don’t be surprised if you see some sediment forming in the bottles as the wine ages. This is perfectly normal and doesn’t affect the quality of the wine. If you really want to get rid of it, you can carefully decant the wine before serving, leaving the sediment behind.
We usually wait at least six months before opening our first bottle. It’s tough, but so worth it!
Tips for a Perfect Dandelion Wine
Avoiding Bitterness
Bitterness is the enemy of good dandelion wine. The key to avoiding it lies in meticulous preparation of your dandelions. We’ve learned that removing every trace of green from the petals is absolutely essential. Even a little bit of the green sepal can impart a harsh, unpleasant flavor.
Here’s what we do:
- Inspect each petal carefully.
- Don’t be afraid to discard petals that are difficult to clean.
- Consider a longer steeping time in cold water to draw out any residual bitterness before fermentation.
We also found that using filtered water, rather than tap water, can make a difference in the final flavor profile. Tap water can contain minerals and chemicals that contribute to bitterness.
Ensuring Proper Fermentation
Proper fermentation is where the magic truly happens, and it’s vital to get it right. We’ve found that using a reliable yeast strain is a great start. Also, temperature control is important. Too hot, and you risk off-flavors; too cold, and the fermentation might stall. We aim for a consistent temperature within the yeast’s recommended range. Adding yeast nutrient can also help ensure a healthy and complete fermentation.
Consider these points:
- Use a hydrometer to track the fermentation progress.
- Degas the wine regularly during the first few days of fermentation.
- Be patient! Fermentation can take time.
Achieving Optimal Flavor
Flavor is subjective, but we’ve discovered some tricks to enhance the overall taste of our dandelion wine. Experimenting with different types of sweeteners, like honey or agave nectar, can add complexity. Also, aging the wine properly is crucial. We’ve found that at least six months of aging allows the flavors to mellow and meld together. Don’t rush the process!
Here’s a simple aging schedule we like to follow:
| Time | Action |
|---|---|
| 0-3 Months | Bulk aging in a carboy |
| 3-6 Months | Bottled aging in a cool, dark place |
| 6+ Months | Enjoy! |
Remember, making dandelion wine is a journey. Don’t be afraid to experiment and find what works best for your palate. Happy winemaking!
Conclusion
So, there you have it! Making dandelion wine might seem like a big project at first, but it’s actually pretty straightforward once you get going. We’ve walked through all the steps, from picking those sunny yellow flowers to getting the wine ready for bottling. It’s a really rewarding process, and there’s nothing quite like sipping on something you made yourself. Plus, it’s a cool way to use something most people just see as a weed. We hope this guide helps you make some delicious dandelion wine that you can share with friends and family. Cheers to your homemade brew!
Frequently Asked Questions
Is dandelion wine alcoholic?
Yes, dandelion wine is an alcoholic drink, usually having between 8% and 12% alcohol.
Can I use any type of dandelion to make wine?
While all dandelions are safe to use, it’s best to pick them from areas that haven’t been sprayed with chemicals. Wild dandelions growing away from roadsides are usually the best choice.
Which part of the dandelion should we use?
We only use the yellow petals for our wine. The green parts, like the stems and the base of the flower, can make the wine taste bitter.
How long does it take to make dandelion wine?
The time it takes can vary, but generally, it takes about 3-6 weeks for the main fermentation, and then we let it age for at least 6 months to a year for the best flavor.
Why does our dandelion wine taste bitter?
If your wine tastes bitter, it’s likely because some green parts of the dandelion made it into the mix. Next time, be super careful to only use the yellow petals.
Can we make dandelion wine less sweet?
Absolutely! We can adjust the amount of sugar we add at the beginning. Less sugar will result in a drier wine, while more sugar will make it sweeter.