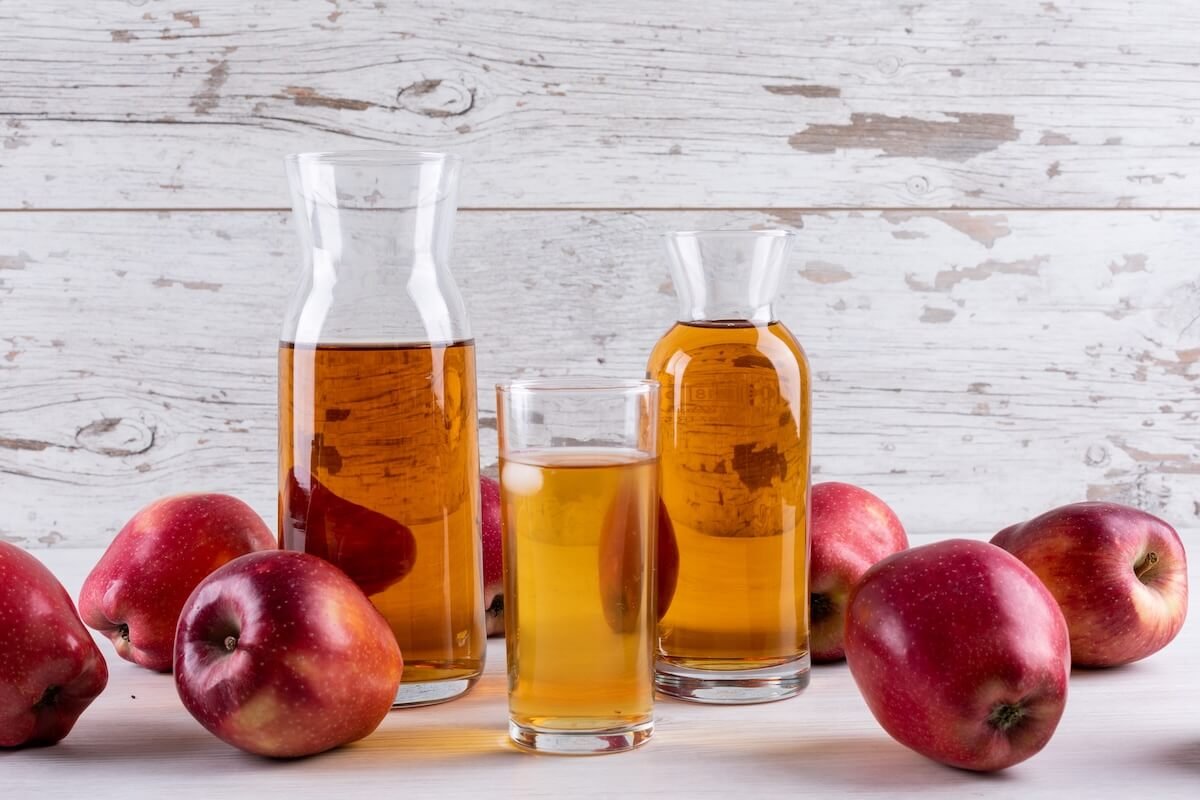
So, you wanna make some apple mead, huh? We get it. There’s something really cool about making your own drinks, and apple mead, or ‘cyser’ as some folks call it, is a total winner. It mixes the sweet kick of honey with the crisp taste of apples, and honestly, it’s pretty satisfying to sip on something you made yourself. We’re gonna walk you through everything, from getting your stuff together to bottling that liquid gold. This isn’t some super fancy, complicated guide. We’re just gonna keep it real and help you make some awesome apple mead.
Key Takeaways
- Gathering the right stuff, like good honey and apple cider, and having the basic tools, makes the whole process way easier.
- Making your mead base means mixing honey and cider, and keeping an eye on the temperature is a big deal so your yeast can do its job.
- Fermentation is where the magic happens; just set things up right, watch it closely, and don’t freak out if you hit a small snag.
- Aging your apple mead takes time, but waiting it out helps the flavors really come together and makes it taste much better.
- When it’s time to bottle, being super clean is important, and you can even add some fizz if you want, then just seal it up and get ready to enjoy.
Gathering Your Apple Mead Arsenal

Before we even think about tasting that sweet, apple-infused mead, we need to gather our supplies. Think of it as prepping for a grand adventure – you wouldn’t set off without your map and compass, right? Same goes for mead making. Let’s make sure we have everything we need to craft a truly exceptional batch of apple mead.
Essential Ingredients for a Stellar Brew
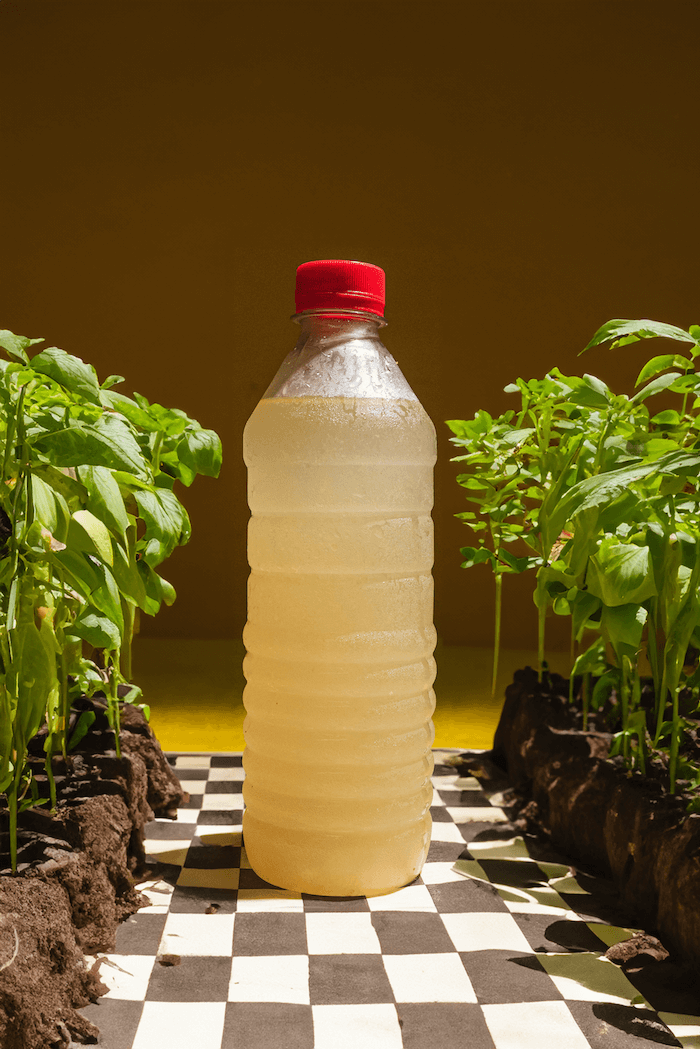
First, the stars of our show: honey and apples! Raw, unfiltered honey is the traditional choice, lending a depth of flavor that processed honey just can’t match. As for apples, we’ll need apple cider or juice, making sure it doesn’t contain potassium sorbate, which can inhibit fermentation.
Here’s a quick rundown:
- Honey: The heart of our mead. About 1-2 cups of honey per gallon, depending on desired sweetness.
- Apple Cider/Juice: The cyser component. One gallon, ensuring no preservatives.
- Yeast: The engine of fermentation. A packet of mead or wine yeast will do the trick. starter kit is a good place to start.
- Water: To top off our must and adjust the gravity.
Don’t skimp on quality here. The better the ingredients, the better the final product. Think of it like cooking – you wouldn’t use old, wilted vegetables for a gourmet meal, would you?
Must-Have Equipment for Mead Making
Okay, ingredients? Check. Now, let’s talk tools. We’re not building a spaceship here, but a few key pieces of equipment will make our lives much easier and our mead much better. Sanitation is key, so make sure everything is squeaky clean before we start.
- One-Gallon Carboy: This is where the magic happens. Glass is preferred, but food-grade plastic will also work.
- Airlock and Stopper: To let the CO2 escape while keeping unwanted critters out.
- Sanitizer: Star San or similar – crucial for preventing infections.
- Hydrometer: To measure the specific gravity and track fermentation progress.
- Racking Cane/Siphon: For transferring the mead without disturbing the sediment.
- Bottles: For the final product. Wine bottles or flip-top bottles work great.
Optional Additions for Next-Level Flavor
Want to take your apple mead from good to amazing? Consider these optional additions. They can add complexity, balance, and a unique twist to your brew. Experimentation is part of the fun!
- Pectic Enzyme: Helps clear the mead by breaking down pectin in the apple juice.
- Acid Blend: Balances the sweetness, especially if your cider is low in acidity.
- Wine Tannin: Adds structure and mouthfeel. A cup of strongly brewed black tea can also do the trick.
- Spices: Cinnamon, cloves, nutmeg – use them sparingly to complement the apple flavor.
- Fruit: Additional apples, berries, or other fruits can add depth and complexity.
With our arsenal assembled, we’re ready to embark on our mead-making journey. Let’s move on to crafting that perfect apple mead base!
Crafting Your Apple Mead Base

Now that we’ve gathered our ingredients and equipment, it’s time to start building the foundation of our apple mead. This stage is all about preparing our honey and apple cider, ensuring the right temperature for our yeast, and setting the stage for a successful fermentation.
Prepping Your Honey and Apple Cider
First things first, let’s talk about the honey and apple cider. The quality of these ingredients will directly impact the final product, so choose wisely! We want to use fresh, preservative-free apple cider. If you’re using honey that’s crystallized, gently warm it in a water bath to make it easier to work with. The goal is to create a homogenous mixture that’s ready for fermentation.
Here’s a simple breakdown:
- Ensure your apple cider has no preservatives like potassium sorbate, as these can inhibit yeast activity.
- Gently heat the honey to make it more fluid, but avoid overheating, which can affect its flavor.
- Mix the honey and apple cider thoroughly until the honey is completely dissolved.
The Importance of Temperature Control
Temperature is key when it comes to mead making. Too hot, and you risk damaging the delicate flavors of the honey and cider. Too cold, and your yeast might not activate properly. We aim for a temperature range that’s comfortable for our yeast friends, typically between 65°F and 75°F (18°C and 24°C). Use a reliable thermometer to monitor the temperature of your must (the honey and cider mixture) before adding the yeast. This is where a wine tannin addition can be helpful.
Introducing Your Yeast Friends
Now for the star of the show: the yeast! Selecting the right yeast strain is crucial for achieving the desired flavor profile in your apple mead. Different yeast strains produce different esters and alcohols, which contribute to the overall taste and aroma. Once your must has cooled to the appropriate temperature, it’s time to pitch the yeast. Rehydrating the yeast according to the manufacturer’s instructions is generally recommended to ensure optimal viability. Sprinkle the rehydrated yeast over the surface of the must, and let it sit for a few minutes before gently stirring it in. This gives the yeast a chance to acclimate to its new environment. Remember to use yeast nutrient for a healthier fermentation.
Patience is key here. Don’t rush the process. Giving your yeast a good start will pay off in the long run with a smoother, more flavorful mead.
The Fermentation Journey

Setting Up for Success
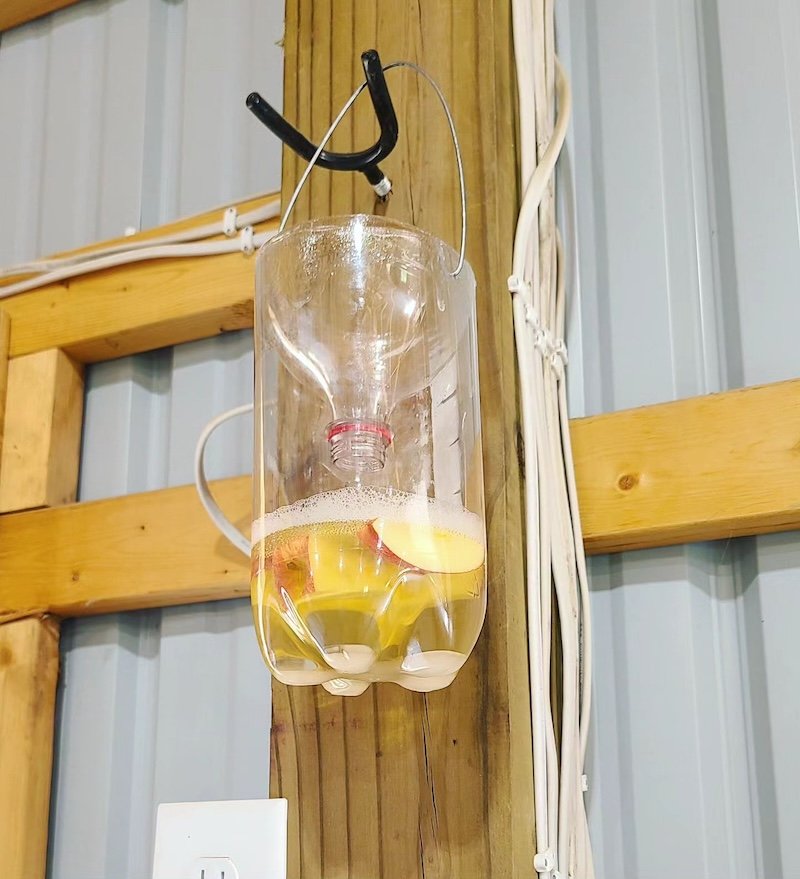
Okay, so we’ve got our must all prepped and ready to go. Now comes the really fun part: fermentation! First things first, make sure your fermentation vessel is squeaky clean and properly sanitized. We don’t want any unwanted guests crashing our mead party. Think of it like this: we’re creating the perfect environment for our yeast to thrive, and that means keeping the bad stuff out. We usually use a sanitized plastic bucket or a glass carboy, depending on the batch size. Make sure you have an airlock and bung ready to go too. These are super important for letting CO2 escape while preventing oxygen from getting in. Oxygen is the enemy during fermentation, as it can lead to off-flavors and spoilage. We also like to have some yeast nutrient on hand to give our little yeast buddies a boost. They’ll thank us for it!
Monitoring Your Mead’s Progress
Once fermentation kicks off, it’s time to keep a close eye on things. We like to check the airlock regularly to see if it’s bubbling. Bubbling means the yeast are doing their job and converting sugars into alcohol and CO2. The rate of bubbling will slow down over time as the fermentation progresses. We also use a hydrometer to track the specific gravity of our mead. This gives us an idea of how much sugar has been converted and helps us estimate the alcohol content. It’s a good idea to take readings every few days and record them. This way, we can see how the fermentation is progressing and catch any potential problems early on. Plus, it’s just plain fun to watch the numbers change! We also keep the mead in a temperature-controlled environment, ideally around 65-70°F (18-21°C). Consistent temperature helps the yeast do their best work.
Troubleshooting Common Fermentation Hiccups
Sometimes, things don’t go exactly as planned during fermentation. Don’t panic! Here are a few common issues and how we usually deal with them:
- Stuck Fermentation: If the airlock stops bubbling and the hydrometer readings aren’t changing, the fermentation might be stuck. This can happen for a variety of reasons, such as low nutrient levels, temperature fluctuations, or yeast problems. We usually try adding more yeast nutrient or gently warming the mead to see if that gets things going again.
- Off-Flavors: Sometimes, the mead can develop unpleasant flavors during fermentation. This can be caused by stressed yeast, high fermentation temperatures, or contamination. If we notice off-flavors, we try to identify the cause and adjust our process accordingly. For example, if the temperature is too high, we’ll move the mead to a cooler location.
- Infection: In rare cases, the mead can become infected with unwanted bacteria or wild yeast. This can result in sour or vinegary flavors. If we suspect an infection, we usually have to discard the batch and start over, making sure to thoroughly sanitize all of our equipment.
Remember, fermentation is a natural process, and sometimes things don’t go perfectly. The key is to be patient, observant, and willing to learn from your mistakes. With a little practice, you’ll become a fermentation pro in no time!
We also make sure to have yeast energizer on hand, just in case the yeast needs a little extra help.
Aging Your Apple Mead to Perfection
Why Patience is a Virtue
Okay, so you’ve made your apple mead, and you’re probably itching to try it. We get it! But trust us, aging is where the magic really happens. Think of it like this: aging is the spa day your mead deserves. It’s during this time that those harsher flavors mellow out, and the more subtle, complex notes start to shine. It’s not just about waiting; it’s about transforming your brew into something truly special. We’ve found that even a few months can make a world of difference.
Choosing the Right Aging Vessel
What you age your mead in matters. A lot. Glass carboys are a popular choice, and for good reason. They’re inert, meaning they won’t impart any unwanted flavors into your mead. Plus, you can see what’s going on inside! Oak barrels are another option, especially if you’re looking to add some vanilla or spice notes. But be careful – oak can be overpowering if you’re not careful. We usually stick with glass for our apple meads, but it really depends on the flavor profile you’re after. Here’s a quick rundown:
- Glass Carboys: Neutral flavor, easy to monitor.
- Oak Barrels: Adds vanilla, spice, or toast notes, requires more attention.
- Stainless Steel: Good for long-term aging, neutral flavor.
Aging is a crucial step. It allows the flavors to meld and mature, creating a smoother, more complex final product. Don’t rush it; your patience will be rewarded.
Flavor Development Over Time
This is where things get interesting. As your apple mead ages, you’ll notice a whole range of changes. The initial flavors might seem a bit rough or disjointed, but over time, they’ll start to harmonize. The apple notes might become more pronounced, the honey flavors will deepen, and any spices you added will integrate more fully. It’s like watching a painting come to life, layer by layer. We recommend tasting your mead every few months to track its progress. You might be surprised at how much it changes! You can even grow goji berries at home to add to your mead for a unique flavor profile. Here’s a rough timeline of what to expect:
- 1-3 Months: Initial flavors mellowing, harshness decreasing.
- 3-6 Months: Flavors start to integrate, complexity increases.
- 6+ Months: Full flavor development, smooth and balanced profile.
Bottling Your Liquid Gold
Sanitation is Key
Okay, folks, listen up! When it comes to bottling, sanitation isn’t just a good idea; it’s absolutely critical. We’re talking about preventing unwanted bacteria and wild yeasts from crashing our mead party. Nobody wants a bottle bomb or off-flavors after all that hard work. So, before we even think about touching a bottle, let’s make sure everything that will come into contact with our mead is properly sanitized. This includes bottles, bottling wands, tubing, and even our hands (as much as possible!).
Here’s a quick rundown of what we use:
- Star San: A no-rinse sanitizer that’s super effective.
- Bottle brushes: For scrubbing those bottles clean.
- Bottle sanitizer: A simple way to sanitize bottles before filling.
Remember, a little extra effort in sanitation now can save you from a lot of disappointment later. We usually soak everything in a trusted sanitizer for the recommended time, just to be safe.
Priming for Carbonation (Optional)
Want some fizz in your apple mead? Then priming is the way to go! Priming involves adding a small amount of sugar to each bottle right before sealing. The remaining yeast will then munch on this sugar, creating CO2, which carbonates the mead. It’s a delicate balance, though. Too little sugar, and you’ll have flat mead. Too much, and you risk bottle explosions. We usually aim for a moderate level of carbonation, similar to a cider or a light beer. Getting the sugar amount right is key.
Here’s a simple table to guide you:
| Carbonation Level | Sugar per Gallon (oz) |
|---|---|
| Light | 2.0 – 2.5 |
| Medium | 2.5 – 3.0 |
| High | 3.0 – 3.5 |
We typically use dextrose (corn sugar) because it ferments cleanly and doesn’t add any unwanted flavors. Make sure to dissolve the sugar in a small amount of boiled water before adding it to your bottling bucket. This ensures even distribution and prevents clumps.
Sealing the Deal
Alright, we’re in the home stretch! Once our bottles are sanitized and primed (if we’re going for carbonation), it’s time to fill ’em up. We like to use a bottling wand attached to a siphon. This helps to prevent oxidation and makes the process much cleaner. Fill each bottle, leaving about an inch of headspace at the top. This space is important for carbonation and prevents over-pressurization. Once filled, it’s time to seal the deal. For non-carbonated mead, we use corks. For carbonated mead, we use wine bottles designed for pressure. Make sure to use a proper corker or capper to get a tight seal. After sealing, store the bottles upright for a few days to allow any sediment to settle. Then, store them on their sides in a cool, dark place to age. Patience, young padawans, patience!
Designing Your Signature Apple Mead
Playing with Apple Varieties
Okay, so you want to make your apple mead stand out? Let’s talk apples! Don’t just grab any old apple from the store. Think about what flavors you want in your final product. Are you aiming for something tart and crisp? Maybe a blend of different apples is the way to go. Here’s a quick rundown:
- Granny Smith: Adds a nice tartness.
- Honeycrisp: Sweet and crisp, a crowd-pleaser.
- Fuji: Another sweet option, with a slightly floral note.
- Braeburn: A good balance of sweet and tart.
Experiment! Try using a mix of these to get a more complex flavor profile. We’ve found that a blend of Honeycrisp and Granny Smith gives a really nice balance. Don’t be afraid to try different apple varieties to find your perfect match.
Honey Choices and Sweetness Levels
Honey is the other half of the equation, and it plays a HUGE role in the final flavor and sweetness of your mead. Different honeys have different flavor profiles, so choose wisely.
- Clover Honey: A mild, light honey that won’t overpower the apple flavor. Great for beginners.
- Orange Blossom Honey: Adds a citrusy note, which can complement certain apple varieties really well.
- Wildflower Honey: Can have a more complex, earthy flavor. It’s a bit more unpredictable, but can add a lot of character.
- Buckwheat Honey: Very strong, almost molasses-like flavor. Use sparingly, if at all, as it can easily overpower the apple.
Consider the sweetness level you’re aiming for. Do you want a dry mead, a semi-sweet mead, or a sweet dessert mead? Adjust the amount of honey accordingly. A hydrometer is your best friend here – it’ll help you measure the specific gravity and estimate the alcohol content and final sweetness. We usually aim for a starting gravity of around 1.080 for a semi-sweet mead. Think about how the honey impacts sweetness.
Experimenting with Spices and Fruits
This is where things get really fun! Want to add a little extra something to your apple mead? Spices and fruits are your allies. But remember, less is often more. You don’t want to completely mask the apple and honey flavors. Here are some ideas:
- Cinnamon: A classic pairing with apples. Use cinnamon sticks during fermentation or aging for a subtle warmth.
- Nutmeg: Adds a cozy, slightly spicy note. Use sparingly, as it can be overpowering.
- Vanilla: Adds a creamy sweetness and enhances the other flavors. Use a vanilla bean during aging.
- Ginger: Adds a spicy kick. Fresh ginger is best, but powdered ginger works in a pinch.
Other fruits can also be a great addition. Berries, like raspberries or blackberries, can add a nice tartness and color. Stone fruits, like peaches or plums, can add a subtle sweetness and complexity. Just make sure to sanitize any fruit before adding it to your mead. Don’t be afraid to experiment with spices, but keep good notes so you can replicate your successes (and avoid your failures!).
We’ve found that adding a small amount of oak during aging can also add a really nice complexity to apple mead. Oak chips or a toasted oak spiral can impart vanilla, caramel, or even smoky notes, depending on the type of oak used. Just be careful not to over-oak it, as it can easily become too tannic.
Enjoying Your Homemade Apple Mead
Serving Suggestions and Pairings
Okay, so you’ve made this amazing apple mead, now what? Let’s talk about how to really enjoy it. First off, think about the temperature. A slightly chilled mead, not ice-cold, really lets the flavors shine. We like to serve ours around 55-60°F (13-16°C). It’s all about finding that sweet spot where the apple and honey notes are most vibrant.
As for pairings, apple mead is surprisingly versatile. It goes great with cheeses, especially sharp cheddar or creamy brie. Think about serving it with roasted chicken or pork – the sweetness of the mead cuts through the richness of the meat. For dessert, try it with apple pie (obviously!) or a simple fruit tart. The goal is to complement, not overpower, the mead’s delicate flavors. We’ve even experimented with spicy Asian dishes, and the slight sweetness can be a really nice contrast. Don’t be afraid to play around and see what works for you!
Storing Your Finished Brew
Proper storage is key to keeping your apple mead tasting its best. Once bottled, store your mead in a cool, dark place. Think of it like wine – direct sunlight and temperature fluctuations are the enemy. A cellar is ideal, but a closet or even a dark corner of your basement will do. The goal is to keep the temperature consistent, ideally below 70°F (21°C).
If you’ve opted for carbonation, make sure to store the bottles upright to prevent sediment from collecting on the seal. For still meads, you can store them on their side, like wine. How long will it last? Well, that depends. A well-made mead can age for years, even decades, improving with time. However, most of us will probably drink it long before that! Generally, you can expect your mead to stay good for at least a year, maybe longer if stored properly. Just keep an eye out for any signs of spoilage, like cloudiness or off-flavors. If you notice anything weird, it’s probably best to err on the side of caution.
Sharing Your Creation with Friends
Okay, this is the best part! You’ve put in the time and effort, now it’s time to show off your creation. There’s nothing quite like sharing a bottle of homemade apple mead with friends and family. It’s a great conversation starter, and people are always impressed by the fact that you made it yourself.
When you’re sharing, take a moment to talk about the process. Tell them about the essential steps for beginners you took, the honey you used, and any special ingredients you added. It makes the experience even more special. Consider creating custom labels for your bottles – it adds a personal touch and makes it feel like a real product. Most importantly, relax and enjoy the moment. Mead is meant to be shared and savored, so raise a glass and celebrate your hard work! And don’t be surprised if everyone starts asking you for the recipe – that’s when you know you’ve really nailed it. Remember to drink responsibly, and enjoy the fruits (or should we say, apples?) of your labor!
Wrapping Things Up
So, there you have it! We’ve gone through all the steps to make your own apple mead, or cyser, as some folks call it. It might seem like a lot at first, but honestly, once you get going, it’s pretty straightforward. We’ve learned about picking the right stuff, getting it all mixed, and then just letting nature do its thing. The best part is, you can totally mess around with the recipe to make it exactly how you like it. Maybe you want it sweeter, or with a bit more apple punch – it’s all up to you. We really hope this guide helps you make some awesome apple mead that you can share with friends, or just keep all to yourself. Happy brewing, everyone!
Frequently Asked Questions
What is apple mead and how do we make it?
Making apple mead, or cyser, is pretty simple! We mix honey and apple cider, then add yeast. The yeast eats the sugars, turning them into alcohol. After some time, we get delicious apple mead!
Why is keeping things clean so important when making mead?
It’s super important to keep things clean! If our tools or bottles aren’t spotless, bad germs can grow and make our mead taste yucky. So, we always make sure everything is super clean before we start.
What ingredients and tools do we need to start?
The main things we need are honey, apple cider (make sure it doesn’t have weird stuff in it!), and special yeast for making drinks. We’ll also need some basic kitchen stuff like a big pot and a container for the mead to sit in.
How long does it take for our apple mead to be ready?
Mead needs time to get really good. The flavors mix and become smoother as it sits. Some meads are great after a few months, but others get even better after a year or more. Patience pays off!
What if our mead isn’t bubbling or smells weird?
If our mead isn’t bubbling, it might be too cold, or the yeast isn’t happy. We can try moving it to a warmer spot. If it smells funny, it might be infected, and we might need to start over. Don’t worry, it happens to everyone!
Can we change the recipe to make our mead taste different?
Absolutely! We can try different kinds of apples, like tart ones or sweet ones. We can also use different types of honey, which will change the taste a lot. Adding spices like cinnamon or cloves, or even some fruit, can make it extra special.