June Preserving Guide: Tomatoes, Cucumbers, and Summer Bounty
June is such a fantastic time for us in the garden. Everything is really starting to take off, and we’re seeing the first real wave of produce. This is the perfect moment to think about how we can enjoy these flavors long after the summer sun fades. We’ve put together this june preserving guide to help us make the most of our harvest, from juicy tomatoes to crisp cucumbers and everything in between.
Key Takeaways
- Summer brings an amazing variety of fresh produce, and it’s smart to preserve some of it.
- Tomatoes are versatile; we can can, freeze, or even sun-dry them.
- Cucumbers are great for making pickles and relishes that last.
- Eggplant can be preserved through pickling or freezing for later dishes.
- Freezing, canning, and dehydrating are all good ways to save summer’s bounty for winter meals.
Embrace The June Preserving Guide: A Summer Harvest

June is here, and with it comes that glorious feeling of abundance. We’re seeing our gardens and local markets burst with fresh produce, and honestly, it’s the best time of year for eating. Think juicy tomatoes, crisp cucumbers, and all sorts of other goodies. But as much as we love eating these fresh, we also know that winter will eventually roll around, and those fresh flavors will be a distant memory. That’s where preserving comes in. It’s our way of capturing this summer magic so we can enjoy it long after the last frost.
The Abundance Of Summer Produce
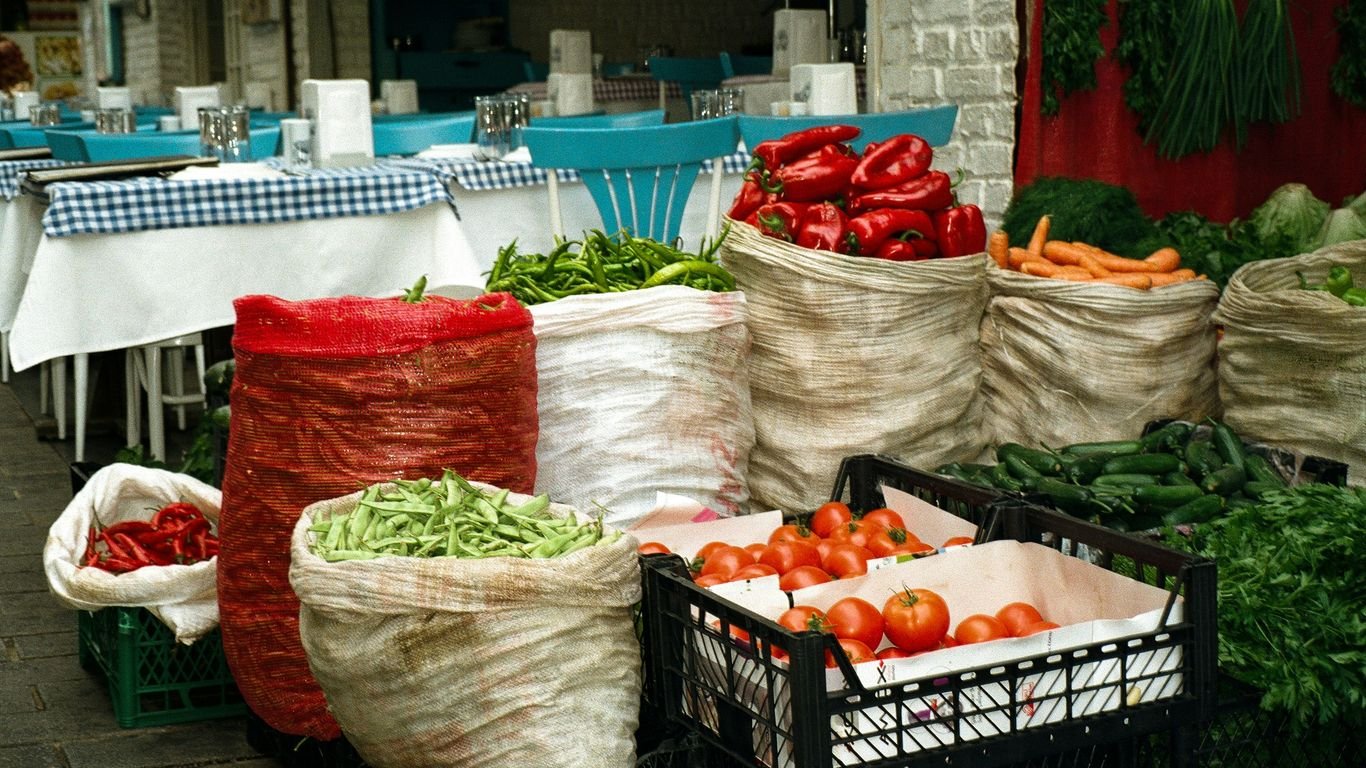
Right now, it feels like we have more tomatoes, cucumbers, and other summer stars than we know what to do with. The plants are just churning out fruit, and it’s a beautiful sight. We’re talking about those sun-ripened tomatoes that taste like pure sunshine, the cool crunch of fresh cucumbers, and the vibrant colors of peppers and corn. It’s a feast for the eyes and the palate, and we want to make sure this bounty doesn’t go to waste.
Why Preserve Your Harvest?
Preserving is more than just a way to save food; it’s a way to extend the season. It means we can have a taste of summer on a cold winter day, whether it’s a spoonful of homemade tomato sauce or a crisp pickle. Plus, it’s incredibly satisfying to know you’ve put up your own food. It connects us to the rhythm of the seasons and gives us a real sense of accomplishment. We believe that everyone can learn to preserve, and it doesn’t have to be complicated.
Getting Started With Preservation
When we think about preserving, canning often comes to mind first, and it’s definitely a big part of it. But it’s not the only way! We also rely heavily on freezing and dehydrating. Even simpler, some things can be stored with minimal effort. The key is to find the methods that work best for you and the produce you have. Don’t feel intimidated; we’ll walk through some straightforward techniques that will help you save that delicious summer harvest for later.
Here are a few common methods we’ll explore:
- Freezing: Super simple and flexible. Great for many fruits and vegetables, and you can freeze them whole or in batches.
- Canning: A time-tested method for shelf-stable goods. Perfect for jams, pickles, and sauces.
- Dehydrating: Removes moisture to preserve food for a long time. Ideal for herbs, fruits, and some vegetables.
- Storage: Some items, like certain root vegetables or winter squash, can be stored in cool, dark places without any special treatment.
The goal is to make the most of the summer’s generosity, ensuring that the vibrant flavors and nutrients of fresh produce are available to us throughout the year, even when the garden is dormant.
Tomatoes: From Vine To Jar

June is prime time for tomatoes, and we love seeing them ripen on the vine. There’s nothing quite like the taste of a sun-ripened tomato, and when you have a bumper crop, preserving them is a fantastic way to enjoy that flavor all year long. We’re going to walk you through how we get our tomatoes from the garden into jars, ready for winter.
Planting and Harvesting Tips
Getting the best tomatoes starts with good practices in the garden. We aim for healthy plants that produce abundantly. When it comes to harvesting, timing is everything. We look for tomatoes that are fully colored and slightly soft to the touch. Gently twist them off the vine; if they resist, a little wiggle usually does the trick. For canning, we prefer firm, ripe tomatoes. It’s best to pick them in the morning after the dew has dried but before the heat of the day sets in. This helps them stay firm.
Here’s a quick rundown of what we look for:
- Color: Deep, even color all over, depending on the variety (red, yellow, orange, etc.).
- Feel: Yields slightly to gentle pressure, but not mushy.
- Stem: The stem should detach easily with a gentle twist.
- Weather: Avoid harvesting right after a heavy rain, as tomatoes can split.
Delicious Tomato Recipes
Before we even think about canning, we love to use fresh tomatoes in all sorts of dishes. Think about slicing them thick for a Caprese salad with fresh basil and mozzarella, or dicing them for a quick salsa. Roasted tomatoes bring out a deep sweetness, perfect for pasta sauces or as a side dish. We also love making fresh tomato soup on cooler evenings. If you’re looking for inspiration, check out some great fresh tomato ideas.
Canning and Freezing Tomatoes
When we have more tomatoes than we can eat fresh, canning is our go-to method. It takes a bit of effort, but the reward is jars of pure tomato goodness. We usually use the boiling-water bath method for diced or whole tomatoes. It’s important to prepare your jars and lids properly. We start by washing everything thoroughly. Then, we blanch the tomatoes briefly in boiling water to make peeling easier. After peeling and coring, we pack them into jars, adding a bit of lemon juice and salt for preservation and flavor. The jars are then processed in a boiling-water bath.
Here’s a simplified look at our canning process:
- Prepare Jars and Lids: Wash jars and lids. Warm jars in the oven to prevent cracking.
- Blanch and Peel Tomatoes: Dip tomatoes in boiling water for 30-60 seconds, then plunge into ice water. Peel and core.
- Pack Jars: Fill jars with prepared tomatoes, leaving about 1/2 inch of headspace. Add lemon juice and salt.
- Process: Place lids and screw bands on jars. Process in a boiling-water bath according to tested guidelines (typically 45 minutes for quarts).
- Cool and Check Seals: Remove jars and let them cool undisturbed. Check for seals the next day.
Freezing is another great option, especially if you want to use tomatoes later in soups or stews. We find that freezing whole tomatoes works well. Just remember to core them before freezing, and the skins slip right off after thawing, saving you a step. It’s a simpler process if you don’t have the time or equipment for canning.
Cucumbers: Crispness For Winter
Summer wouldn’t be summer without a steady supply of crisp, refreshing cucumbers. We love them sliced in salads, blended into cooling dips, and, of course, pickled! But as the days start to shorten, we want to make sure we can still enjoy that satisfying crunch. That’s where preserving comes in. Turning a surplus of cucumbers into jars of pickles or relishes means we get to taste summer all year long.
Growing and Picking Cucumbers
Getting the best cucumbers for preserving starts with how we grow and pick them. We aim for varieties that are known for their firm texture and good flavor, like Kirby or Boston Pickling. Planting them in well-drained soil, giving them plenty of sunshine, and watering them consistently are key. We usually direct sow seeds after the last frost, making sure they have room to spread or climb.
When it’s time to harvest, we’re always on the lookout for cucumbers that are firm, green, and not too large. Overripe cucumbers can become seedy and soft, which isn’t ideal for pickling. We try to pick them every day or two during peak season. This not only ensures we get them at their best but also encourages the plants to produce even more.
Refreshing Cucumber Dishes
Before we even think about preserving, we enjoy cucumbers fresh! A simple cucumber salad with a light vinaigrette, maybe some fresh dill and a pinch of sugar, is a go-to on a hot afternoon. We also love grating them for tzatziki sauce, which is fantastic with grilled meats or as a dip for veggies. It’s amazing how a few simple ingredients can transform a humble cucumber into something so delightful.
We find that using cucumbers picked just a day or two before making a salad or sauce really makes a difference in flavor and texture. It’s that peak freshness that we’re after.
Preserving Cucumbers For Later
When we have more cucumbers than we can eat fresh, it’s time to preserve them. Pickling is our favorite method. We usually make a big batch of refrigerator pickles, which are quick and easy. For longer storage, we turn to vinegar-based brine recipes that are shelf-stable. These pickled cucumbers are perfect for sandwiches, burgers, or just snacking straight from the jar.
Here are a few ways we like to preserve cucumbers:
- Dill Pickles: A classic brine with dill, garlic, and peppercorns. These are great for eating as is.
- Bread and Butter Pickles: Sliced thin with onions and a sweet, tangy brine. They add a wonderful sweetness to dishes.
- Cucumber Relish: Finely chopped cucumbers, onions, and peppers in a sweet and sour brine. This is fantastic on hot dogs or as a condiment.
We also sometimes freeze thinly sliced cucumbers to add to smoothies, though they lose their crispness and are best used in blended recipes after thawing.
Eggplant: Versatile And Delicious
Eggplant might seem a bit intimidating with its deep purple skin and spongy texture, but we promise, it’s one of the most rewarding vegetables to grow and preserve. It’s a real workhorse in the kitchen, soaking up flavors like a sponge and transforming into something truly special. We love seeing it go from our garden beds to our dinner plates, and then, of course, into our pantries for later.
Eggplant Planting and Harvest
Getting eggplant started is pretty straightforward, though they do love the warmth. We usually get ours going indoors about 8 to 10 weeks before we expect the last frost. Once the soil is nice and warm, typically by late May or early June, we transplant them outside. They need a sunny spot and consistent watering to really thrive. We grow a few different kinds, from the classic globe to smaller, more delicate varieties. You’ll know they’re ready to pick when they feel firm and have a nice, glossy sheen. We usually harvest them when they’re about 6 to 8 inches long. A quick snip with scissors, leaving a little bit of stem attached, and they’re ready to go.
Creative Eggplant Recipes
Eggplant is incredibly versatile. One of our absolute favorites is baba ganoush. Roasting the eggplant until it’s super soft and then blending it with tahini, lemon, garlic, and olive oil creates this wonderfully smoky dip. It’s perfect with pita bread or fresh veggies. And who can resist a good eggplant parmesan? Breaded, fried, and layered with marinara and cheese – it’s pure comfort food. We also have a fantastic Eggplant Caprese Salad recipe on our site that’s a lighter, yet still delicious, take on the classic.
Preserving Eggplant Delights
When we have a bumper crop, preserving is key. Pickled eggplant is a fantastic way to keep them around. We slice them up and pickle them in a tangy vinegar brine with lots of spices. They make a great snack or addition to salads. For longer storage, blanching eggplant slices and then freezing them works wonders. They’re perfect for tossing into stews or ratatouille later in the year. Don’t let their unique texture fool you; with a little preparation, eggplant is a preservation superstar.
Eggplant is a summer vegetable that truly shines when preserved. Its ability to absorb flavors makes it ideal for pickling and freezing, ensuring you can enjoy its deliciousness long after the growing season ends.
Beyond Tomatoes And Cucumbers: Other Summer Stars

While tomatoes and cucumbers often steal the summer spotlight, we can’t forget about the other incredible produce that makes this season so special. This time of year is bursting with flavor, and we love finding ways to capture it all. Let’s talk about some of our other favorite summer stars and how we bring them into our kitchens and pantries.
Sweet Peppers: Sweet and Spicy
Peppers are such a joy to grow and eat during the summer. Whether you’re a fan of the sweet crunch of bell peppers or the fiery kick of hot varieties, there’s a pepper for everyone. We start our pepper seeds indoors about 8 to 10 weeks before the last frost. Once the soil is warm and all danger of frost has passed, we transplant them outside. They really need that consistent warmth and plenty of sunshine to produce well. We always mulch around them, which helps keep the soil moist and the weeds down.
Harvesting is pretty straightforward. We pick peppers when they reach the size and color we want. A quick snip with scissors or a knife, leaving a little stem attached, and they’re ready to go. They’re fantastic stuffed with rice and meat, or you can get creative with pepper jelly – that sweet and spicy kick is amazing on crackers or as a glaze.
Corn: Sweetness Preserved
There’s nothing quite like biting into fresh, sweet corn straight from the stalk. It’s a quintessential summer treat! We plant our corn seeds directly into the garden after the last frost, making sure they have plenty of space. Corn is a heavy feeder, so we make sure the soil is rich with compost before planting.
When it comes to preserving corn, freezing is our go-to method. We like to blanch the corn first – just a quick dip in boiling water, then an ice bath. This stops the cooking process and helps keep that vibrant color and sweet flavor. After blanching, we cut the kernels off the cob and spread them on a baking sheet to freeze individually. Once frozen, we transfer them to freezer bags. This way, we can easily grab just what we need for soups, stews, or side dishes all year long.
Other Summer Bounty
Beyond peppers and corn, summer offers so much more! Think about zucchini, summer squash, and even early varieties of beans. Zucchini, in particular, can be incredibly prolific. We’ve found that slicing it and freezing it after a quick blanch works wonders for later use in baked goods or casseroles. Summer squash can be treated similarly.
We also love to pickle things! Cucumbers are obvious candidates, but don’t overlook green beans or even some of the smaller summer squash varieties. A good vinegar brine with some dill and garlic can transform them into delicious, tangy treats that last for ages. For vegetables that store well without processing, like onions and winter squash, curing and cool storage are fantastic options. This method means they can last for months without any special canning equipment.
Preserving the summer harvest isn’t just about saving food; it’s about saving the taste of sunshine and warmth for those colder months. It’s a way to extend the season and enjoy the fruits (and vegetables!) of our labor long after the last frost.
Here’s a quick look at some common summer produce and how we like to preserve them:
- Sweet Peppers: Best frozen after blanching, or made into jellies and relishes.
- Corn: Blanch and freeze kernels off the cob for easy use.
- Zucchini/Summer Squash: Slice, blanch, and freeze for baking or casseroles.
- Green Beans: Can be blanched and frozen, or pickled.
- Cucumbers: Primarily pickled for long-term storage, though some varieties can be frozen for specific uses.
We find that having a variety of preservation methods at our disposal allows us to make the most of every single harvest. It’s a rewarding process that connects us more deeply to the food we eat. For more ideas on preserving, you can check out our food preservation category.
Mastering Preservation Techniques

Preserving our summer bounty doesn’t have to be complicated. While canning often gets all the attention, we’ve found that a mix of methods works best for us. It’s all about finding what fits your lifestyle and your kitchen.
The Art Of Canning
Canning is a classic for a reason. It’s a reliable way to keep food safe on the shelf for a long time. We mostly use water-bath canning for high-acid foods like tomatoes and fruits, and pressure canning for lower-acid items like vegetables. It takes a bit of setup, but once you get the hang of it, it’s pretty straightforward. Just remember to follow tested recipes and guidelines to keep everything safe.
- Water-Bath Canning: Great for fruits, jams, jellies, pickles, and tomatoes. Jars are submerged in boiling water.
- Pressure Canning: Necessary for vegetables, meats, and poultry. Achieves higher temperatures to kill bacteria.
- Sterilize Jars and Lids: Always start with clean equipment.
- Proper Seal: Listen for that satisfying ‘pop’ as jars cool.
Safety first is the golden rule with canning. Always use up-to-date, reliable recipes from sources like the National Center for Home Food Preservation or Ball. Trying to cut corners or use old methods can lead to spoilage or, worse, foodborne illness.
Simple Freezing Methods
For us, freezing is the easiest and most flexible way to preserve. We can freeze many things whole, like berries, corn, or even blanched green beans. It’s also perfect for sauces, soups, and fruit purees. The biggest downside? You’re dependent on electricity. A good chest freezer in the basement has been a game-changer, letting us store a lot more.
- Blanching: Briefly boiling vegetables before freezing helps keep their color and texture. Then, plunge them into ice water.
- Flash Freezing: Spread items like berries or chopped veggies on a baking sheet before bagging. This stops them from clumping together.
- Airtight Packaging: Use freezer bags or containers, removing as much air as possible to prevent freezer burn.
Dehydrating For Longevity
We’ve really come to love our dehydrator. It’s amazing what you can do with it – from making your own fruit leather and jerky to drying herbs and vegetables for powders. Dehydrating removes most of the water, which stops spoilage. Plus, the dried goods take up way less space than frozen or canned items.
- Fruits: Slice thinly and arrange on trays. Great for snacks or adding to oatmeal.
- Vegetables: Perfect for adding to soups, stews, or grinding into powders.
- Herbs: Dry them whole or chopped for easy seasoning all year.
Open Air And Refrigerated Storage
Some things just need minimal fuss. We’ve found that certain root vegetables, like onions and garlic, store well if cured properly. Winter squash, if kept in a cool, dry spot, can last for months. Even some apples can keep for a while in the fridge. It’s not long-term preservation like canning, but it extends the season for those items that don’t need much help.
Enjoying the Summer Bounty All Year
So there we have it! We’ve talked about getting those tomatoes, cucumbers, and other summer favorites from the garden to our plates, and even how to keep that goodness going long after the season ends. Whether you’re canning, freezing, or just enjoying them fresh, we hope this guide helps you make the most of all that amazing summer produce. Don’t let those flavors fade away – give yourself the gift of summer sunshine all winter long!
Frequently Asked Questions
What’s the best way to start growing tomatoes for preserving?
We usually start our tomato seeds inside about 6 to 8 weeks before the last frost. Once all danger of frost is gone and the soil is warm, we move them outside. They really love sunny spots and need water regularly, so we often use drip hoses to keep them happy and save water.
How do we know when tomatoes are ready to pick for canning?
We pick tomatoes when they’re fully colored and feel just a little soft when you gently squeeze them. It’s important to carefully twist or cut them from the plant so we don’t hurt the plant itself.
Besides canning, what are other simple ways to save summer veggies?
Freezing is super easy and gives us lots of options! We can freeze many veggies like corn, peas, beans, and even whole tomatoes. This way, we can make our favorite sauces or dishes later without worrying about the tricky balance of acidity needed for safe canning.
Can we freeze eggplant, or does it get mushy?
Yes, we can freeze eggplant! We just slice it, give it a quick blanch (a short dip in boiling water), and then freeze it. It works great for later use in recipes like ratatouille or other dishes where the texture is less important.
What’s the easiest way to preserve cucumbers?
Making pickles is a classic and simple way to keep cucumbers. We pack them in a vinegar brine with dill, garlic, and spices. It makes for a crunchy and tasty treat that lasts a long time.
How can we store summer squash and other veggies without canning or freezing?
Some veggies, like winter squash, garlic, and onions, can be stored for a while if we prepare them right. We need to cure them to form a protective skin and then keep them in a cool, dry, dark place. Potatoes also need a cool, dry, dark spot to prevent them from going bad or sprouting too soon.


