How to Build a Low-Cost Outdoor Pantry Storage Shed
We all need a bit more room for our stuff, right? Building a shed can seem like a big job, but it doesn’t have to be. We’re going to show you how to put together a simple and affordable outdoor pantry storage shed that will give you that much-needed space. No need for fancy tools or a huge budget here; we’ll break it down step-by-step so you can get started on your own outdoor pantry storage project.
Key Takeaways
- Planning ahead is key, including figuring out the right size for your outdoor pantry storage needs and checking local rules.
- Gathering the right tools and picking budget-friendly, sturdy materials will make building your shed much smoother.
- A solid foundation is a must for a shed that lasts, so preparing the ground and setting strong beams is important.
- Building the frame for the walls and roof needs careful attention to make sure everything is secure.
- Finishing the exterior with siding and roofing protects your outdoor pantry storage, and adding smart shelving and ventilation keeps the inside functional.
Planning Your Outdoor Pantry Storage Shed
Before we grab our tools and start hammering away, we need to do some serious thinking about our outdoor pantry shed. This isn’t just about slapping some wood together; it’s about building something that works for us, fits our space, and doesn’t cause headaches down the road. Let’s break down the planning phase.
Choosing the Right Size for Your Needs
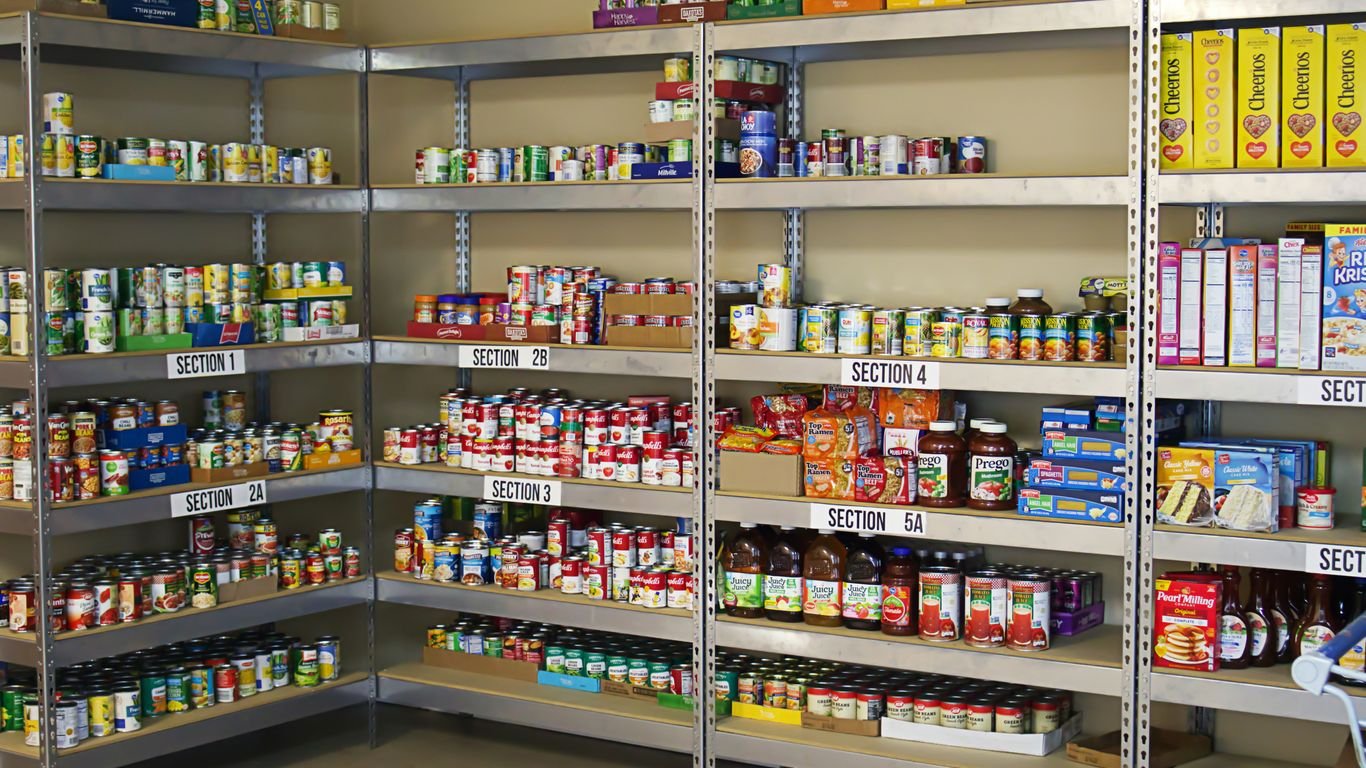
This is probably the most important step. Think about what you actually need to store. Are we talking about a few extra cans of beans and some gardening gloves, or are we planning to stock up for the apocalypse? Be realistic. A shed that’s too small will be frustrating, and one that’s way too big might be overkill and cost more than we want. We should consider the dimensions of common pantry items and how we want to arrange shelves. A good rule of thumb is to go a little bigger than you think you need, but not so big that it becomes a burden to build or maintain.
Here are some things to consider:
- What will you store? Canned goods, dry goods, root vegetables, gardening supplies, extra cleaning products?
- How much do you plan to store? Think about bulk buying or seasonal storage.
- What’s the available space? Measure the area where the shed will go.
- Future needs: Might your storage needs change over time?
Understanding Local Building Regulations
This is the part that can sometimes be a buzzkill, but it’s super important. We need to check with our local town or city hall about any building permits or regulations. Some places have rules about the size of structures you can build in your yard without a permit, or where you can place them. Ignoring this could lead to fines or having to tear down our hard work. It’s better to spend a little time making a phone call or visiting the planning department than dealing with problems later. We’re aiming for a low-cost build, and permits can add to the expense, so knowing the rules upfront is key.
Budgeting for Your Project
Let’s talk money. Since this is a low-cost build, we need to be smart about our spending. We should list out all the potential costs, from lumber and fasteners to roofing materials and any finishing touches. It’s a good idea to get quotes from a few different lumber yards or home improvement stores. We can also look for sales or consider using reclaimed materials where appropriate, as long as they’re still sturdy and weather-resistant. Having a clear budget will help us make smart choices throughout the project.
Here’s a sample budget breakdown:
| Item Category | Estimated Cost | Notes |
|---|---|---|
| Lumber (framing) | $XXX | Treated lumber for base, standard for walls |
| Plywood/OSB (sheathing) | $XXX | For walls and roof |
| Roofing Material | $XXX | Shingles, metal, or roll roofing |
| Fasteners (nails, screws) | $XX | Various sizes |
| Foundation Materials | $XX | Gravel, concrete blocks (if needed) |
| Door Hardware | $XX | Hinges, latch |
| Paint/Sealant | $XX | For weather protection |
| Total Estimated Cost | $XXXX | Contingency: Add 10-15% |
We want this shed to be functional and last, so while we’re keeping costs down, we shouldn’t skimp on materials that affect the shed’s structural integrity or weather resistance. A little extra spent on treated lumber for the base or good roofing can save us a lot of headaches later.
Gathering Essential Tools and Materials
Alright, let’s talk about what we’ll need to get this outdoor pantry shed built. Before we start cutting and screwing, we need to make sure we have the right gear and supplies. This isn’t the time to skimp; having good tools and decent materials will make the whole process smoother and the final shed sturdier.
Must-Have Tools for Shed Construction
We’ll need a few key tools to get the job done. Some of these you might already have in your garage, while others might be worth borrowing or picking up if you plan on doing more projects down the line. Having the right tools makes all the difference.
Here’s a basic rundown:
- Measuring and Marking: A reliable tape measure and a pencil are non-negotiable. A speed square is also super handy for getting those straight lines and angles right.
- Cutting: You’ll definitely need a circular saw for cutting lumber and plywood. A miter saw can be a big help for making precise angled cuts, especially for the roof.
- Fastening: A cordless drill is a must for driving screws. If you have a nail gun, that can speed things up, but it’s not strictly necessary.
- Safety Gear: Always, always wear safety glasses and hearing protection when you’re cutting or drilling. Gloves are a good idea too.
- Other Handy Items: Clamps will be your best friend for holding pieces together while you fasten them. A level is important for making sure things are straight.
Selecting Affordable and Durable Materials
When we’re building on a budget, we want materials that won’t break the bank but will also hold up to being outside. For the main structure, treated lumber is a good choice because it’s designed to resist rot and insects. Plywood is also going to be a big part of our build.
We’ll also need exterior-grade screws and wood glue to make sure everything stays together, even when the weather gets rough. For the roof, something like asphalt shingles or even a metal panel will offer good protection. Don’t forget about caulk to seal up any gaps and prevent water from getting in.
Sourcing Treated Lumber for Longevity
This is where we really want to invest a little extra. Treated lumber is specifically designed to withstand moisture and pests, which is exactly what we need for an outdoor structure. When you’re at the lumber yard, look for lumber that’s rated for ground contact if you’re planning on setting the shed directly on a base, or at least rated for
Building the Foundation for Stability

Alright, let’s talk about getting our outdoor pantry shed to stand up straight and strong. This is where we lay the groundwork, literally. A wobbly shed is no good for storing anything, especially not your precious canned goods or gardening supplies. We need a solid base, and that starts with preparing the ground.
Preparing the Ground
First things first, we need to pick a good spot. It should be relatively level, or at least a place where we can make it level. We’ll clear away any grass, weeds, or debris. Think of it as giving the shed a nice, clean bed to rest on. We don’t want anything growing up and under the shed later on, right? So, a good clearing is step one.
Creating a Solid Base with Gravel
Once the ground is prepped, we’re going to dig out two trenches. These trenches will hold our main support beams. The exact size and spacing will depend on your shed’s dimensions, but for a typical pantry shed, digging trenches about 16 inches wide and 12 inches deep, spaced about 66 inches apart, is a good starting point. After digging, we’ll fill these trenches with a layer of gravel. This gravel layer is super important. It helps with drainage, preventing water from pooling around the foundation, and it gives us a firm, stable surface to set our beams on. We’ll compact this gravel layer really well. You can use a hand tamper for this, or even just stomp on it a lot. We’ll repeat this process, adding gravel and compacting, until the trenches are full and level.
Setting Foundation Beams
Now for the main event of the foundation: the beams. We’ll be using treated lumber for this, usually something sturdy like 6x6s, cut to the length of our shed. These beams will rest directly on the compacted gravel in the trenches. It’s absolutely vital that these beams are perfectly level and parallel to each other. We’ll use our level to check this constantly. If your ground isn’t perfectly level to begin with, you might need to build up one side of the foundation beam with extra treated lumber to match the height of the other side. This step is key to making sure the rest of your shed construction goes smoothly. A level foundation means a level shed, and that’s what we’re aiming for. If you’re considering a concrete slab, you might want to check out this guide on pouring a concrete slab for more details on that method.
Constructing the Shed Frame
Now that we’ve got our foundation sorted, it’s time to build the skeleton of our shed. This is where things really start to take shape, and honestly, it’s pretty satisfying to see it come together. We’ll be framing the walls and then moving on to the roof structure. Don’t worry, we’re keeping it straightforward.
Framing the Walls
We’ll start by building the end walls first. Lay out your lumber on a flat surface – the shed platform itself is ideal if you have it ready. We’ll nail together the perimeter pieces and add a center stud. Then, we measure out from that center stud to mark where the rest of the studs will go. It’s important to get these measurements right for a sturdy frame. Remember, we’re building this to last, so taking a little extra time here pays off.
- Assemble the perimeter of the wall.
- Add the center stud for support.
- Mark and install the remaining studs at even intervals.
- Use a level frequently to ensure everything is plumb.
Building the Roof Structure
With the walls up, we need to think about the roof. This involves creating the roof structure that will support the roofing material. We’ll be cutting pieces to create the slope and connecting them securely. This part can feel a bit more complex, but breaking it down makes it manageable. We’ll focus on getting the main beams and rafters in place first.
Adding Support Beams
To make sure our shed is strong, we’ll add extra support beams where they’re needed most. These beams help distribute the weight and prevent any sagging, especially in the roof structure. Think of them as the muscles of the shed, holding everything together. We’ll identify the key points where these supports are necessary and install them carefully.
Proper framing is the backbone of any structure. Taking the time to cut accurately and fasten securely now will save you headaches down the road. We want this shed to withstand the elements and hold your stored goods safely.
Adding Siding and Roofing

Now that we’ve got a solid frame, it’s time to give our shed some skin and a hat. This is where it really starts to look like something! We’ll be putting on the siding and then tackling the roof. It’s not super complicated, but you’ll want to take your time to make sure everything is sealed up tight against the weather.
Installing OSB Siding
We’re going with Oriented Strand Board (OSB) for the siding because it’s a budget-friendly option that still does a good job. Before we nail it up, make sure your walls are square. You can snap chalk lines on the plywood deck to help guide where the bottom of the walls should sit. When you nail the siding on, let it overhang the framing a bit on each side. This gives you some wiggle room for trimming later. For the front and back walls, you’ll need to trim the top corner to match the slope of the angled top plate. This makes sure the roof will sit flush.
Applying Weather-Resistant Roofing
Getting the roof on is a big step. We need to protect our stored goods from rain and sun. First, we’ll build the roof frame, cutting rafters and nailing them to the ridge and subfascia. It’s a good idea to add the soffit material to the roof frame while it’s still on the ground – trust us, it’s way easier than trying to do it upside down later. Once the roof frame is built, we’ll lift it into place and secure it to the walls. After that, it’s time for the actual roofing material. You can go with shingles, metal roofing, or even roll roofing, depending on your budget and what you like the look of. Just make sure you follow the manufacturer’s instructions for installation to get a good seal. Don’t forget to add fascia boards and shingle molding around the edges for a clean finish and extra protection. This is a good time to think about how to build a shed if you haven’t already started.
Finishing Touches with Trim
Once the main siding and roofing are done, we’ll add the trim. This includes corner boards, fascia, and any window or door trim. The trim not only makes the shed look finished but also helps seal up any gaps where water could get in. We’ll wrap the corners with corner boards, overlapping them correctly so water runs off. If you’re adding windows, now’s the time to install them and their trim. Remember to caulk any gaps and fill nail holes before painting. A good paint job will protect the wood and make your pantry shed look great for years to come.
Creating Your Outdoor Pantry Storage

Now that we’ve got the basic structure of our shed up, it’s time to focus on making it a functional outdoor pantry. This is where we turn a simple box into a useful storage space for your extra food items. We want to make sure it’s organized, protected from the elements, and easy to access.
Designing Shelving for Maximum Space
When it comes to shelving, we need to think smart. We want to fit as much as possible without making it feel cramped. We’ll use the full height of the shed, so think about adjustable shelves if you can. This way, you can change them up if you get taller jars or bigger boxes. We’ll use sturdy materials like treated plywood or even some strong plastic shelving units if you find them on sale. Remember to space them out so you can easily see and grab what you need.
Here’s a quick idea for shelf spacing, assuming a standard shed height:
| Shelf Height | Item Type Examples |
|---|---|
| 12 inches | Canned goods, jars |
| 15 inches | Boxes of pasta, rice |
| 18 inches | Larger containers |
Ensuring Proper Ventilation
This is super important for an outdoor pantry. We don’t want any stale air or moisture building up inside, which can ruin food. We need to let fresh air circulate. We can do this by adding some vents near the top and bottom of the shed. You can buy simple vent covers at the hardware store. Make sure they’re covered with a mesh screen to keep bugs out. Good airflow is key to keeping your stored food fresh.
Securing Your Outdoor Pantry Storage
Since this is an outdoor storage unit, we need to think about security. We’ll add a sturdy door with a reliable latch. You might even consider a lock if you’re storing anything particularly valuable or if you live in an area where you’re concerned about critters or unwanted visitors. We’ll also want to make sure the whole structure is stable and won’t tip over, especially if you’ve got it on a bit of a post. Adding some extra bracing at the base can really help with that.
We’ll use exterior-grade paint and seal all the joints with caulk. This extra step will protect the wood from rain and sun, making your pantry last much longer. It’s a bit of extra work now, but it saves headaches down the road.
Wrapping It Up
So there you have it! We walked through building our own outdoor pantry shed, and honestly, it wasn’t as tough as we thought it might be. Using simple materials and methods, we’ve got a sturdy spot to keep our stuff organized and out of the weather. It feels pretty good to have this done, and we’re already thinking about what else we can build. Hopefully, this guide helps you get your own shed project started too. Happy building!
Frequently Asked Questions
What’s the first step before we start building?
Before we even think about cutting wood, we need to figure out the best size for our shed and check if we need any special permits from our town. It’s also smart to set a budget so we know how much we can spend.
What tools will we absolutely need?
We’ll need some basic tools like a tape measure, a level, a saw (a circular saw works well), a drill, and a hammer. Safety gear like eye and ear protection is super important too!
What kind of materials should we use to make it last?
To make sure our shed stands up to the weather, we should use treated lumber for the parts that touch the ground. For the rest, sturdy wood like OSB for siding and good roofing material will keep it protected.
How do we make sure the shed is stable?
We’ll start by preparing the ground, making it level. Then, we’ll create a solid base, often by using gravel, and set down strong foundation beams. This makes sure our shed doesn’t shift or sink.
Is it cheaper to build our own shed?
Generally, yes! When we build it ourselves, we’re mostly just paying for the materials. This usually saves us a lot of money compared to buying a pre-made shed or a kit.
How can we make the most of the inside space?
We can design the inside with shelves that go all the way up to the ceiling. Thinking about how we’ll use the space helps us plan the best layout for our storage needs, and making sure there’s some air flow is good too.