Spring Chick Care: Brooder Setup and Healthy Growth Tips
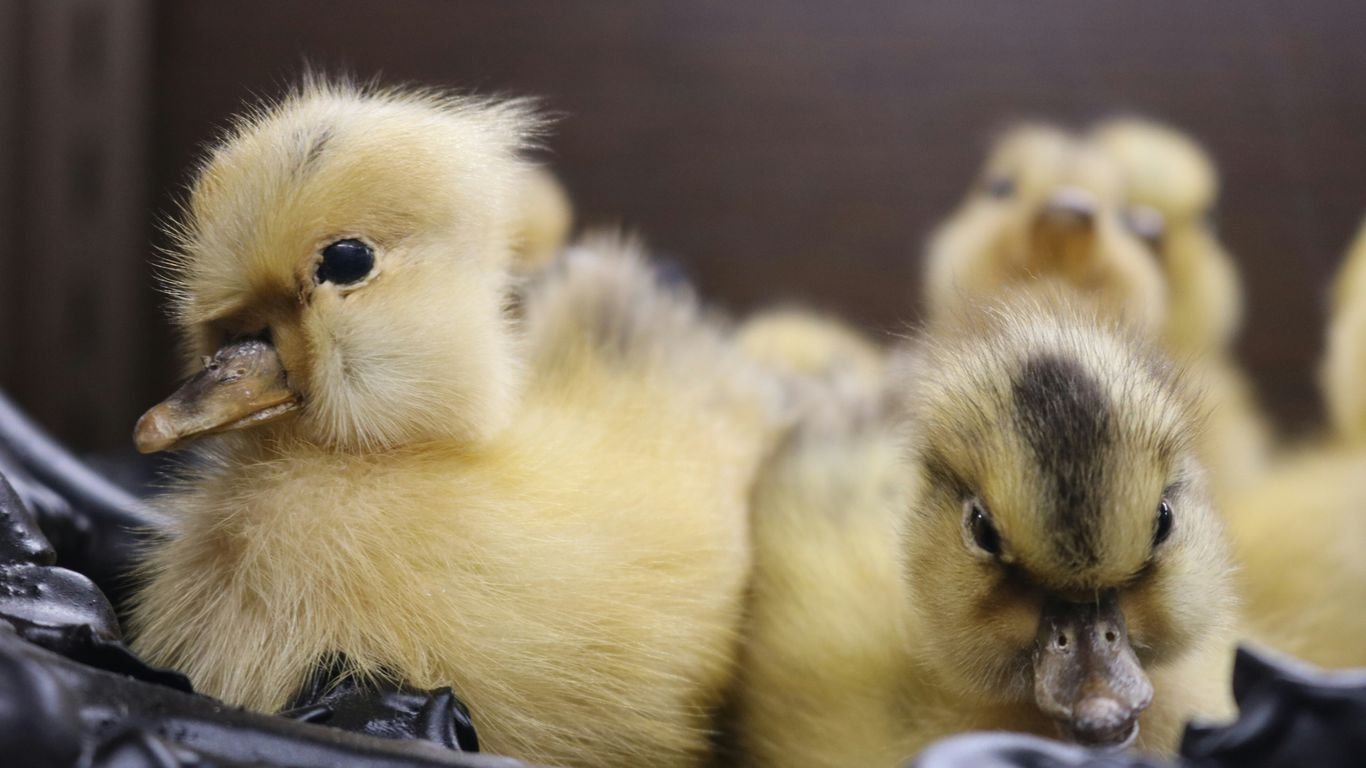
Getting started with spring chick care can be a really rewarding experience. We know it might seem a little daunting at first, especially if it’s your first time raising these little fluffballs. But don’t worry, we’re here to walk you through setting up a cozy brooder and making sure your chicks grow up healthy and strong. It’s all about providing them with the right environment, food, and attention during those important early weeks.
Key Takeaways
- Setting up a safe and warm brooder is the first step in spring chick care, using appropriate bedding and accessories.
- Maintaining the correct temperature in the brooder is vital, adjusting it as the chicks grow and feather out.
- Providing the right chick starter feed and constant access to fresh water is fundamental for healthy development.
- Observing your chicks’ week-by-week development helps you understand their changing needs and milestones.
- Gentle handling and enrichment activities in the brooder encourage good behavior and socialization.
Setting Up The Perfect Brooder
Getting ready for baby chicks is super exciting! Before they arrive, we need to set up a cozy and safe spot for them, called a brooder. Think of it as their nursery for the first few weeks. It doesn’t have to be complicated or expensive; the main goal is to keep them warm, dry, and protected.
Choosing The Right Brooder Container
When we pick a container, we want something that will keep the chicks contained and safe from drafts, other pets, or little hands. For a small flock, a large plastic storage tote works great. We can even cut out part of the lid and secure some chicken wire to keep them safely inside. If we have more chicks, a metal stock tank or even a large dog crate can be good options. Some folks use large cardboard boxes, which are easy to assemble and can be sized just right. Just remember, chicks grow fast, so we need to plan for space. A good rule of thumb is about 3/4 to 1 square foot per chick. It’s best to have this ready before they even hatch or arrive.
Selecting Safe And Absorbent Bedding
What we put on the floor of the brooder is important for their health and comfort. We want something absorbent to soak up moisture and also something that isn’t slippery. Slippery surfaces can cause leg problems for young chicks. Pine shavings are a popular choice because they are absorbent and safe. We should avoid cedar shavings, though, as the oils can be irritating to their respiratory systems. Some people like to use puppy pee pads on the bottom first, then cover them with shavings. This makes cleanup a breeze and adds an extra layer of absorbency.
Essential Brooder Accessories
Besides the container and bedding, there are a few other things we need. A heat source is number one, usually a heat lamp. We’ll also need a feeder and a waterer. It’s a good idea to get feeders and waterers that are designed for chicks so they don’t drown or get too much bedding in their food. Some people add a small perch or a piece of wood for them to practice their balancing skills. We also want to make sure there’s good ventilation in the brooder, allowing fresh air to circulate without creating direct drafts on the chicks. This helps keep the air clean and reduces the risk of respiratory issues.
Keeping Your Chicks Warm And Cozy

Keeping our little fluffballs warm is probably the most important thing we do when they’re first born. Since they don’t have feathers yet, they can’t regulate their own body temperature, so they really rely on us for that. Getting the temperature right is key to their survival and healthy development.
Understanding Brooder Temperature Needs
Chicks need a warm environment, especially in the first few weeks. Think of it like a mother hen hovering over them. We need to mimic that warmth. Too cold, and they can get chilled, which is dangerous. They might pile up trying to stay warm, and sometimes they can suffocate. If they’re too hot, they’ll try to get away from the heat source, panting or holding their wings out. We want them to be active and curious, not huddled or stressed.
Monitoring Heat With A Thermometer
It’s pretty easy to check the temperature. You can use a thermometer placed at chick level. A good starting point for the first week is around 95°F (35°C). After that, we can gradually lower it each week. Watching the chicks’ behavior is also a great indicator. Happy chicks will be moving around, peeping softly, and eating and drinking. If they’re all huddled together chirping loudly, they’re likely too cold. If they’re trying to get as far away from the heat source as possible, they’re too hot.
Here’s a general guideline for temperature:
| Week | Temperature (°F) | Temperature (°C) |
|---|---|---|
| 1 | 95°F | 35°C |
| 2 | 90°F | 32°C |
| 3 | 85°F | 29°C |
| 4 | 80°F | 27°C |
| 5 | 75°F | 24°C |
| 6+ | 70°F | 21°C |
Adjusting Heat For Growth Stages
As our chicks grow, their temperature needs change. We can slowly decrease the heat by about 5 degrees Fahrenheit each week. This helps them get used to cooler temperatures and prepares them for moving to the coop. It’s a gradual process, and we’re watching them to make sure they’re comfortable. Some people even use a brooder plate instead of a heat lamp. These are safer and allow chicks to move under them when they need warmth, kind of like a real mom hen. This setup helps them learn to regulate their own temperature naturally, making the transition to the coop much smoother. If you’re worried about power outages, having a backup plan like a hot water bottle or hand warmers (wrapped in a towel!) is a good idea. We also keep a heat lamp handy for emergencies, but we use it with close supervision. Remember, proper temperature management is vital for keeping chickens healthy year-round, even when they’re just babies.
Feeding And Watering Your Chicks
Getting the food and water right for our little peeps is super important for their health and growth. They need constant access to both, and what we give them makes a big difference.
Choosing The Right Chick Starter Feed
When we first bring our chicks home, they need a special feed called chick starter. This feed is formulated with the right balance of protein and nutrients to support their rapid growth. We usually opt for a non-medicated starter feed, especially if the chicks have been vaccinated for common issues like coccidiosis. If we choose non-medicated, we just make sure the brooder stays extra clean. The feed should be in a feeder that’s easy for them to access. We’ve found that chick-sized feeders are best so all of them can eat at the same time without too much competition. It’s tempting to buy a big feeder, but they won’t be able to reach it when they’re this small. We check the feeders multiple times a day to make sure they’re full and clean because these little guys eat a lot and can be messy!
Ensuring Constant Access To Fresh Water
Water is just as vital as food, and chicks need it from the moment they arrive. We always make sure their waterer is full of clean, fresh water. For the first week or so, we like to put some small stones or marbles in the waterer. This helps prevent them from drowning, as they can be a bit top-heavy and prone to falling in. The shiny stones also seem to encourage them to investigate and drink more. We check the water levels frequently throughout the day. Some people add a little apple cider vinegar to the water every few days; it’s thought to help with their immune and digestive systems. We also found that adding electrolytes for the first week can be really helpful, especially for chicks that have been shipped. It helps keep them hydrated, which is super important for their well-being. Remember, clean water is a must!
Introducing Grit For Digestion
Chicks don’t have teeth, so they need a little help digesting their food, especially if we decide to give them any small treats. Grit is essentially tiny stones that help grind up food in their gizzards. If we’re only feeding them a commercial chick starter, they might not need extra grit right away. However, if we introduce any whole grains or other scratch-like foods, then providing chick grit becomes necessary. We make sure they have access to it if their diet includes anything other than their standard starter feed. This helps them break down and absorb nutrients from everything they eat. It’s a simple addition that can make a big difference in their digestive health as they grow.
Week-By-Week Chick Development

The Crucial First Week
Welcome to the adventure of raising chicks! The first week is all about getting them settled and comfortable in their new home. They’ll be doing a lot of sleeping, which is totally normal as they adjust. We need to make sure their brooder is set up just right, especially the temperature. Think around 95°F (35°C) for this initial stage. They’ll need constant access to chick starter feed and fresh water. Sometimes, we have to gently guide them to the food and water dishes the first day or two to show them where it is. It’s a good idea to keep a close eye on them this week, just to make sure everyone is eating, drinking, and seems healthy.
Weeks Two and Three: Growth and Activity
By week two, our little fluffballs start to wake up and get more active. They’ll be growing pretty fast now, and their wing feathers will start to show – a sure sign they’re developing! We’ll need to adjust the brooder temperature down a bit, maybe to around 90°F (32°C) for week two, and then down to about 85°F (29°C) for week three. More space is good, so they can move around and stretch those growing wings. We’ll keep offering plenty of food and water, and daily cleaning of the brooder is a must to keep things healthy. This is also a great time to start interacting with them more, getting them used to our presence.
Weeks Four Through Six: Feathering Out
As we hit week four, our chicks are really starting to look less like fluffy balls and more like actual birds. Their adult feathers will begin to replace the down, and they’ll get more adventurous. We can lower the brooder temperature again, aiming for around 80°F (27°C) for week four, and then even cooler in the following weeks, maybe down to about 70°F (21°C) by week six, as long as the room stays warm enough. They’ll be eating and drinking a lot to fuel this growth. We might also start introducing a little bit of grit to their diet to help with digestion, especially if they’re starting to peck at things outside their feed. By week six, they should be mostly feathered out and looking like mini versions of adult chickens!
Beyond Week Six: Preparing for the Coop
Once our chicks are fully feathered and the outside temperatures are consistently mild (think 50s°F or higher), they might be ready to think about moving out of the brooder and into a more permanent coop. This usually happens around 6 to 8 weeks old. They’ll be much more independent now, engaging in flock behavior and exploring. We’ll continue to provide them with good quality starter feed and fresh water, and make sure their new coop is safe and ready for them. It’s an exciting transition as they get ready to become full members of the flock!
Encouraging Healthy Chick Behavior
Once your chicks are settled into their brooder, it’s time to think about how we can help them grow into confident, well-adjusted birds. This isn’t just about keeping them alive; it’s about helping them thrive. We want them to develop natural behaviors that will serve them well when they eventually move to the coop.
Providing Opportunities For Perching
Even though they’re tiny, chicks have an instinct to perch. Giving them something to climb on in the brooder helps them practice this natural behavior. It also gives them a way to get away from each other if they need a little space. We like to use simple wooden dowels or even sturdy branches that are about an inch in diameter. Placing these at different heights can add a fun challenge for them. Watching them figure out how to jump up and down is pretty entertaining!
Enriching The Brooder Environment
Chicks can get bored just like we do. Adding a few simple items to their brooder can make a big difference in their activity levels and overall well-being. We sometimes toss in a few safe toys, like small ladders or even some parrot toys, just to give them something new to explore. Rotating these toys every few days keeps things interesting. We also find that adding a shallow tray of coarse dirt or sand can encourage natural dust-bathing behaviors. It’s amazing how much they enjoy digging and scratching around!
Socialization Through Handling
This is a big one, and it requires a bit of patience. Chicks are naturally wary of things that come from above, as this is how many predators approach. So, instead of reaching in and grabbing them, we want them to come to us. The best way to do this is to sit by the brooder with clean hands and let them approach you. Sometimes, putting a few tasty treats, like cracked corn or mealworms, in your palm can encourage them to investigate. They’ll start by pecking at the food, and before you know it, they’ll be climbing onto your hand. This builds trust and helps them learn that we are a source of good things, not a threat. It’s important to always wash our hands before and after handling them to keep them healthy. Remember, they are fragile and can pick up germs easily. We also make sure to introduce grit to their diet around this time to help with digestion, which you can find information on at [fe70].
Building trust with your chicks through gentle handling is key. It sets the stage for a good relationship as they grow, making them more comfortable around people and less likely to be skittish later on. This early interaction helps them feel secure in their environment.
Keeping Your Brooder Clean
We all know that a clean living space is important for us, and it’s even more critical for our little chicks. Keeping their brooder tidy helps prevent health issues and makes for happier, healthier birds. It might seem like a chore, but it’s really not too bad once you get into a routine.
Daily Spot Cleaning
Every day, we do a quick sweep of the brooder. This means picking out any obviously soiled bedding, especially around the food and water areas. We also check for any dropped food that might be getting stale or attracting unwanted attention. A little bit of daily attention goes a long way in keeping things fresh. If we notice any wet spots, we’ll try to dry them up or replace that small section of bedding. It’s amazing how much mess a few tiny chicks can make in just 24 hours!
Full Bedding Changes
How often we do a full bedding change depends on a few things, like how many chicks we have and how quickly the bedding gets dirty. Generally, we aim for a full change about once a week, but sometimes it might be sooner. We’ll carefully move the chicks to a temporary safe spot – maybe a small box or a laundry basket with some air holes. Then, we dump out all the old bedding, give the brooder a good wipe-down (a little vinegar and water works wonders), and add fresh bedding. We like to use a mix of things, sometimes starting with paper towels or puppy pads for absorbency and a non-slip surface, then adding a layer of pine shavings or straw on top. We avoid cedar shavings because the oils aren’t good for their lungs.
Using Natural Odor Control
Nobody likes a stinky brooder! While regular cleaning is the best way to control smells, we also like to use a few natural helpers. Sometimes, we’ll sprinkle a bit of food-grade diatomaceous earth or some dried herbs like lavender or mint over the bedding. These can help absorb moisture and keep things smelling fresh without using harsh chemicals. We’ve also found that adding a bit of dried grass or even a small amount of coarse dirt can be beneficial. The chicks love scratching around in it, and it seems to help keep the air cleaner. It’s all about creating a healthy, pleasant environment for them.
Introducing Outside Time
Once your chicks are getting bigger and more active, they might appreciate a change of scenery. Taking them outside for supervised playtime can be a really rewarding experience for both you and them. It lets them explore a bit and get some fresh air and sunshine, which is great for their development. Just remember, this is for supervised fun only!
When To Start Outdoor Adventures
We usually wait until our chicks are fully feathered out, which is typically around 6 to 8 weeks old. By this time, they don’t need that extra heat from the brooder anymore, and they can handle the cooler outdoor temperatures better. A good rule of thumb is to wait until the nighttime temperatures are consistently above 50 degrees Fahrenheit. If you’ve been using a heat lamp, make sure you’ve gradually reduced the temperature in the brooder over the weeks leading up to this. It’s all about making sure they’re ready for the transition.
Supervising Outdoor Play
When you take them out, pick a safe, enclosed area. Let them explore at their own pace. You’ll know they’re enjoying themselves if they’re scratching around, pecking at bugs, or even taking a dust bath. It’s pretty funny to watch them spread out in the sun! Always stay with them while they are outside. They are still quite vulnerable, and you need to be there to keep an eye on things. If they start to get stressed or make loud, panicked chirps, it’s time to bring them back to the warmth and safety of their brooder.
Watching For Predator Threats
This is super important. Even in your own backyard, there can be dangers. Keep a close watch for birds of prey, neighborhood cats, or even foxes. They can move in quickly and pose a serious threat to young chicks. Having a secure run or keeping them close by while you’re supervising is your best defense. If you have an existing flock, it’s best to introduce new chicks to the coop gradually. A good way to start is by placing them in an enclosure within the main run, so the older chickens can see them without being able to cause harm. This helps them get used to each other before a full integration when introducing new chickens to your flock.
Wrapping Up Your Chick Care Journey
So, there we have it! Getting baby chicks settled into their brooder and watching them grow is a really rewarding experience. We’ve covered the basics of setting up their cozy space, keeping them warm, fed, and watered, and how to tell if they’re happy and healthy. Remember, a little attention goes a long way in these early weeks. Before you know it, they’ll be feathered out and ready for their next adventure outside the brooder. Keep up the good work, and enjoy watching your flock grow!
Frequently Asked Questions
What exactly is a brooder and why do our chicks need one?
A brooder is basically a safe and warm place for our baby chicks to live until they’re big enough to move to a chicken coop. Think of it like a cozy nursery! It needs to keep them safe from drafts and other dangers, and most importantly, provide the right warmth, which is super important since they can’t regulate their own body heat when they’re so young.
How do we know if our chicks are warm enough in their brooder?
The best way to tell is by watching them! If they’re all huddled together under the heat lamp and chirping a lot, they’re probably too cold. But if they’re spread out, peeping quietly, and moving around, they’re likely comfortable. We can also use a thermometer to keep an eye on the temperature, adjusting the heat lamp up or down as needed.
What kind of bedding is best for our chicks, and how often should we change it?
We want to use bedding that’s safe and absorbent. Pine shavings or hemp bedding are good choices, but we should avoid cedar shavings because they can be harmful. It’s a good idea to clean out soiled bedding daily and do a full bedding change every few days to keep their home clean and fresh.
When can our chicks start going outside, and what should we watch out for?
Once the weather is warm enough, usually when temperatures are in the 60s or higher and they have most of their feathers, we can start letting them have short supervised playtimes outside. We need to keep a close eye on them for predators like birds of prey or cats, and also watch for signs that they might be getting too stressed or cold.
How much food and water do our chicks need, and how do we make sure they get it?
Our chicks need constant access to fresh water and chick starter feed. For water, we can put some marbles or stones in the waterer to prevent them from drowning. We should also dip their beaks in the water the first time to show them where it is. For food, we need to make sure the feeder is accessible to all of them so everyone gets enough to eat.
Is it okay to handle our baby chicks, and how should we do it?
Yes, we can handle our chicks, but it’s important to do it gently and with clean hands to avoid spreading germs. We shouldn’t grab at them, as this can make them fearful. Gentle handling helps them get used to us and makes them more social as they grow.


