We all love having fresh herbs from the garden, but what happens when the season ends? It’s a bummer, right? Well, we’ve found that there are tons of simple ways to preserve herbs so we can enjoy their flavor all year long. Learning how to preserve herbs is easier than you might think, and it means we don’t have to miss out on that fresh taste, even when it’s snowing outside. We’re going to cover a bunch of methods, from drying and freezing to infusing them in oils and vinegars.
Key Takeaways
- We can harvest herbs in the morning when their oils are strongest for the best flavor preservation.
- Drying herbs by hanging them or using a dehydrator is a common method, especially for hardier herbs.
- Freezing herbs, either in ice cube trays with water or oil, or as compound butter, keeps them close to their fresh state.
- Preserving herbs with salt or sugar helps draw out moisture and extends their shelf life.
- Infusing vinegars and oils with herbs is a great way to capture their essence for dressings and cooking.
Harvesting And Preparing Your Herbs

Getting your herbs from the garden into your kitchen is the first step to preserving them for the year ahead. It might seem straightforward, but a little attention to detail here makes a big difference later on. We want to make sure we’re getting the best flavor and quality from our plants.
When To Harvest Your Herbs
For the best flavor and potency, we aim to harvest our herbs when they are young and tender. This usually happens in the spring, before the plant puts all its energy into flowering and going to seed. Think of it as catching them at their peak performance. Harvesting before they flower means the leaves are more flavorful and less bitter.
The Best Time Of Day For Harvesting
Timing is everything, and when it comes to harvesting herbs, the morning is our go-to. Specifically, we like to get out there right after the dew has dried but before the sun gets too hot. This is when the essential oils in the leaves are most concentrated, giving us the most bang for our buck in terms of flavor and aroma. If you wait until the heat of the day, some of those precious oils can evaporate.
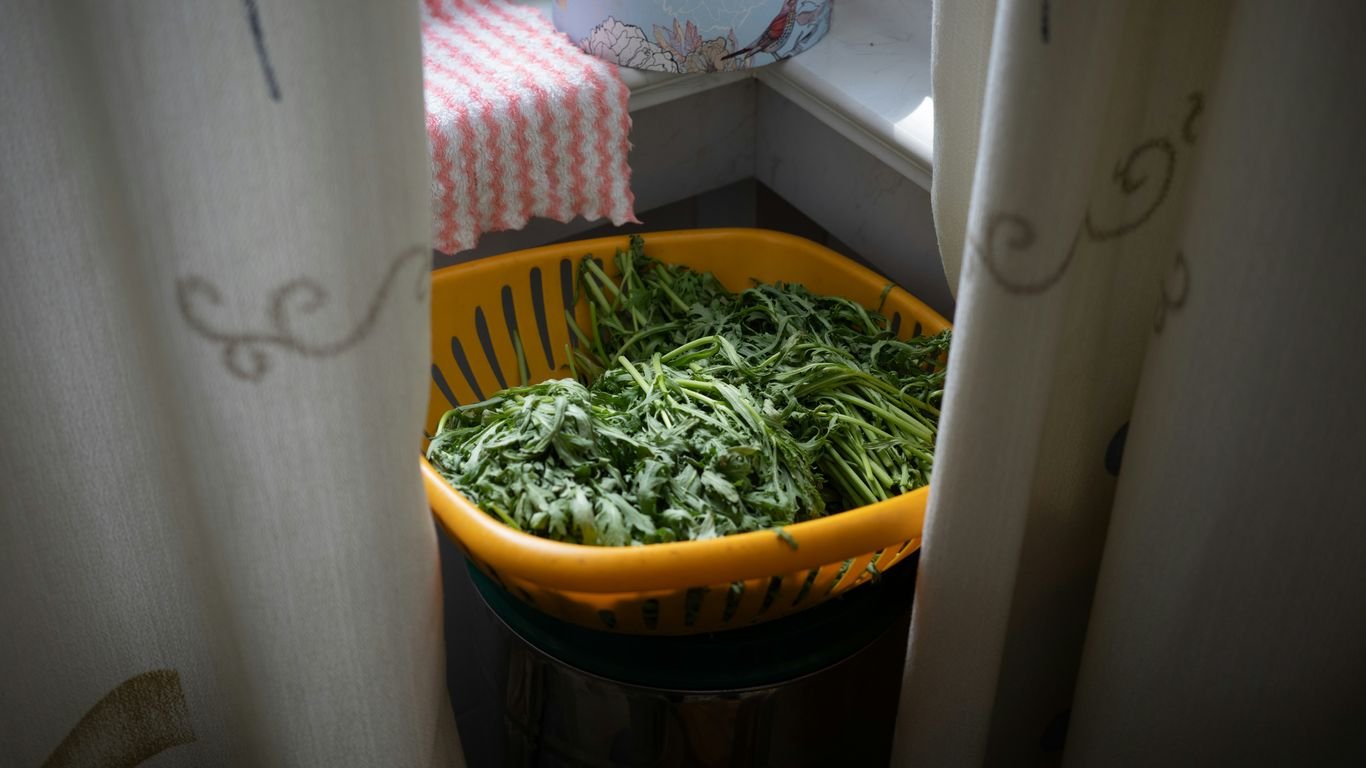
Washing And Drying Your Fresh Herbs
Once we’ve gathered our bounty, it’s time for a gentle clean. We want to get rid of any dirt, tiny bugs, or garden debris that might have hitched a ride. A good rinse under cool water usually does the trick. After washing, it’s super important to get them thoroughly dry. Excess moisture is the enemy of preservation and can lead to mold. We often use a salad spinner for this, followed by a gentle pat-down with clean towels or paper towels. Inspecting them carefully at this stage helps catch any damaged leaves or bits we don’t want.
Here’s a quick rundown of our washing and drying process:
- Rinse herbs gently under cool water.
- Use a salad spinner to remove most of the moisture.
- Pat them completely dry with clean kitchen towels or paper towels.
- Inspect for any remaining debris or damaged leaves.
We’ve found that being meticulous about drying at this stage really pays off. It prevents spoilage and ensures that our preserved herbs retain their best quality for months to come.
Drying Herbs For Long-Term Storage

Drying is a classic way to keep herbs around for ages, and honestly, it’s pretty straightforward once you get the hang of it. We find that most herbs do really well when dried, especially the ones we use a lot in cooking, like oregano, thyme, and rosemary. It’s a great method for preserving their flavor and scent for use in teas, cooking, or even homemade beauty products.
Air Drying Herbs By Hanging
This is probably the simplest method. We just gather a few stems together, tie them up with some twine or a rubber band, and hang them upside down. The key is to find a spot that’s warm, dry, and has good air circulation, but importantly, out of direct sunlight. Hanging them upside down helps keep all those good oils concentrated in the leaves, which means more flavor for us later. We usually leave them hanging for a few days to a week, depending on the herb and how humid it is. You’ll know they’re ready when the leaves feel brittle and crumble easily between your fingers. Once they’re totally dry, we strip the leaves off the stems and store them in airtight jars in our pantry.
Using A Dehydrator For Dried Herbs
If you have a food dehydrator, it can speed things up quite a bit. We spread the herbs out in a single layer on the dehydrator trays, making sure not to overcrowd them so air can get around. We set the dehydrator to its lowest setting, usually around 95-120°F. It typically takes about 6-8 hours, but we check on them periodically. It’s important to keep the leaves whole at this stage; we only crumble or chop them right before we use them. This helps keep the essential oils from escaping too quickly. If you don’t have a dehydrator, you can also use your oven on its lowest setting, keeping the door slightly ajar to allow moisture to escape. Just keep a close eye on them so they don’t burn. You can find more details on oven drying here.
Storing Your Dried Herbs Properly
Once our herbs are completely dry, we store them in glass jars with tight-fitting lids. We keep these jars in a cool, dark cupboard. Proper storage is what makes them last for up to a year, sometimes even longer. We avoid storing them in plastic bags because they don’t offer the same protection. When we need them, we just grab a jar, and if we need smaller pieces, we crumble them right then. It’s amazing how much flavor they retain!
Keeping herbs whole until just before use is a good trick for preserving their flavor. The less surface area exposed, the better the essential oils stay put.
Here’s a quick rundown of what we do:
- Wash and pat herbs completely dry.
- Bundle and hang in a well-ventilated, dark spot, or use a dehydrator/oven on low heat.
- Ensure herbs are totally brittle before storing.
- Store in airtight containers in a cool, dark place.
Freezing Herbs For Maximum Freshness
When we have a bounty of fresh herbs, we want to keep them around for as long as possible. Freezing is a fantastic way to lock in that vibrant flavor and color, making them almost as good as fresh, even months later. It’s a pretty simple process, and there are a few ways we like to do it.
Freezing Herbs In Ice Cube Trays
This method is great for tender herbs like basil, parsley, cilantro, or mint. We just chop them up, pack them into ice cube trays, and then cover them with either water or olive oil. Once they’re frozen solid, we pop the herb cubes out and store them in a freezer bag. They’re perfect for tossing into soups, stews, or sauces.
- Step 1: Wash and thoroughly dry your herbs.
- Step 2: Finely chop the herbs.
- Step 3: Fill ice cube tray compartments about halfway with chopped herbs.
- Step 4: Top off with water or olive oil.
- Step 5: Freeze until solid, then transfer to a freezer bag.
Freezing Herbs With Butter
Making herb butter, or compound butter, is another favorite. It’s super easy and adds a wonderful flavor boost to so many dishes. We soften some butter, mix in our chopped herbs (think rosemary, thyme, garlic, chives – whatever you like!), roll it into a log using parchment paper, and then freeze it. When we need it, we just slice off a bit. It’s amazing on steak, chicken, or even just some crusty bread.
Freezing Herbs On Their Own
Sometimes, the simplest method is the best. For herbs like rosemary, thyme, or sage, we can just lay them out on a baking sheet lined with parchment paper and freeze them until they’re firm. After that, we transfer them to an airtight container or freezer bag. This way, we can pull out just what we need without them clumping together. This method works best for heartier herbs that don’t have a lot of moisture.
We find that freezing herbs whole or in larger pieces before chopping them later preserves more of their essential oils and thus, their flavor. It’s a small step that makes a noticeable difference when you’re cooking.
Preserving Herbs With Salt And Sugar
Sometimes, we want to keep our herbs around for a long time, and salt and sugar are old-school ways to do just that. They work by pulling out moisture, which makes it tough for any spoilage to happen. It’s a pretty neat trick that’s been used for ages.
Using Salt To Preserve Herbs
Salt is a fantastic preservative because it draws out water and stops those pesky microbes from growing. We can use it in a couple of ways. For a simple herb salt, we can chop up our herbs and mix them with coarse salt. Think of it like making a chunky paste. Another method is to blend the herbs and salt together until it forms a sort of paste, then spread that mixture out to dry. Once it’s dry, we can blend it again, and it’ll clump up nicely. This dried herb salt can be stored in an airtight container in your pantry, ready to add a burst of flavor to dishes.
- Chop and mix: Roughly chop fresh herbs and combine them with coarse salt in a jar.
- Blend and dry: Process herbs and salt into a paste, dry it, then re-process into a clumpy mixture.
- Store: Keep your finished herb salt in an airtight container away from moisture.
This method is great for heartier herbs like rosemary, thyme, and sage. You can even use it to make herb-infused culinary salts for finishing dishes.
Preserving Herbs With Sugar
We can also use sugar, much like salt, to preserve herbs. This is especially good for more delicate, aromatic herbs. The process is similar: chop the herbs and mix them with sugar, or blend them into a paste and dry it out. However, we need to be extra careful with sugar. If there’s even a little bit of moisture left, the sugar can get syrupy, which isn’t ideal for long-term storage. It’s crucial that the herbs are completely dry before sealing them away. This technique is perfect for herbs like mint, lemon balm, and lavender, turning them into lovely flavored sugars for baking or teas. We found that making sure the herbs are totally dry before sealing them away is key to avoiding a sticky mess.
When preserving with sugar, always double-check that your herbs are bone dry. Any lingering moisture can turn your sugar into an unmanageable syrup, ruining your preservation efforts.
Infusing Vinegars And Oils

We’ve talked about drying and freezing, but what about keeping those vibrant herb flavors in liquid form? Infusing vinegars and oils is a fantastic way to capture the essence of your herbs and add a gourmet touch to your cooking all year long. It’s surprisingly simple, and the results are pretty spectacular.
Making Herb-Infused Vinegars
Infusing vinegar with herbs is one of the easiest methods to preserve their flavor. Think of all those salad dressings and marinades you can jazz up! We like to pack a clean jar about halfway with fresh herbs, then just cover them with your chosen vinegar. Let it sit for a couple of weeks, tasting it periodically until it reaches the flavor intensity you like. Once it’s ready, strain out the herbs and pour your flavored vinegar into a nice bottle. We often use a bottle with a cork for that extra fancy touch.
Here are some herb and vinegar pairings we love:
- Tarragon with White Wine Vinegar
- Thyme with Apple Cider Vinegar
- Rosemary with Balsamic Vinegar
- Oregano with Red Wine Vinegar
- Chives with Champagne Vinegar
Apple cider vinegar and balsamic vinegar are popular choices, but feel free to experiment with rice vinegar or white wine vinegar too. The longer you let the herbs steep, the stronger the flavor will be, so it’s all about finding that perfect balance for your taste buds. For longer storage, consider coating the cork with beeswax to create a good seal proper storage.
Creating Herb-Infused Oils
Preserving herbs in oil is another wonderful way to keep their flavor handy for cooking. This method works particularly well with heartier herbs like rosemary, sage, thyme, tarragon, and oregano. We find that these herbs hold up beautifully in oil, and the resulting infused oil is a bonus!
Here’s a simple way we do it:
- Wash and thoroughly dry your chosen herbs. A salad spinner works great, or you can gently pat them dry with a clean towel.
- Remove the leaves from the stems. Gently bruising the leaves a bit can help release more of their aromatic oils.
- Chop the herbs or leave the leaves whole – it’s up to you! We sometimes mix herbs that we often use together, like a rosemary and thyme blend.
- Pack the herb leaves into ice cube trays, filling them about two-thirds full. You can keep herbs separate or create custom blends.
- Pour good quality olive oil over the herbs, making sure they are completely covered.
- Freeze the trays overnight. Once frozen, pop the herb-oil cubes out and store them in airtight freezer bags. Don’t forget to label the bags with the herb names and the date!
These little cubes are perfect for adding a burst of flavor when starting sauces, sautéing vegetables, or even brushing onto grilled meats. It’s a really convenient way to have seasoned oil ready to go.
Other Creative Preservation Methods
Beyond the usual drying and freezing, we’ve found some really fun and tasty ways to keep our herb harvests going all year. These methods not only preserve the herbs but also add a special something to our cooking and drinks.
Making Pesto For The Freezer
We all know basil pesto, but don’t stop there! You can make pesto with all sorts of herbs. Think parsley, cilantro, or even a mix of whatever you have on hand. It’s a fantastic way to use up a big bunch of herbs quickly. Just blend your chosen herbs with garlic, nuts (like pine nuts or walnuts), Parmesan cheese, and olive oil. Then, spoon it into ice cube trays or small containers and freeze. These little flavor bombs are perfect for adding a burst of freshness to pasta, sandwiches, or grilled chicken later on.
Creating Herb Salts
This one is super simple and adds a nice touch to meals. We just chop up our fresh herbs really fine and mix them with coarse salt. You can use a food processor for this, or just do it by hand if you have the patience. Some people like to dry this mixture out a bit more, but we often just store it in a jar in the fridge. It’s great for finishing off dishes, rimming cocktail glasses, or even just sprinkling on roasted vegetables. Mint, rosemary, and thyme work particularly well for this.
Making Herb-Infused Honey
If you’re a fan of sweet things, infusing honey with herbs is a delightful option. We gently warm honey (don’t let it get too hot, or you’ll lose the good stuff!) and stir in fresh herb sprigs. Let it sit for a few days, or even a week, to let the flavors meld. Then, strain out the herbs. This honey is amazing drizzled over yogurt, cheese, or used in tea when you’re feeling under the weather. Lavender, chamomile, and lemon balm are lovely choices for this.
Here are a few of our favorite herb and honey pairings:
- Lavender Honey: Great for calming teas and desserts.
- Lemon Balm Honey: Adds a bright, citrusy note to drinks and baked goods.
- Rosemary Honey: Wonderful with roasted meats or on toast.
We’ve found that the key to most of these creative preservation methods is to start with the freshest herbs possible. The better they are when you preserve them, the better they’ll taste when you use them months down the line. Don’t be afraid to experiment with different herb combinations and see what delicious results you can come up with!
So, What’s the Takeaway?
Well, we’ve gone through a bunch of ways to keep those garden herbs around for the long haul. Whether you’re drying them out, freezing them, or even making fancy herb salts, there’s really a method for everyone. It might seem like a lot at first, but once you get the hang of it, it’s pretty straightforward. Now we can all enjoy the taste of fresh herbs, even when it’s snowing outside. Happy preserving!
Frequently Asked Questions
When is the best time to pick herbs from our garden?
We find that the best time to harvest herbs is in the morning, right after the dew has dried but before the sun gets too hot. This is when the herbs are packed with the most flavor and scent because their natural oils are at their peak. Picking them when they are young and tender, before they start to flower, also gives us the best results for preserving their taste.
How do we properly wash and dry herbs before storing them?
First, we give our herbs a good rinse under cool water to wash away any dirt or little critters. Then, it’s super important to dry them completely. We often use a salad spinner for this, or we gently pat them dry with clean towels. Any leftover moisture can lead to mold, so we make sure they’re bone dry before we move on to preserving them.
What’s the difference between tender and hardy herbs for preserving?
Tender herbs, like basil, cilantro, and parsley, have soft, leafy stems and are a bit more delicate. Hardy herbs, such as rosemary, thyme, and sage, have tougher, woodier stems. Knowing this helps us choose the best way to store each type, as some methods work better for one than the other.
Can we really preserve herbs for a whole year?
Yes, we absolutely can! By using different methods like drying, freezing, or infusing them in oils and vinegars, we can keep our herbs fresh and flavorful for up to a year. It means we can enjoy the taste of our garden all through the colder months.
What are the easiest ways to start preserving herbs?
For us, drying herbs by hanging them upside down or freezing them in ice cube trays with a little water or oil are some of the simplest methods. Making herb-infused vinegars or compound butters is also quite straightforward and gives us delicious results.
How should we store dried herbs to keep them fresh?
Once our herbs are completely dry, we store them in airtight containers, like glass jars with tight-fitting lids. We keep these containers in a cool, dark place, such as a pantry or cupboard. This helps protect them from light, heat, and moisture, which can make them lose their flavor over time.