We all know that having a plan for emergencies is smart. One of the most basic needs we have is water. If the taps go dry, whether it’s from a storm, a power outage, or something else, we need to be ready. That’s where emergency water storage comes in. It sounds like a big task, but we’ve broken it down to make it easier for us to get prepared. Let’s look at how much we really need, what to store it in, and how to keep it safe.
Key Takeaways
- Figure out how much water each person and pet will need daily, planning for at least three days, but ideally longer.
- Always use food-grade containers specifically designed for water storage to avoid contamination.
- Clean and sanitize your containers thoroughly before filling them with water.
- Store water in a cool, dark place, away from potential contaminants and hazards.
- Replace your stored water every six months to ensure it stays fresh and safe.
How Much Water Do You Really Need?

Okay, so we’re talking about emergency water, and the first big question is: how much do we actually need to have on hand? It’s not as simple as just grabbing a few bottles. We’ve got to think about a few things to make sure we’re covered.
The Daily Minimum Per Person
When it comes to just staying alive and functioning, the general rule of thumb is to have at least one gallon of water per person, per day. This might sound like a lot, but remember, this gallon covers everything – drinking, cooking, and a little bit for basic hygiene. For drinking alone, aim for at least two quarts (that’s about eight cups) per person each day. This is the absolute baseline to keep dehydration at bay. If you live somewhere really hot or if you’re doing a lot of physical activity, you’ll definitely need more than the minimum.
Considering Extra Needs
Beyond the basic daily requirement, we need to think about who’s in our household and what their specific needs might be. Little kids, for instance, can get dehydrated faster. Nursing mothers have increased fluid needs. If someone in the family is sick, they’ll likely need more water too. So, if you have a larger family, or if anyone has special health considerations, bump up that gallon-per-person estimate. It’s always better to have a bit too much than not enough when things get tough.
Don’t Forget Your Furry Friends
We often focus on ourselves and our human family members, but our pets need water too! They can’t just open the tap. Depending on the size and type of pet, their water needs can add up quickly. A good rule of thumb is to factor in at least one quart of water per day for each pet. So, if you have a couple of dogs or cats, that’s an extra two quarts a day you need to account for in your storage plan. They’re part of the family, so let’s make sure they stay hydrated too.
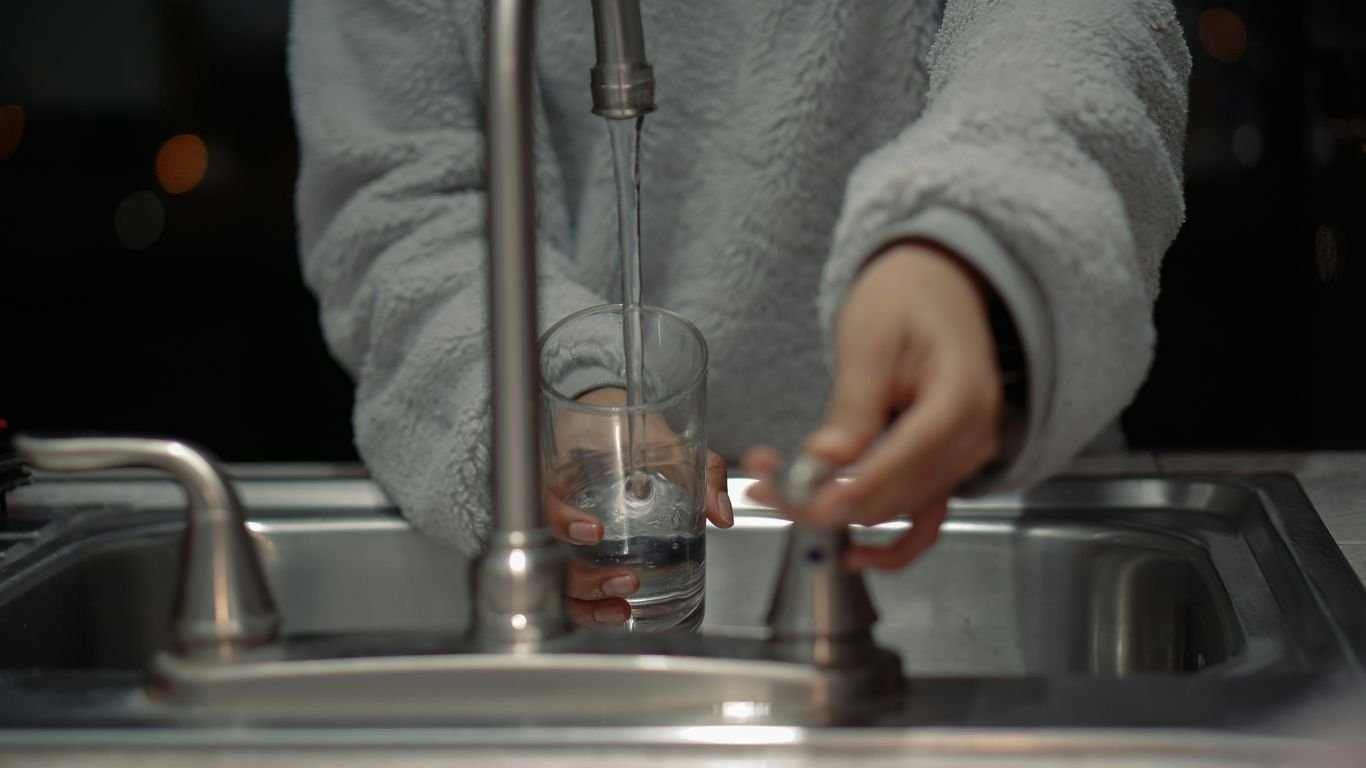
Choosing The Right Containers For Storage

Alright, so you’ve figured out how much water you need, which is awesome. Now, let’s talk about what you’re going to put all that precious liquid into. This is actually a pretty big deal, because the wrong container can make your stored water go bad or even become unsafe to drink. We definitely don’t want that.
Food-Grade Is The Way To Go
When we’re talking about storing water for drinking and cooking, the golden rule is to use food-grade containers. What does that mean? It means the container is made from materials that are safe for contact with food and beverages. They won’t leach weird chemicals into your water, which is, you know, important. Think about those sturdy plastic jugs that usually hold juice or milk – if they’re labeled as food-grade, they’re a good bet. You can often find these at camping supply stores or places that sell emergency preparedness gear. The key is that they are specifically designed not to transfer anything harmful into the water.
What If Food-Grade Isn’t An Option?
Okay, so maybe you can’t get your hands on a brand-new, shiny food-grade container right away. What then? Well, you can still use some existing containers, but you’ve got to be a bit more careful. Plastic jugs that previously held things like juice, punch, or other edible liquids are usually okay, as long as they have a tight-fitting lid. Just make sure you wash them out really, really well first. We’ll get into cleaning in the next section, but for now, just know that thorough washing is a must. If you’re using a container that’s not explicitly labeled food-grade, try to pick one made of durable, unbreakable material with a lid that seals tightly. A narrow opening can also be helpful for pouring.
Avoid These Container Types
Now, for the containers you should steer clear of. First off, never use containers that have held toxic chemicals. We’re talking about things like bleach, pesticides, motor oil, or anything similar. Even after washing, those residues can be impossible to get rid of completely and can make your water dangerous. Also, while glass jars might seem like a good idea because they don’t leach chemicals, they’re just too fragile. Dropping one could be a mess, and broken glass is a hazard. And try to avoid those thin plastic milk jugs if you can; they can degrade over time and might hold onto traces of milk, which isn’t ideal for long-term water storage.
Preparing Your Containers For Water Storage
Alright, so we’ve figured out how much water we need and what kind of containers to use. Now comes the part where we actually get those containers ready to hold our precious emergency water supply. This step is super important because even the best water can get messed up if the container isn’t clean.
Give Them A Good Scrub
First things first, we need to wash everything. Grab your containers and lids and give them a good scrub with hot water and some regular dish soap. Make sure you get into all the nooks and crannies. If you have a dishwasher, running them through a hot cycle is a great way to get them really clean. After washing, rinse them thoroughly with hot water. We want to get all that soap residue out.
Sanitize For Safety
Washing is good, but sanitizing is even better. This is where we kill off any lingering germs that might have survived the wash. A simple and effective way to do this is with a bleach solution. Mix about 1 teaspoon of plain, unscented household bleach (the kind that’s 5-9% sodium hypochlorite) with a quart of water. Pour this solution into your clean container, put the lid on tight, and give it a good shake so the solution touches every inside surface. Let it sit for at least 30 seconds, then pour it out. This sanitizing step is key to preventing bacterial growth.
Let Them Air Out
After sanitizing, we don’t want to fill them up right away. We need to let them air dry completely. Turn the containers upside down on a clean surface or a drying rack. This helps any remaining moisture evaporate. It’s important they are totally dry before you fill them with water. This prevents any funky smells or tastes from developing and gives you peace of mind that you’re starting with a truly clean slate for your stored water.
Treating Water For Long-Term Storage
Okay, so we’ve got our containers ready and filled with water. Now, we need to make sure it stays safe to drink for a while. This is where treating the water comes in. We don’t want any nasty little critters growing in there, right?
The Bleach Method Explained
This is a pretty common way to go about it. You’ll want to grab some regular household bleach. Make sure it’s plain bleach, with no added scents or cleaning agents. Look for one that’s 4-6% sodium hypochlorite. If it’s older than three months, it might not be as effective, so try to use a fresh bottle.
Here’s the general idea:
- For every gallon of water, add about six drops of bleach. Use a clean medicine dropper for this – no guessing!
- Give the water a good stir.
- Let it sit, covered, for about 30 minutes. You should be able to smell a faint chlorine scent. If you can’t, add another dose and wait another 15 minutes.
- Once it smells faintly of chlorine, cap your containers tightly and label them with the date you treated the water.
This method works by using the chlorine to kill off any bacteria or other tiny things that might have gotten into the water during filling or from the container itself. It’s a simple step that adds a big layer of safety.
Freezing For Preservation
Freezing is another option, especially if you have the freezer space. It’s a great way to keep water safe and also helps keep other frozen foods cold if the power goes out. When you’re filling your containers, leave a little bit of space at the top – maybe two or three inches. Water expands when it freezes, and you don’t want your containers to burst. Thin plastic ones might still break, so be aware of that. We generally avoid freezing water in glass containers because they’re more likely to crack.
Canning For The Long Haul
If you’re really thinking long-term, canning is an option. You can use glass jars specifically made for canning, the kind with flat metal lids and screw bands. Wash them really well with hot, soapy water and rinse thoroughly. Fill the jars with water, leaving about an inch of space at the top. Then, just put on the lid and band. This method is a bit more involved, but it can keep water safe for a very long time.
Where To Store Your Emergency Water Supply
Alright, so we’ve got our water ready to go, but where do we actually put it? This is super important because storing it wrong can make it go bad faster or even become unsafe. We need to think about a few things to make sure our water stays good.
Keep It Cool And Dark
Temperature and light are the enemies of stored water. Think about it – if you leave a water bottle out in the sun all day, it gets warm and might even start to smell a bit funky. The same goes for our emergency supply. We want to find a spot that’s consistently cool, ideally between 50°F and 70°F (10°C to 21°C). Also, keeping it out of direct sunlight is key. Darkness helps prevent algae and bacteria from growing. A dark closet or a basement is usually a great bet. If you live in a place with extreme temperature swings, consider a temperature-controlled environment if possible.
Away From Potential Hazards
This one might seem obvious, but it’s worth saying. We don’t want our water supply anywhere near things that could contaminate it. That means keeping it away from cleaning supplies, chemicals, gasoline, or anything else that has strong fumes. If there’s a leak or spill, we don’t want that stuff getting into our drinking water. Also, think about where you’re storing it in relation to potential disasters. If you’re in a flood-prone area, don’t store it on the floor where it could get contaminated by rising water. We’ve seen how floodwaters can affect everything, so keeping supplies elevated is smart. You can find some good advice on storing food safely in flood-prone areas online.
Ensure Shelving Can Handle The Weight
Water is heavy! A gallon of water weighs about 8.3 pounds. If you’re storing a decent amount – say, a two-week supply for a family of four, that’s a lot of weight. We need to make sure whatever shelves or storage units we’re using are strong enough to hold it all. A wobbly shelf or a weak cabinet could be a real problem. It’s better to use sturdy shelving or even store containers directly on the floor in a designated, safe spot if your shelving isn’t up to par. Don’t stack them too high either, just in case they fall.
Here’s a quick rundown of good places to consider:
- Basements (if dry and cool)
- Closets (away from chemicals)
- Under beds (if protected from dust and light)
- Pantry (if it stays cool and dark)
Remember, the goal is to keep your water safe and accessible. Think about stability, temperature, and protection from contaminants. It takes a little planning, but it’s totally worth it for peace of mind.
Maintaining Your Stored Water
Okay, so we’ve gone through the effort of getting our emergency water supply ready. That’s awesome! But we can’t just set it and forget it. We need to make sure it stays good to drink.
When To Replace Your Supply
Think of your stored water like milk – it doesn’t last forever. For water stored on a shelf, we generally aim to use or swap it out every six months. This keeps things fresh. If you’ve frozen your water, it can last longer, but it’s still a good idea to rotate it annually. The goal is to have water that’s safe and tastes decent when you actually need it.
Keeping It Clean When Dispensing
This is super important. Once you open a container, you’ve broken the seal, and that’s when germs can get in. Try to only open the containers you plan to use right away. If you have power, storing opened containers in the fridge below 40°F is a good move. And please, use clean hands or a clean ladle to get water out. We don’t want to contaminate our good supply with everyday gunk.
Remember, even if the water looks clear, it’s the invisible stuff we’re worried about. Proper rotation and careful dispensing are key to keeping your emergency water safe.
Here’s a quick rundown:
- Shelf-stable water: Rotate every 6 months.
- Frozen water: Rotate annually.
- Opened containers: Refrigerate if possible and use quickly.
- Dispensing: Always use clean hands or tools.
Wrapping Up: Water Storage Made Simple
So, there you have it. Storing water for emergencies might seem like a big task at first, but we’ve broken it down. We’ve talked about how much you’ll likely need, the best kinds of containers to use, and how to keep that water fresh and safe for when you need it most. It’s really about taking a little time now to set yourselves up for peace of mind later. Think of it as a small chore that pays off big if the unexpected happens. We hope this guide helps you feel more prepared and less worried about your water supply when it counts.
Frequently Asked Questions
How much water should we store for emergencies?
We should keep at least one gallon of water per person each day for a minimum of three days. If we can, storing enough for two weeks is even better. This water will be used for drinking, cooking, and cleaning.
Can we use any container to store emergency water?
No, we should use food-grade containers that are safe for storing water. These containers won’t leak harmful chemicals into the water. If we don’t have food-grade containers, we must make sure the containers are clean, strong, and can be closed tightly. We should avoid using containers that once held chemicals or milk.
How often should we replace stored water?
We need to replace stored water every six months to make sure it stays fresh and safe to drink. If we use store-bought bottled water, we should check the expiration date and use it before it expires.
How do we make water safe for long-term storage?
We can add unscented liquid bleach to the water—about 8 drops of bleach for every gallon of water. Let it sit for at least 30 minutes before sealing the container. We can also freeze water or use canning methods to keep it safe for a long time.
Where is the best place to store emergency water?
We should keep our water in a cool, dark place, away from sunlight and heat. It’s also important to store it away from chemicals like gasoline or pesticides. Make sure the shelf or area is strong enough to hold the heavy containers.
What should we do when using stored water?
When taking water out, we should use a clean scoop or pour it out instead of dipping cups or hands in. We shouldn’t drink straight from the container, and we should always keep the container’s opening clean to avoid germs getting inside.


