Rustic Holiday DIYs: 15 Zero-Waste Christmas Decorations from Your Homestead
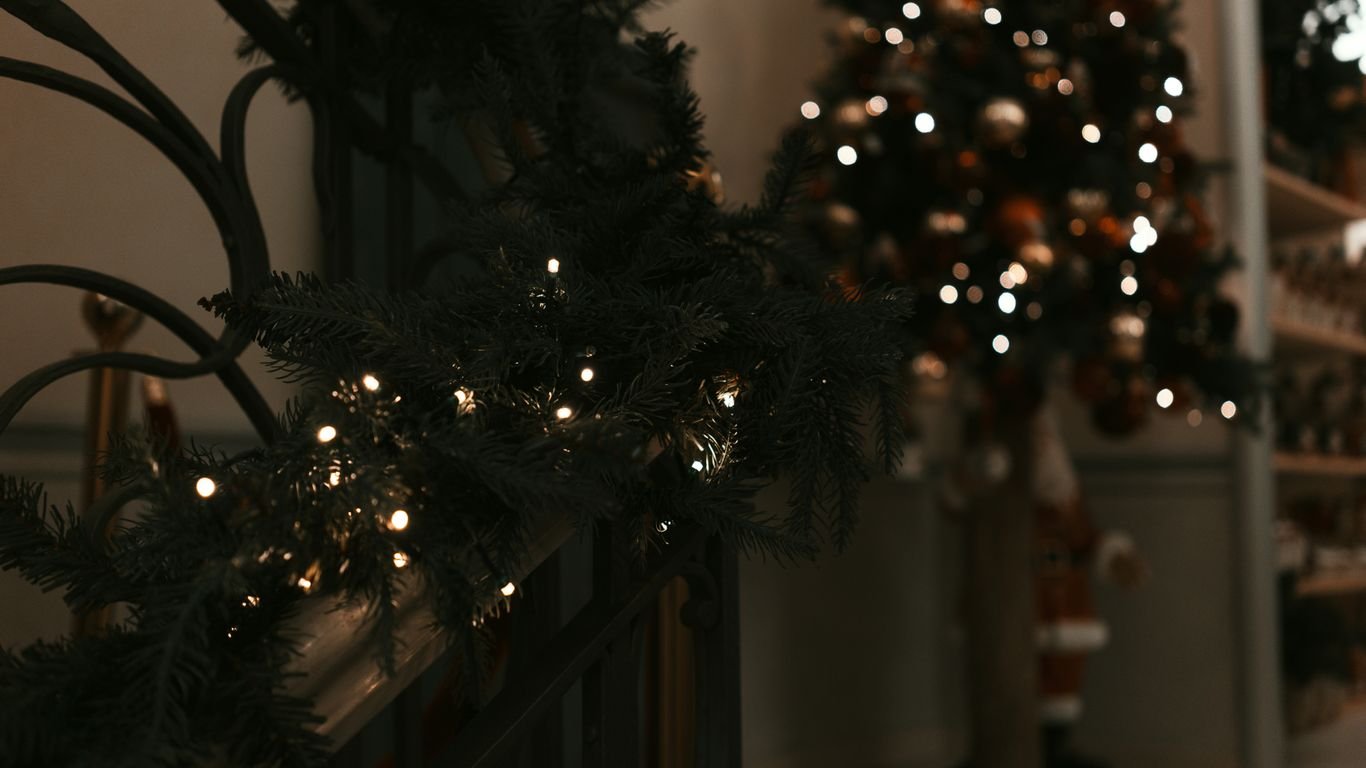
This year, we’re embracing a more natural way to deck the halls. We’ve gathered some wonderful ideas for homestead Christmas decor that not only look charming but also help us reduce waste. It’s all about using what we have around the homestead to create a warm, festive atmosphere without all the extra trash. We think you’ll love these simple, down-to-earth projects that bring a bit of the outdoors in.
Key Takeaways
- We can create beautiful homestead Christmas decor using natural materials found on our property, like wood slices and evergreens.
- Simple crafts like cranberry garlands and fabric stars are easy for the whole family to make and add a rustic touch.
- Simmer pots with natural ingredients fill our homes with festive scents without harsh chemicals.
- Homemade gifts and decorations, like beeswax candles and dried fruit ornaments, are thoughtful and reduce waste.
- Embracing zero-waste principles for our holiday decorations aligns with a sustainable homestead lifestyle.
1. DIY Wooden Slice Ornaments
We love adding a rustic touch to our holiday decor, and these wooden slice ornaments are just perfect for that. They’re simple to make, look charming on the tree, and are a great way to use up small branches if you’ve been doing any yard work. The real magic happens when you use decorative napkins to transfer beautiful designs onto the wood. It’s a technique called decoupage, and it makes even the most basic wooden slice look like a professional piece of art.
Making your own wooden slices is pretty straightforward if you have a branch. We usually aim for slices about 2 to 2.75 inches across and around ⅜ inch thick. After sawing, a light sanding smooths them out, and letting them dry completely is key to avoid any mold later on. If you don’t have branches handy, you can easily find pre-cut wooden rounds at most craft stores.
Here’s what you’ll need to get started:
- Wooden slices (either homemade or store-bought)
- Decorative napkins (look for ones with a white background for the best effect)
- Craft glue, Mod Podge, or watered-down wallpaper paste
- A paintbrush
- String, ribbon, or jute for hanging
- Scissors
- A drill with a small bit (around ⅛ inch)
To make them:
- Prepare the Napkin: Carefully separate the layers of your napkin. You only need the top printed layer. Cut out the design you want to use, making sure it fits nicely on your wooden slice.
- Glue it Down: Apply a thin, even coat of glue to the wooden slice. Gently place the printed napkin layer onto the glued surface and smooth it out. Then, brush another thin layer of glue over the top of the napkin.
- Let it Dry: Allow the glue to dry completely. You’ll notice the white parts of the napkin become clear, leaving just the design on the wood.
- Add a Hanger: Once dry, drill a small hole at the top of the slice. Thread your string or ribbon through the hole and tie a knot to create a loop for hanging.
These ornaments are wonderfully versatile. Beyond the Christmas tree, they can double as unique gift tags or even place cards for your holiday table. We’ve found that a set of four, tied with a bit of twine, makes a lovely little present for neighbors or teachers.
We love how these turn out – they feel so personal and add such a warm, handmade charm to our decorations. Plus, it’s a fun activity to do with the whole family!
2. Cranberry Garland
We love a good DIY project, especially when it’s as simple and festive as a cranberry garland. It’s a classic for a reason! Making one is super easy and adds a beautiful pop of color to your holiday decor without costing much at all. Plus, it’s a great way to use up those cranberries you might have leftover from baking.
This garland is not only pretty but also completely edible, though we don’t recommend eating it after it’s been hanging around for a while!
Here’s how we put ours together:
- Gather your supplies: You’ll need fresh cranberries (a few bags should do it), a sturdy needle with a large eye, and some strong thread or twine. We like using a natural twine for that extra rustic feel.
- Start threading: Carefully thread your needle. It helps to tie a knot at the end of your thread to stop the cranberries from sliding off. Then, just start piercing the cranberries and sliding them onto the thread. Don’t worry about making them perfectly spaced; a little variation looks more natural.
- Keep going until it’s long enough: We usually make ours long enough to drape over our tree or mantel. You can string them end-to-end to create one long strand, or make several shorter ones to hang in different spots.
This simple garland looks amazing draped across a mantelpiece, woven through a Christmas tree, or even hung in swags around doorways. It brings a natural, festive touch that store-bought decorations just can’t match. We often pair it with popcorn garlands for an even more traditional look.
It’s a fun activity to do with the kids, too. They love the repetitive motion of threading the berries, and it keeps their hands busy while you get some decorating done. Just be prepared for a few stray cranberries rolling around the floor!
3. Simple Fabric Star Ornaments
We love finding ways to use up fabric scraps, and these simple fabric star ornaments are just the ticket. They’re surprisingly easy to make, even if you’re not a whiz with a sewing machine. You can whip these up by hand pretty quickly.
These little stars are perfect for adding a touch of handmade charm to your tree. They’re also great for using up those small fabric remnants that are too good to toss but too small for bigger projects. We found a free pattern online that made the process super straightforward.
Here’s a basic idea of what you’ll need:
- Fabric scraps (cotton prints work wonderfully)
- Batting or a bit of stuffing
- Thread and needle (or a sewing machine)
- Scissors
- A pattern (we’ll link to one below!)
We like to make a variety of sizes and patterns to give our tree some visual interest. You can even use different fabrics for the front and back of each star for a unique look. If you have little ones, making these can be a fun, low-pressure craft for them to participate in, and the soft ornaments are safe to hang lower on the tree.
Making these stars is a really satisfying way to repurpose fabric. It feels good to create something beautiful from materials that might otherwise go to waste. Plus, they look so cozy hanging on the branches.
We found a great tutorial that includes a free printable pattern, which makes cutting out the star shapes a breeze. Just follow the simple stitching instructions, stuff them lightly, and you’ll have a lovely set of ornaments in no time.
4. Simple Evergreen Simmer Pot

We love filling our homes with festive scents during the holidays, and a simmer pot is such an easy way to do it. It’s a natural air freshener that uses simple ingredients to create a wonderful aroma. For a basic evergreen simmer pot, we just need a few things from our yard or pantry.
Here’s what we usually grab:
- Fresh evergreen sprigs (like pine, fir, or cedar)
- A few cinnamon sticks
- Whole cloves
- Orange peels or slices (dried ones work great too!)
The key is to combine these elements in a pot with water and let it gently simmer on the stove. We usually add enough water to cover everything, then keep an eye on it, adding more water as needed. The scent that fills the house is just amazing, a real holiday smell that feels so cozy.
This method is fantastic because it uses natural materials and avoids any artificial fragrances. It’s a simple, zero-waste way to bring the scent of the season indoors. Plus, you can often reuse the ingredients for a day or two before composting them.
We often find that a good simmer pot can last for a couple of days if we keep adding water. It’s a simple pleasure that makes our home feel extra festive. For more ideas on using natural elements, check out how to dry orange slices for crafts and cooking.
5. Easy to Make Eco-Friendly Ornaments
We’re always looking for ways to make our holidays a little greener, and crafting our own ornaments is a fantastic way to do it. It’s not just about reducing waste, though that’s a big plus. There’s something really special about decorating the tree with items we’ve made ourselves, especially when they come from materials we already have or can easily find.
Think about it: instead of buying new plastic decorations, we can use things like dried fruit, fabric scraps, or even bits of wood. These materials not only look great but also add a unique, rustic charm that store-bought items just can’t match. Plus, the process of making them can be a really fun activity for the whole family.
Here are a few ideas to get us started:
- Dried Citrus Slices: Thinly slice oranges, lemons, or grapefruit, pat them dry, and bake them on a low heat until they’re dried out. They look beautiful when the lights shine through them and smell amazing.
- Fabric Scraps: Old clothes or linens can be cut into shapes like stars or hearts, stuffed lightly, and sewn together. We can even use fabric paint to add designs.
- Pinecone Decorations: Simply gather some pinecones from the yard, maybe give them a light dusting of glitter or white paint to look like they’re covered in snow.
Making ornaments this way connects us to the season and the natural world around us. It’s a simple act that brings a lot of joy and a personal touch to our holiday celebrations.
These aren’t just decorations; they’re little pieces of memories we create each year. The satisfaction of hanging something handmade is pretty unbeatable.
6. Festive Holiday Simmer Pot to Enjoy and Gift
We all love that cozy, festive smell that fills the house during the holidays, right? A simmer pot is a fantastic way to achieve that without any artificial scents. It’s super simple to put together, and the best part is, you can enjoy the wonderful aroma yourself and then package the leftover ingredients into a charming gift for someone else.
Making a simmer pot is all about combining natural elements that release a delightful fragrance when gently heated. We like to use a mix of dried citrus slices, cinnamon sticks, whole cloves, and maybe a sprig of fresh rosemary or a few star anise. The combination creates a warm, inviting scent that just screams ‘holidays’.
Here’s a basic idea of what we put in ours:
- Dried orange slices
- Cinnamon sticks
- Whole cloves
- Star anise
- A few sprigs of fresh pine or rosemary
To make it a gift, we simply layer these dry ingredients into a pretty mason jar. Tie a ribbon around the top, maybe add a little tag with simple instructions (just add water and simmer on the stove!), and you’ve got a thoughtful, zero-waste present that anyone would appreciate. It’s a gift that keeps on giving, filling their home with holiday cheer.
This is a wonderful way to use up leftover citrus peels or dried fruit from other projects. It’s a truly sustainable gift that smells amazing.
7. Dried Fruit Christmas Ornaments

We love adding natural touches to our holiday decor, and dried fruit ornaments are a fantastic way to do just that. They bring a beautiful, rustic charm to the Christmas tree and have a lovely scent too. Plus, they look like little stained-glass windows when the lights shine through them!
Making these is pretty straightforward. You can dry all sorts of fruits, not just the usual citrus slices. Think apples, pears, and even cranberries. The key is to slice them thinly and dry them out completely to prevent any spoilage. We usually slice ours about ⅜ inch thick and let them air dry or use a dehydrator on a low setting. It takes a bit of patience, but the result is totally worth it.
Here’s a quick rundown of how we do it:
- Slice your chosen fruit thinly. Apples and oranges are classics, but don’t be afraid to experiment with other fruits.
- Dry them thoroughly. You can use a dehydrator, a low oven setting (around 200°F or 93°C), or even just let them air dry in a warm, dry place for a few days.
- Add embellishments. Once dry, we like to add a cinnamon stick, a sprig of rosemary, or a star anise for extra visual appeal and scent. You can also tie them with twine or ribbon.
- Drill a small hole at the top to thread your hanging material through.
These ornaments are not only pretty but also smell amazing. They add a unique, homemade touch that store-bought decorations just can’t match. We’ve even used them as gift tags on presents, which is a nice little bonus for the recipient. If you’re looking for a simple way to add some natural beauty to your holiday decorations, give dried fruit ornaments a try. You can find more ideas for natural garlands using dried fruits like persimmons here.
We find that the thinner the slice, the quicker they dry and the more translucent they become when the lights hit them. It’s a simple trick that makes a big difference in their appearance on the tree.
8. DIY Peppermint Scrub
We love finding simple, natural ways to pamper ourselves and others, especially during the busy holiday season. This DIY peppermint scrub is one of our favorites. It’s incredibly easy to make, uses ingredients we often already have on hand, and leaves skin feeling wonderfully soft. Plus, the invigorating scent of peppermint is just perfect for a festive pick-me-up.
This scrub is fantastic for tired feet after a long day of holiday preparations. It also makes a thoughtful, zero-waste gift that feels luxurious without costing a lot.
Here’s what you’ll need:
- 1 cup granulated sugar (or Epsom salt for a coarser scrub)
- 1/2 cup carrier oil (like coconut oil, almond oil, or olive oil)
- 10-15 drops peppermint essential oil
We find that using a combination of sugar and Epsom salt gives the best exfoliating texture.
To make it, simply combine all the ingredients in a bowl and mix until well combined. If you’re using coconut oil and it’s solid, you might want to melt it slightly first. Once everything is mixed, spoon the scrub into small glass jars. We like to use mason jars because they seal well and look pretty on a shelf.
A little tip: If you’re gifting this, tie a ribbon around the jar and attach a small tag with the ingredients and instructions for use. It adds a lovely handmade touch.
This scrub is a wonderful way to bring a bit of spa-like indulgence into our homes, using simple, natural ingredients. It’s a small act of self-care that we can easily share.
9. Sawtooth Star Quilted Table Runner Pattern
We love quilting because it’s a one-size-fits-all kind of craft. Unlike making clothes, where fit can be tricky, quilts and table runners are pretty forgiving. This sawtooth star pattern is a fantastic way to add some handmade charm to your holiday table. It looks impressive, but it’s totally doable, even if you’re not a seasoned quilter.
This project is perfect for using up fabric scraps you might have lying around. Think about mixing and matching your favorite holiday colors or even using some vintage-inspired prints for a truly rustic feel. The sawtooth star design is classic and always looks good.
Here’s a general idea of what you’ll need:
- Assorted fabric scraps (cotton is best for quilting)
- Batting
- Backing fabric
- Thread
- Rotary cutter, mat, and ruler
- Sewing machine
We found that cutting the fabric into consistent squares makes the process much smoother. For a standard table runner size, you might aim for blocks that finish around 6 inches. This allows for a good number of stars without making the runner too massive.
The beauty of a quilt pattern like this is its adaptability. You can easily adjust the length and width to fit your specific table. Don’t be afraid to play with different fabric combinations; that’s where the real fun and personalization come in. We’ve seen people use everything from traditional reds and greens to more muted, earthy tones, and they all look wonderful.
10. Holiday Simmer Pot in a Jar
Want to fill your home with that wonderful, cozy holiday scent without a lot of fuss? We’ve got you covered with this simple holiday simmer pot in a jar. It’s a fantastic way to use up bits and bobs from your kitchen and garden, turning them into something truly special. Plus, it makes for a thoughtful, zero-waste gift!
Making your own simmer pot is incredibly easy and customizable. You can tailor the ingredients to your favorite holiday smells. Think warm spices, citrus, and evergreens. It’s a much more natural and sustainable way to get that festive aroma compared to artificial air fresheners.
Here’s what we usually toss into our simmer pots:
- Orange peels (dried or fresh)
- Cinnamon sticks
- Whole cloves
- Star anise
- Apple slices (dried work great too)
- Pine or spruce clippings (make sure they’re clean!)
- A splash of vanilla extract (optional, but nice!)
To assemble one for gifting, layer your chosen dry ingredients into a clean mason jar. You can add a little note with instructions: "Add contents to a pot with water and simmer on low heat." It’s a beautiful, fragrant present that keeps on giving. We love using citrus peels and spices for a classic scent.
11. Beeswax Candles
Making our own beeswax candles is a wonderful way to bring a warm, natural glow into our homes, especially during the holidays. Unlike many store-bought candles that can release less-than-ideal stuff into the air, beeswax burns cleanly and can even help purify the air. Plus, they have this subtle, sweet honey scent all on their own.
We love using old jars or pretty thrifted containers for these. It’s a great way to reuse things and makes each candle totally unique. You can find all sorts of containers – jam jars, old teacups, or even small ceramic bowls work perfectly. Just make sure they’re heat-safe, of course.
Here’s a basic rundown of how we do it:
- Gather your supplies: You’ll need beeswax (pellets are easiest to work with), wicks (cotton or wooden work well), wick stickers or a dab of hot glue, and your chosen containers. If you want to add a scent, you can use a few drops of essential oil, but honestly, the natural beeswax smell is lovely on its own.
- Prepare the wick: Secure the wick to the bottom center of your container using a wick sticker or a bit of hot glue. You can use a wick holder or even a couple of pencils laid across the top of the container to keep the wick centered and upright while the wax cools.
- Melt the beeswax: Gently melt the beeswax. We usually do this in a double boiler setup – a heatproof bowl set over a pot of simmering water. Never leave melting wax unattended.
- Pour the wax: Once the beeswax is fully melted, carefully pour it into your prepared containers. Let it cool and harden completely. This can take a few hours.
- Trim the wick: Once the candle is solid, trim the wick to about a quarter-inch above the wax surface.
These candles burn for a long time and give off a beautiful, soft light. They’re perfect for creating a cozy atmosphere on a winter evening. If you’re looking for a simple, natural way to add ambiance, making your own beeswax candles is a fantastic project. You can find more detailed instructions on how to create your own beeswax candles at home if you want to get started.
We find that the process itself is quite calming. It’s a nice way to slow down and create something tangible and beautiful. Plus, the scent of warm beeswax is just so comforting.
12. Delicious Honey Spoons

As homesteaders, we love giving gifts crafted from the fruits of our labor. While a jar of delicious honey is always a sweet gift, it’s not the easiest to take on the go. That’s why these honey spoons are such a clever alternative! They’re a fun and portable way to share your homegrown honey—perfect for the tea lover in your life.
Making these is pretty straightforward. You just need a few things:
- Wooden spoons (the small tasting kind work great)
- Your best honey
- Optional: edible glitter or sprinkles for a festive touch
Here’s how we do it:
- Make sure your wooden spoons are clean and completely dry. Any moisture can make the honey slide off.
- Gently warm your honey just a little bit. You don’t want it hot, just warm enough to be a bit more fluid. This makes it easier to coat the spoon.
- Dip the bowl of the spoon into the honey, scooping up a good amount. You can also use a small spoon to dollop honey onto the wooden spoon.
- Let any excess honey drip off for a moment.
- If you’re adding any fun toppings like edible glitter, sprinkle them on now while the honey is still sticky.
- Lay the spoons on parchment paper to set completely. This can take a few hours, depending on how much honey you used and the room temperature.
Once they’re set, you can wrap them individually in cellophane or small bags. These make fantastic stocking stuffers or small thank-you gifts. They’re a sweet little treat that feels really special, especially when you’ve harvested the honey yourself.
13. Snowman Handprint Ornament
We all know how fast little hands grow, right? One minute they’re tiny, the next they’re reaching for the cookie jar on the top shelf. That’s why we love making keepsakes that capture those fleeting moments. This snowman handprint ornament is a perfect example. It’s a simple craft that turns your child’s handprint into a little family of snowmen, ready to hang on the tree.
It’s not just a sweet memory for us; it makes a heartwarming gift for grandparents, too. Imagine their faces when they unwrap an ornament featuring their grandchild’s handprint, transformed into cheerful snowmen!
Here’s what you’ll need:
- White, black, and orange non-toxic paint
- A paintbrush
- A small paintbrush or fine-tip marker for details
- A plain ornament (we like using wooden slices or plain glass ones)
- A ribbon or twine for hanging
Steps to create your snowman family:
- Paint the Handprint: Carefully paint your child’s palm and fingers with white paint. Press their hand firmly onto the ornament, then lift gently. Let this dry completely.
- Add the Snowmen: Once the white base is dry, use a small brush or marker to add the snowman details. For each "snowman" (finger), add two small black dots for eyes and a tiny orange dot or line for a nose. You can also add little black dots for buttons down the "body" (palm).
- Add a Hanger: Once all the paint is dry, thread a ribbon or twine through the ornament’s hanging loop or a pre-drilled hole.
This craft is wonderfully forgiving. If a line isn’t perfect or a dot is a bit smudged, it just adds to the charm. It’s about the memory and the effort, not perfection.
It’s a fun activity to do together, and the result is a personalized ornament that tells a story of tiny hands and holiday cheer.
14. Simmer Pots Gift Idea with Printable Label

We love finding gifts that are both thoughtful and easy to put together, especially when they come from our homestead. A simmer pot in a jar is one of those perfect gifts. It’s a consumable present that smells amazing and leaves behind only compostable ingredients – a truly zero-waste option!
Making these is pretty straightforward. You just layer dried fruits, spices, and maybe a sprig of evergreen into a nice glass jar. Think cinnamon sticks, dried orange slices, cloves, star anise, and a bit of rosemary or pine. It’s a gift that keeps on giving, filling a home with the cozy scents of the season.
Here’s a simple way to assemble them:
- Start with a clean glass jar. Mason jars work great.
- Layer your chosen aromatic ingredients. Alternate colors and textures for visual appeal.
- Seal the jar tightly. You can tie a ribbon around the lid for an extra touch.
- Attach a tag with simple instructions: "Add contents to a pot with water and simmer on low heat. Enjoy the festive aroma!"
We also found some really cute printable labels online that make these look extra special. They usually have a little space to write the ingredients or a festive holiday message. It’s a small detail, but it really elevates the gift.
These simmer pots are fantastic because they’re so customizable. You can tailor the scent profile to the recipient’s preferences, making each jar a unique and personal present. Plus, they’re a wonderful way for kids to get involved in making gifts for teachers, neighbors, or grandparents.
15. Free and Easy Last Minute Gift Ideas
Sometimes, the best gifts are the ones we make ourselves, especially when time is short and the budget is tight. We’ve found that a few simple items you probably already have around the homestead can be turned into thoughtful presents. These last-minute ideas are perfect for adding a personal touch without breaking the bank or adding to holiday waste.
Here are a few go-to options when you need a quick, heartfelt gift:
- Salt Dough Ornaments: Super easy to make with flour, salt, and water, these can be cut into any shape, baked, and then painted or decorated. Kids can help make these, turning them into a fun family activity. They’re great for teachers, neighbors, or anyone who appreciates a handmade touch.
- Simmer Pot Jars: Layer dried citrus slices, cinnamon sticks, whole cloves, and a sprig of rosemary or pine in a clean jar. Attach a tag with instructions to simmer on the stove for a wonderfully festive aroma. This is a consumable gift that leaves no waste behind.
- Fabric Scraps: Got a pile of fabric remnants? Cut them into strips and tie them around jars of homemade jam or cookies. Or, if you’re feeling a bit more ambitious, sew simple fabric coasters or small pouches. Even a nicely folded kitchen towel can be a lovely, reusable gift wrap.
Remember, the thought and effort behind a homemade gift are often more meaningful than its monetary value. Don’t stress about perfection; focus on sharing a bit of your time and creativity.
Wrapping It All Up
So there you have it – 15 ways to bring that cozy, homestead feel to your Christmas without all the extra waste. We hope this inspires you to look around your own place, maybe even your backyard, and see the potential for beautiful, handmade decorations. It’s not about being perfect, but about making things with love and intention. Plus, who doesn’t love a good DIY project that makes your home feel extra special for the holidays? We think you’ll find that these zero-waste ideas are not only good for the planet but also add a unique charm that store-bought items just can’t match. Happy decorating, and Merry Christmas from our homestead to yours!
Frequently Asked Questions
What does ‘zero-waste’ mean when decorating for the holidays?
Zero-waste means we try our best to not throw anything away. We use things we already have, like branches from our yard or old fabric scraps, to make our decorations. This way, we don’t create a lot of trash that goes to the landfill.
Are these DIYs really easy to do?
Yes, we’ve picked projects that are simple enough for most people to do, even if you’re not a master crafter. Many of them are great for doing with family, including kids!
Can I use these decorations for gifts too?
Absolutely! Many of these DIYs, like simmer pots or beeswax candles, make wonderful homemade gifts. They’re thoughtful and show you put extra effort into them.
Where can I find materials for these crafts?
We encourage using what you have around your home or homestead. Think about wood scraps, fabric remnants, dried fruit from your kitchen, or even things you can find in nature, like pinecones or evergreen branches.
What if I don’t have a lot of time?
We understand that time can be tight during the holidays. We’ve included some quicker projects, like the cranberry garland or simple ornaments, that you can whip up without taking too much time.
How do these decorations help the environment?
By using natural or recycled materials and avoiding store-bought decorations that often come with a lot of packaging, we reduce waste. It’s a way to celebrate the holidays while being kind to our planet.


