October is when our kitchens really start to smell like fall. We’re pulling in apples by the box, digging up root vegetables, and eyeing those pumpkins and squash we’ve been saving for cozy recipes. The october canning calendar is all about making the most of what’s coming out of the garden or local market right now. It’s a busy time, but it’s also pretty satisfying to see the pantry shelves fill up with jars for winter. Let’s talk about what we’re canning this month, which tools we need, and how we can set ourselves up for even better preserving next year.
Key Takeaways
- October is prime time for canning apples, root vegetables, pumpkins, squash, cranberries, and pears.
- Choosing the right produce at peak ripeness makes a big difference in flavor and texture for preserves.
- Root vegetables can be canned, pickled, or kept in a cool spot for fresh eating all winter.
- Organizing your canning supplies and tracking what you make helps avoid waste and plan for next year.
- Reviewing what worked and what didn’t from last year’s october canning calendar helps us improve each season.
What to Expect in Your October Canning Calendar

October is a really busy time in the canning kitchen, and if we’re honest, it creeps up every single year. We find ourselves racing against the weather and trying to capture as many fall flavors as possible before winter hits. The payoff? Shelves packed with the tastes of autumn, ready to brighten up the colder months.
Timing Your Harvest for Peak Flavor
We always try to time our harvest so the produce is at its absolute best. A lot can change in just a week—root veggies get sweeter after a light frost, apples are juicier, and pears seem to go from rock-hard to overripe overnight. The trick is to harvest when things are ripe, but before a big freeze threatens the crop. It helps to check the garden or visit the market every few days this month. We also set reminders on our phones so we don’t miss the short window for perfect flavor.
Local Produce to Focus On in October
This is the month for some of our favorite things. Here’s what we usually have on our canning radar:
- Apples (for sauce, butter, jelly, or pie filling)
- Carrots, beets, potatoes (great for pressure canning or pickling)
- Pumpkins and winter squash (for purée, but not for cubed canning—safety first!)
- Cranberries (fantastic for chutneys and relishes)
- Pears (for preserves, canned halves, butters)
| Crop | Why We Love It | Top Canning Use |
|---|---|---|
| Apples | Tons of flavor, keeps well | Sauce, butter, pie filling |
| Beets | Earthy, vibrant color | Pickled, whole canned |
| Carrots | Sweet, easy to process | Sliced, pickled |
| Cranberries | Tart, festive | Relish, jam |
| Pears | Sweet, juicy | Canned, butter |
Aligning Your Efforts with Seasonal Rhythms
If we’ve learned anything, it’s that everything about fall canning is about working with the season, not against it. The days get shorter and cooler, and we try to split up the work so we don’t burn out. For example, we might prep veggies one day, process them the next, and spend a weekend batch-canning apple butter. Sometimes, plans fall apart (thanks, early frost or surprise harvest of way too many beets), but we try to stay flexible and use what we have.
- Keep an updated canning checklist on the fridge.
- Don’t worry if you have to swap recipes when something is suddenly ready—just roll with it.
- Take breaks, play some music, and invite a friend to help. It really does make the work lighter.
Canning in October isn’t just about stocking up; it’s about enjoying each step of the season—one jar at a time.
Apples Galore: Sauces, Butters, and Pie Fillings

October is when our kitchens smell like apples from morning to night. There’s something about peeling, chopping, and simmering them that just feels right this time of year.
How to Choose the Best Apples for Canning
Let’s talk apple picking. When we’re canning, it pays to be picky. The kind of apple you use will totally change the finished product. Here’s what we keep in mind:
- Firmer apples (think Granny Smith or Jonathan) hold up better for pie fillings and chunky sauces.
- Softer types (like McIntosh) are amazing for smooth applesauce or butter.
- If you can, blend a few varieties for extra depth. Sweet and tart together just work.
Using slightly underripe apples helps with thicker textures, since they have more natural pectin.
Must-Try Recipes: Applesauce, Apple Butter, and Pie Filling
When we start canning, we don’t just stop at basic applesauce. Here’s our go-to list every October:
- Applesauce – Simple, kid-friendly, freezes or cans well. We sauce enough for the whole winter.
- Apple Butter – Deep, rich, and spreads like a dream. Slow-cooked and perfect on toast.
- Pie Filling – Ready-to-go jars mean apple pie is just a crust away when the urge strikes.
| Recipe | Jars to Aim For | Notes |
|---|---|---|
| Applesauce | 100–150 quarts | Great for snacks & baking |
| Apple Butter | 24 half-pints | Fantastic as gifts |
| Pie Filling | ~12 quarts | Enough for the holidays |
Tips for Canning Large Batches of Apples
There’s a rhythm to preserving apples, and after a few years, you’re working like a machine (sort of). Here’s what keeps us from losing our minds:
- Organize all your jars, lids, and rings before starting. Nothing ruins a good rhythm like missing supplies.
- Make it a group thing if you can—peeling and coring takes forever alone.
- Cook apples in batches if your pot isn’t huge; smaller loads are easier to manage and safer.
- Plan a system for labeling and storing finished jars immediately, so you don’t wind up with a sticky mess.
Some weekends, our countertops are absolutely buried under apples, peelings, and bubbling pots. It’s a lot, but come February, those jars are literal gold. We never regret doing one more batch—with apples, there’s always room for more.
Preserving Root Vegetables: Carrots, Beets, and Potatoes
Root vegetables are at their peak in October. Our kitchens turn into little preservation hubs, with stacks of carrots, beets, and potatoes piling up on every surface. Honestly, there’s something about filling up jars with these cool-weather crops that just feels like we’re banking sunshine for the cold months ahead.
Prepping Root Vegetables for Canning
When we prep root veggies for canning, we want everything cleaned and ready so we’re not scrambling mid-process. Here’s how we tackle it:
- Scrub the dirt off all your carrots, beets, and potatoes – no one wants gritty preserves.
- Slice or cube for even cooking. For beets, we usually roast and peel them first, since the skins come off easily after baking.
- Blanching is our friend, especially with carrots and potatoes. It sets the color and cuts the risk of mushy texture.
Getting organized before the canner heats up makes the whole day go smoother.
Alternative Storage Methods for Roots
Not every root vegetable needs a mason jar. Sometimes, we want to stash some away fresh so they’ll last through winter. Here’s what works:
- Store carrots and parsnips in a box of damp sand in the basement or garage.
- Potatoes do best in a cool, dark, slightly humid space. We like to keep them in burlap sacks so they get airflow but stay in the dark.
- In colder zones, roots like carrots can be left right in the ground until we’re ready to eat them—seriously handy when freezer space is limited.
Having a range of storage options gives us more flexibility for winter meals and means less pressure for marathon canning sessions.
You can check out some creative storage ideas (and a bit about preserving your garlic or other seasonal goodies) with this practical advice on garden preservation and storage tips.
Easy Pickled Beets and Canned Carrots
Of all the ways we preserve root veggies, quick pickles and classic canned jars win for convenience and flavor.
Quick Pickled Beets
- Roast or boil the beets, peel, and slice.
- Pack into jars with a hot vinegar brine (classic mix: vinegar, water, sugar, salt, and your favorite spices).
- Process in a water bath canner for shelf stability.
Canned Carrots
- Peel and cut carrots into uniform pieces.
- Blanch for a few minutes.
- Pack into jars with boiling water or brine.
- Process in a pressure canner – carrots are low acid and need extra heat for safe storage.
Here’s a quick table to compare some preservation options:
| Method | Best For | Storage Time | Effort Level |
|---|---|---|---|
| Canning | Carrots, Beets | 12+ months | Moderate |
| Cold Storage | Potatoes, Carrots | 3-5 months | Low |
| Pickling | Beets, Carrots | 6-12 months | Easy |
Root vegetables make the pantry feel full and ready for whatever winter throws at us. As long as we pick the right preservation method for each crop (and what we’ll actually eat), we’re always happy to pull a jar off the shelf or dig a carrot from the sand.
Pumpkins and Winter Squash: Purees for Cozy Recipes
Pumpkins, butternut, acorn — you name it, we love turning all our winter squash into purees this time of year. It makes everything so much easier when baking or whipping up a quick soup once the weather turns cold. October really does feel like prime time to stock up on ready-to-use squash for all of our fall and winter cooking.
Safely Canning Pumpkin and Squash Puree
We need to talk safety first, because canning pumpkin and squash is trickier than some other veggies. The big thing is, we shouldn’t can pumpkin or squash puree at home—the USDA recommends only canning these foods in cubes. Pureed pumpkin just gets too dense in jars, which means heat has trouble reaching the center. Here’s our workaround:
- Wash, peel, and de-seed your squash or pumpkin.
- Cut into uniform cubes (about 1-inch each).
- Boil the cubes until tender, then pack them hot into canning jars.
- Process jars in a pressure canner (never a water bath!).
After opening a jar, we mash or puree as needed. It’s just as handy and totally safe for homemade soups, pies, and more.
We learned the hard way: don’t risk shortcutting the cube rule. It keeps everything safe for the whole family, even if it adds a minute or two to the prep.
Creative Ways to Use Canned Puree
Once our jars are lined up in the pantry, there are tons of ways to use that pumpkin or squash. Here’s what gets the most action in our kitchen:
- Add to pancake or waffle batter for breakfast that tastes like autumn
- Whisk into soups for creamy texture and mellow flavor
- Stir into chili for a subtle sweetness and extra nutrition
- Make classic pumpkin pie or butternut muffins—super fast since the puree’s ready to go
We keep a running list on the fridge for all the different dishes to use our stash. Even the kids pitch in ideas!
Storage Tips for Whole Squash
If you don’t feel like canning every last squash, that’s cool too. Winter squash and pumpkins will keep for months if you give them the right treatment. Here’s how we handle ours:
- Wipe surfaces with a weak bleach solution, then dry thoroughly (keeps mold away)
- Store in a single layer, not touching, in a cool spot (50°F-55°F is perfect)
- Keep away from apples or pears—they release ethylene gas that causes squash to rot faster
| Squash Type | Avg. Storage Life |
|---|---|
| Pumpkin | 2–3 months |
| Butternut | 3–4 months |
| Acorn | 1–2 months |
A little prep now can mean delicious, homegrown flavor in our meals for months. It’s one of those small fall traditions that just feels right every year!
Don’t Forget Cranberries and Pears! Unique Fall Preserves
Autumn always feels like it’s all about apples and pumpkins, but let’s not overlook the bold flavors that cranberries and pears bring to the preserving table. These fruits are absolutely packed with personality and they’re at their best just as the leaves are really starting to drop. Canning these in October means we get to keep a little bit of tart and sweet for months ahead.
Tangy Cranberry Sauces and Relishes
Cranberries aren’t just for Thanksgiving dinner. We like to batch up more than we think we’ll ever need, because homemade relish ends up on everything—turkey, sandwiches, toasted bread, even over soft cheese. Here’s our favorite way to use up a pile of cranberries:
- Simmer fresh cranberries with orange zest, a splash of maple syrup, and a cup of water for a quick sauce.
- Add a couple of chopped apples for natural sweetness and thickening—no boxed pectin needed.
- For a savory twist, we’ll toss in fresh jalapeño and chopped onions. A perfect match for roast meats.
We don’t always stick to the same recipe, since cranberry sauce is so forgiving. Plus, it’s great to have a few jars set aside to give as last-minute gifts.
Nothing wakes up a dreary winter meal quite like a bright, tangy cranberry relish straight from the pantry. It makes food feel special, even on a Tuesday.
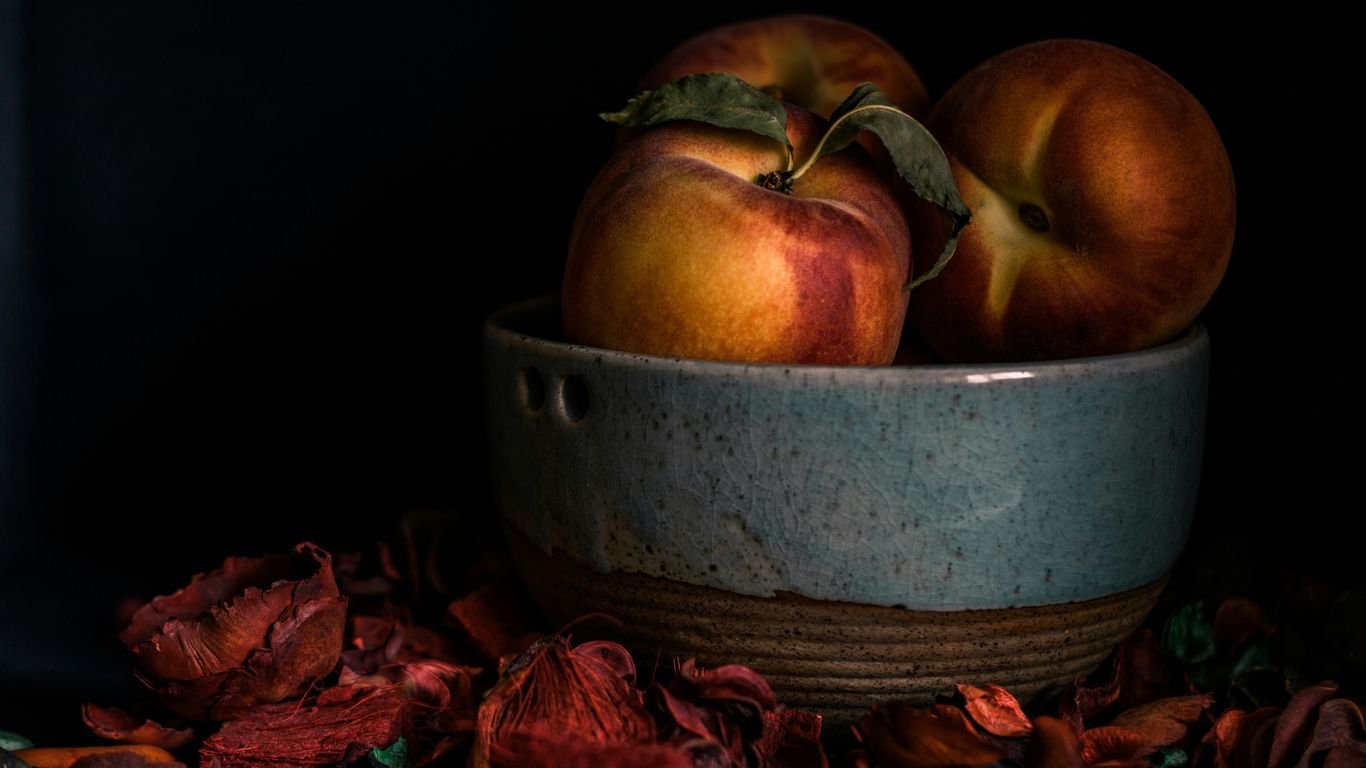
Delicious Canned Pears and Butters
Pears start dropping in our yard around the end of September and into October, and that means it’s time to get serious about filling some jars. The texture and mild flavor of pears make them a perfect match for syrupy canning, and the process is all about keeping it simple. Canning pears is a simple, satisfying project that always pays off in the middle of winter.
To get your pears just right:
- Rinse and peel pears, then cut them into halves or quarters.
- Prepare a light syrup, or use apple juice for a twist—less sugar, all the flavor.
- Pack the pairs into jars with enough headspace, then add the syrup and process in a canner. You’ll find detailed, easy steps for canning pears at packing peeled pears into jars.
- For pear butter, blend very ripe pears with a little cinnamon and ginger, then slow-cook until thick and golden.
We aim for at least a dozen jars of plain canned pears and a few smaller ones of pear butter each October.
Combining Fall Fruits for Flavorful Jams
Jams don’t have to follow the old rules—fall fruits are made for mixing. Cranberries bring the tart, pears add some body, and apples help jams gel without the need for extra ingredients. Some combos we love to throw together:
- Pear and cranberry jam (simple, beautiful color)
- Apple, pear, and cranberry fruit spread
- Spiced cranberry-pear conserve with a handful of nuts or raisins for texture
You don’t even need fancy equipment, just a saucepan and a good long spoon. The real trick is to taste as you go, since every batch of fruit is a little different. Here’s a quick cheat chart for getting the mix right:
| Fruit Combo | Sugar (cups) | Lemon Juice (Tbsp) | Cooking Time (min) |
|---|---|---|---|
| Pear + Cranberry | 3 | 2 | 20–25 |
| Pear + Apple + Cran | 2.5 | 3 | 25 |
| Cranberry + Orange | 2 | 2 | 15–20 |
By the time we’re stacking jars in the pantry, we know we’ll be enjoying these fall flavors all winter. It’s one of those small efforts that always come back to reward us later.
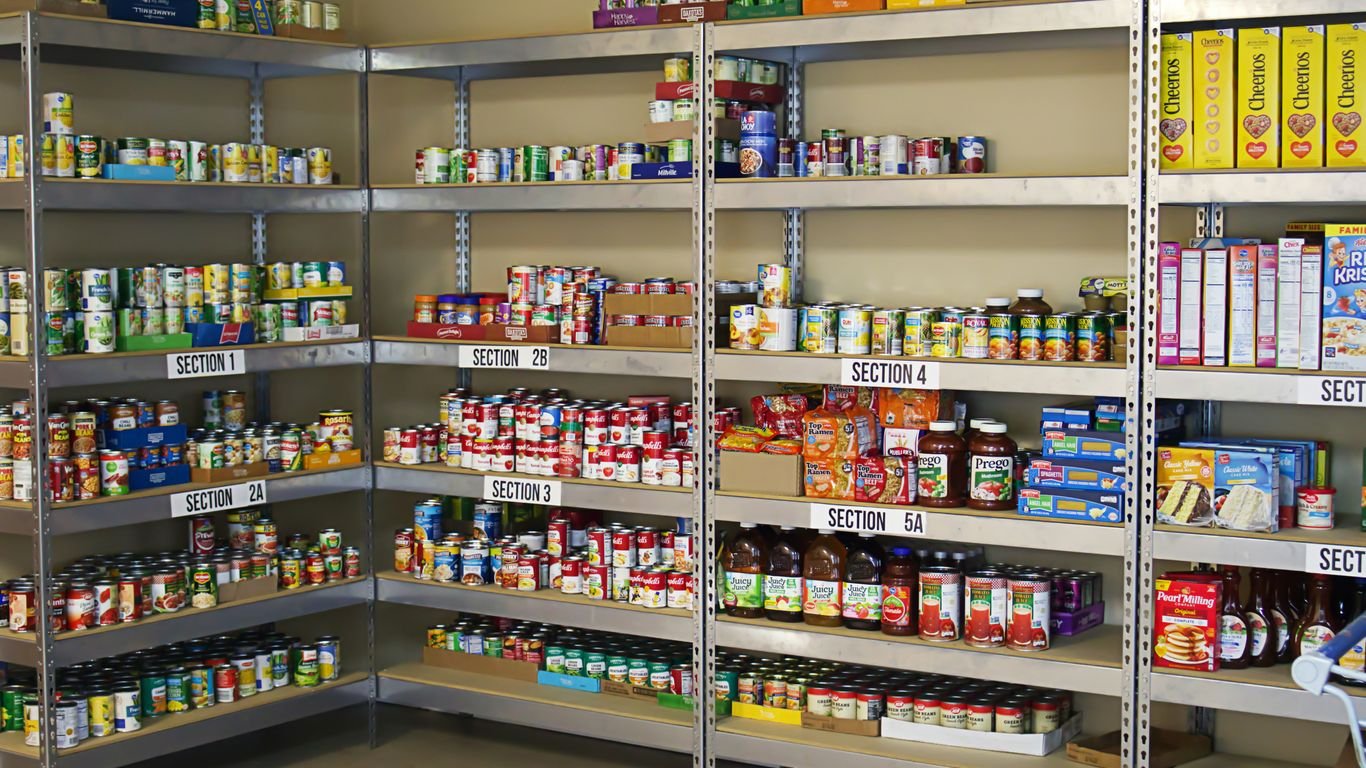
Tools, Supplies, and Space: Getting Ready for the Canning Rush
Canning really sneaks up on us every fall, doesn’t it? The apples pile up, there are beets everywhere, and before we know it, the kitchen feels like a food processing factory. So, before we’re in over our heads, let’s go through the basics—what gear to pull out, how to keep stuff organized, and ways to track what actually ends up in our pantry.
Essential Equipment for October Preserving
When it comes down to it, canning isn’t rocket science, but you do need some very specific tools. Having our basic equipment ready means we’re never scrambling mid-recipe. Here’s what we want prepped and sitting out by October:
- Clean, chip-free glass jars (multiple sizes, depending on what we’re making)
- Metal lids and new sealing rings (one-time use for most lids)
- Large boiling-water canner or pressure canner, cleaned and tested
- Jar lifter, magnetic lid wand, and a wide-mouth funnel
- Extra ingredients like sugar, vinegar, lemon juice, pickling salt, and pectin, depending on our recipes
Here’s a quick comparison table for our main supplies:
| Item | Replace Each Year? | Must-Have for Water Bath? | Must-Have for Pressure? |
|---|---|---|---|
| Jars | No (check for chips) | Yes | Yes |
| Lids | Yes | Yes | Yes |
| Rings | Maybe (if rusty) | Yes | Yes |
| Boiling Water Canner | No | Yes | No |
| Pressure Canner | No | No | Yes |
How to Organize Your Supplies
We know from messy experience: nothing ruins the canning rush like hunting for jar lids or digging through a tottering pile of pots. Our best move is setting up a straightforward storage system so things are easy to grab:
- Store jars, canners, and big tools in one area—stack jars inside the canner to save space.
- Put lids and rings in bins or baskets, ideally labeled by size.
- Keep ingredients like vinegar and sugar together, away from direct sunlight or heat so they’re ready when we are.
- Use shallow shelving for filled jars so nothing hides in the back, forgotten until next winter.
Every year, we find that spending ten minutes making space in early October saves us so much headache when the applesauce and pickles start to stack up. It doesn’t have to look pretty—just functional and easy!
Keeping an Inventory All Season Long
It’s way too easy to forget what we canned (and what we wished we had) by January, so let’s start tracking stuff now. This isn’t about perfection—it’s just about knowing what’s on hand and what to prioritize next time. Here’s our simple process:
- Write down each batch as we make it (on a paper in the pantry or in a phone note) with the date, recipe, and count.
- Mark favorites or flops so we remember what everyone liked next year.
- At the end of the season, review what’s still left, and adjust for next time—we always seem to make too much jam and run out of tomato sauce first.
If you want a little more structure for your planning, or need ideas about storage and efficient use of pantry space, there’s a handy seasonal canning calendar with tips for organizing and early prep.
Honestly, prepping now just feels good. There’s nothing like being ready when all that produce comes in—we can enjoy the process instead of rushing around. And hey, by February, having a pantry full of our own preserves really does make all the effort worth it!
Planning Ahead for Next Year’s October Canning Calendar

October’s always a busy month in our kitchens, and it’s clear each fall just how much we learn— what jars never run out, which recipes our families avoid, and what we’d do differently next time. Getting a jump on next year’s canning plans can save us a lot of stress when the harvest rush hits again. So let’s get into how we tackle this at home, reflecting on pantry wins, wishlist goals, and where we get fresh inspiration.
Reviewing Last Year’s Pantry Hits and Misses
Every season, we find a few recipes that totally hit the mark and others that flopped. To keep things practical (and avoid food waste), here’s what we do:
- Take inventory: Count what’s left and what’s been used up. If there’s still a cabinet full of dilly beans from last year, maybe skip them next time.
- Talk with the family: Get honest feedback. Did anyone actually like that pear chutney? If not, let’s not make it again.
- Jot notes: Record the big winners and the never-agains in a notebook right before we forget.
We’ve learned that making a short, honest list at the end of the season helps, especially as supplies dwindle and we’re tempted to make the same mistakes.
Pantry Inventory Table
| Recipe | Jars Made | Jars Left | Make Again? |
|---|---|---|---|
| Apple Butter | 16 | 0 | ✔️ |
| Pickled Beets | 10 | 2 | ✔️ |
| Spiced Pear Jam | 8 | 7 | ❌ |
| Carrot Coins | 12 | 4 | ✔️ |
| Cranberry Relish | 6 | 6 | ❌ |
Dumping jars nobody likes feels wasteful, but leaving them on the shelf even longer just clutters everything. We’re getting better at being picky about what we can!
Making a Canning Wishlist for Fall
Every year, right as the leaves start dropping, we’re already thinking about what to change next time. The wishlist is where we dream a little and plan for the practical too:
- Look at what ran out first—double up on those!
- Track new ideas: Did we hear about a neighbor’s plum ketchup? Jot it down.
- Map out what fruits and veggies will be available locally next fall.
- Note optimal canning days, like October 12 or 13 next year, if we want to line up with the farmer’s market or even the best sign of the Moon.
Being realistic is key. We usually want to do it all but end up frazzled—so we keep it manageable and flexible. Plans always change when harvest time comes around, anyway.
Top Resources for New Recipe Inspiration
Finding new recipes (that actually work) is what keeps canning fresh. Here’s what we check every year:
- Canning books from the library, especially for tried-and-true classics.
- Blogs and online groups—people love to share their best ideas.
- Friends or neighbors—sometimes swapping a jar leads to a new fall favorite.
If we get stuck in a rut, there’s always a food magazine or seasonal cookbook to browse. Sometimes it just takes one new ingredient to make October’s canning lineup feel different.
So—review what worked, dream about what’s next, and grab ideas from anywhere you can. October comes fast. Planning now means we’ll have more jars and less stress next year.
Wrapping Up Our October Canning Adventure
So, that’s our October canning calendar in a nutshell. We’ve spent the month filling jars with applesauce, root veggies, and all sorts of fall flavors. It’s a lot of work, but honestly, there’s something really satisfying about seeing those shelves fill up. We always try to focus on what we actually eat—no point in canning a ton of something nobody likes (learned that the hard way). If you’re new to this, don’t stress about doing everything perfectly. Just start with what you have and what you love. And if you mess up a batch or two, welcome to the club—it happens to all of us. As we head into winter, we’ll be enjoying the fruits (and veggies) of our labor, and probably already thinking about what we want to try next year. Happy canning, and here’s to cozy meals all season long!
Frequently Asked Questions
What fruits and vegetables are best to can in October?
In October, we focus on canning apples, pears, root vegetables like carrots and beets, pumpkins, winter squash, and cranberries. These are in season and taste best when preserved at this time.
Can we safely can pumpkin or squash puree at home?
It’s not recommended to can homemade pumpkin or squash puree because it can be too thick to heat evenly in jars. Instead, we cut them into cubes before canning, or freeze the puree for later use in recipes like pies and soups.
How do we know if our canned foods are sealed and safe to eat?
After processing, we check that the lids have popped down and don’t move when pressed. If a jar didn’t seal, we use that food right away or reprocess it. Always look for signs of spoilage, like odd smells or mold, before eating.
What equipment do we need for October canning projects?
We need canning jars with lids and bands, a large pot or pressure canner, jar lifters, a funnel, and a ladle. It helps to have extra supplies like pectin, pickling salt, and labels to keep things organized.
How can we keep track of what we’ve canned throughout the season?
We keep an inventory list of everything we can. This helps us see what we have, plan meals, and decide what to make more or less of next year. Writing down favorites and things we didn’t use much keeps us organized.
Is it better to can or store root vegetables like carrots and beets?
We do both! If we have a cool, dark place, we store some root vegetables whole. We also can them, especially if we want them ready to eat or if we don’t have good storage space. Pickled beets and canned carrots are easy and tasty options.