Growing Onion Seeds for a Bountiful Harvest

Hey there, fellow garden enthusiasts! We’re diving into something super rewarding today: growing onion seeds. It might seem a bit tricky at first, but trust us, with a little know-how, you’ll be harvesting your own amazing onions in no time. We’re going to walk through everything, from getting those tiny seeds started indoors to enjoying a big, homegrown harvest. So, let’s get our hands dirty and learn all about growing onion seeds for a truly bountiful crop!
Key Takeaways
- Starting onion seeds indoors gives them a head start, especially if your growing season is short.
- Good soil is important for onions; they like well-draining soil with a pH between 6.0 and 7.0.
- You can plant onions from seeds, small bulbs (sets), or young plants (transplants), each with its own benefits.
- Regular watering and feeding help your onion plants grow strong and healthy.
- Knowing when to pick your onions and how to dry them properly means they’ll store well for a long time.
Starting Your Onion Seeds Indoors
Starting onion seeds indoors is a great way to get a head start on the growing season, especially since onions need a good amount of time to mature. We’ve found it gives us more control over their early development, leading to healthier, stronger plants when we finally transplant them outside. Plus, it’s kind of fun watching those tiny seeds sprout and grow!
Getting the Timing Just Right
Timing is everything when it comes to starting onion seeds indoors. We aim to sow our seeds about 8-10 weeks before the last expected frost in our area. This gives the seedlings enough time to develop a good root system and become sturdy enough to handle transplanting. To figure out the best time, we usually check the average last frost date for our specific location – a quick online search will do the trick. Starting too early can lead to leggy, weak plants, while starting too late might mean smaller onions at harvest time. It’s a balancing act, but getting it right makes a big difference.
Gathering Your Seed Starting Supplies
Before we even think about planting, we make sure we have all our supplies ready. This includes:
- Seed starting trays or small pots: We prefer trays with individual cells to minimize root disturbance during transplanting.
- A high-quality seed starting mix: This is crucial! Regular garden soil is too heavy and doesn’t drain well enough.
- Onion seeds: Choose varieties that are suited to your climate and day length. Consider day length onions for optimal growth.
- A spray bottle filled with water: For gentle watering.
- A heat mat (optional): To speed up germination.
- Grow lights (optional but recommended): To provide consistent light, especially if you don’t have a sunny window.
Planting Those Tiny Onion Seeds
Okay, now for the fun part! Here’s how we plant our onion seeds:
- Moisten the seed starting mix: We want it damp, but not soaking wet. Think wrung-out sponge.
- Fill the seed starting trays or pots with the mix.
- Sow the seeds about ¼ to ½ inch deep. We usually plant 2-3 seeds per cell to increase our chances of germination.
- Gently cover the seeds with more seed starting mix.
- Mist the surface with water to settle the soil.
- If using a heat mat, place the trays on top. Otherwise, find a warm spot in your house.
We like to cover the trays with a clear plastic dome or plastic wrap to create a humid environment. This helps with germination. Just remember to remove the cover once the seedlings start to emerge to prevent fungal diseases.
Nurturing Your Young Onion Seedlings
Once the seedlings emerge, it’s all about providing the right conditions for them to thrive. This means:
- Light: Onion seedlings need plenty of light. If you don’t have a sunny window, use grow lights. We keep ours on for about 14-16 hours a day.
- Watering: Keep the soil consistently moist, but not waterlogged. We water from the bottom by placing the trays in a shallow dish of water and letting them soak it up.
- Fertilizing: Once the seedlings have their first true leaves, we start feeding them with a diluted organic fertilizer every couple of weeks. This gives them the nutrients they need to grow strong.
- Thinning: If more than one seed germinated in a cell, we thin them out, leaving only the strongest seedling. It can be tough to do, but it’s necessary to prevent overcrowding.
With a little care and attention, your onion seedlings will be ready to transplant outdoors in no time!
Prepping Your Garden for Onion Planting
Okay, so you’ve got your onion seeds ready to go. Now comes the really important part: getting your garden ready for them. We can’t just toss those little guys into any old patch of dirt and expect a bumper crop. It takes a little planning and effort, but trust us, it’s worth it. A well-prepared garden bed is the foundation for healthy, happy onions.
Understanding Soil pH and Fertility Needs
Onions are kind of picky about their soil. They like it slightly acidic to neutral, with a pH between 6.0 and 7.0. You can get a soil test kit from most garden centers to check your soil’s pH. If it’s too acidic, add some lime. If it’s too alkaline, add sulfur.
- Fertility is also key. Onions are heavy feeders, meaning they need a lot of nutrients to grow big and strong. Before planting, we like to amend the soil with plenty of compost or well-rotted manure. This adds organic matter and provides a slow-release source of nutrients.
- A balanced fertilizer, like a 10-10-10, can also be helpful. Just be careful not to over-fertilize, as this can lead to excessive top growth at the expense of bulb development.
- Consider doing a soil test to determine exactly what nutrients your soil is lacking. This way, you can tailor your fertilizer application to meet the specific needs of your onions.
We’ve found that a little extra effort in soil preparation goes a long way. It’s much easier to amend the soil before planting than to try to correct deficiencies later on.
Picking the Perfect Spot and Prepping Beds
Sunlight is crucial for onions. They need at least 6 hours of direct sunlight per day, so pick a spot in your garden that gets plenty of sun. Also, make sure the soil drains well. Onions don’t like to sit in soggy soil, as this can lead to rot. If your soil is heavy clay, consider building raised beds to improve drainage.
- Raised beds also warm up faster in the spring, which can give your onions a head start.
- When prepping the beds, we like to dig down at least 12 inches and loosen the soil. This makes it easier for the onion roots to penetrate and access nutrients.
- Remove any rocks, roots, or other debris that could impede growth.
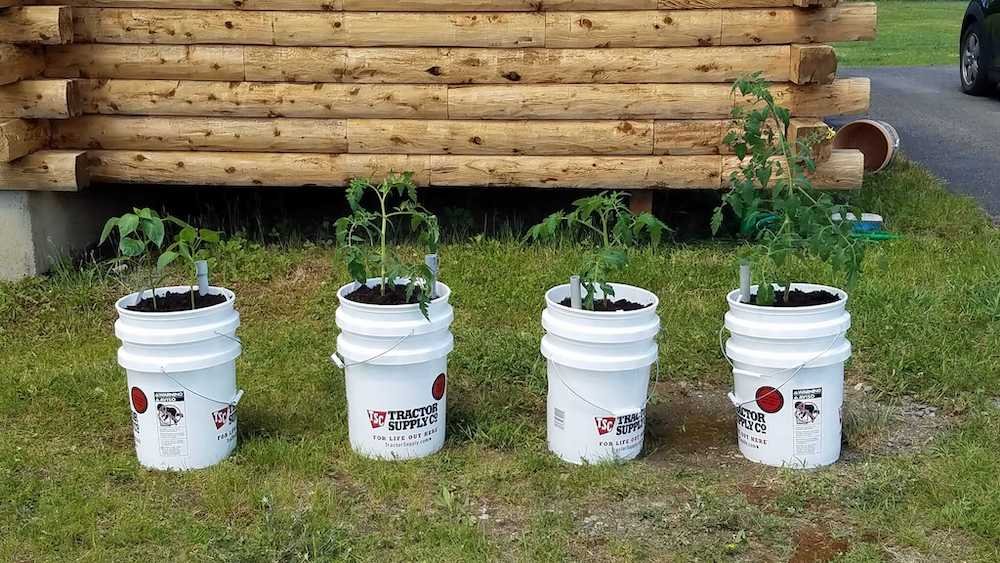
Considering Container Growing for Onions
Don’t have a lot of garden space? No problem! Onions can also be grown in containers. Just make sure you choose a pot that’s at least 10-12 inches deep and has drainage holes. Use a good quality potting mix that drains well. We’ve had success with a mix of compost, peat moss, and perlite.
| Consideration | Recommendation |
|---|---|
| Container Size | At least 10-12 inches deep |
| Potting Mix | Well-draining mix of compost, peat, and perlite |
| Watering Frequency | Check soil moisture regularly |
| Fertilizing Schedule | Feed every 2-3 weeks with liquid fertilizer |
Essential Planting Techniques for Growing Onion Seeds
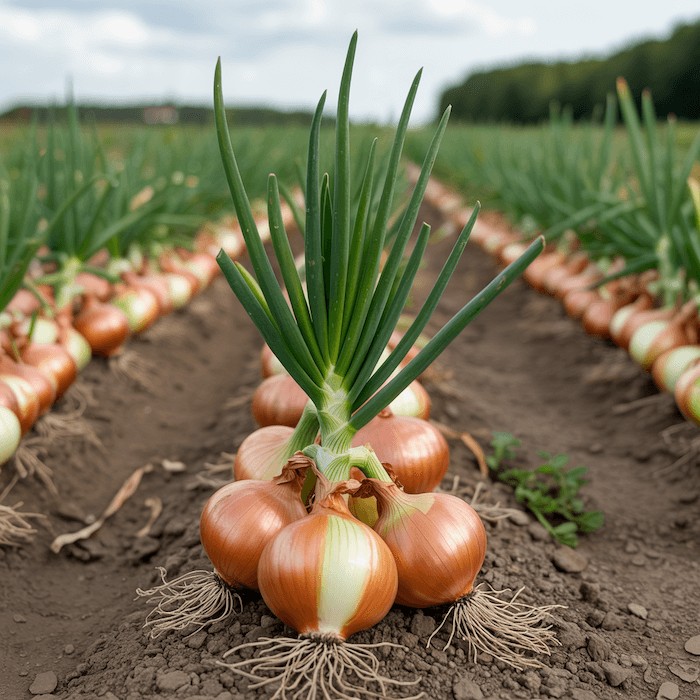
Alright, so you’ve got your onion seeds, your garden’s prepped, and you’re ready to get those little guys in the ground. Let’s talk about the best ways to actually plant them. There are a few different approaches, and each has its own set of pros and cons. We’ll walk you through sowing seeds directly, transplanting seedlings, and even using onion sets for a quicker start.
Sowing Onion Seeds Directly
Direct sowing is exactly what it sounds like: planting the seeds straight into the garden soil. This method works best if you live in an area with a longer growing season. It eliminates the need for transplanting, which can sometimes shock the young plants.
Here’s how we do it:
- Make sure your soil is finely worked and free of clumps. We want those tiny roots to have an easy time getting established.
- Create shallow furrows about 1/4 to 1/2 inch deep. Just like you would do for a salsa garden.
- Sow the seeds thinly in the furrows. Don’t overcrowd them! Aim for about 1/2 inch spacing between seeds.
- Gently cover the seeds with soil and water thoroughly.
- Keep the soil consistently moist until the seedlings emerge, which usually takes about a week or two.
Direct sowing can be a bit more challenging because the seedlings are exposed to the elements from the get-go. You’ll need to be diligent about watering and weed control. But if you’re up for the challenge, it can be a very rewarding way to grow your onions.
Transplanting Onion Seedlings with Care
If you started your onion seeds indoors (like we talked about earlier), you’ll need to transplant them into the garden. This gives you a head start on the growing season, especially if you live in a colder climate.
Here’s our transplanting process:
- Harden off your seedlings. Gradually expose them to outdoor conditions for a week or so before transplanting. This helps them adjust to the sun, wind, and temperature changes.
- Prepare your garden beds. Make sure the soil is loose, fertile, and well-drained. We like to add some compost or aged manure to give the seedlings a boost.
- Carefully dig up the seedlings, trying to disturb the roots as little as possible. Gently tease apart any tangled roots.
- Plant the seedlings about 4-6 inches apart, depending on the variety. Make sure the top of the root ball is level with the soil surface.
- Water thoroughly after transplanting. This helps settle the soil and encourages root growth.
Planting Onion Sets for Quick Growth
Onion sets are basically small, immature onion bulbs. They’re a super easy way to get a jump start on your onion crop. You can usually find them at your local garden center in the spring. Planting onion sets is a great option for beginners.
Here’s the lowdown on planting sets:
- Choose sets that are firm and healthy-looking. Avoid any that are soft, shriveled, or moldy.
- Plant the sets about 1-2 inches deep, with the pointed end facing up. Space them about 3-4 inches apart.
- Water thoroughly after planting.
- Keep the soil consistently moist until the sets start to grow.
| Method | Pros | Cons |
|---|---|---|
| Direct Sowing | No transplant shock, potentially stronger root systems | Requires longer growing season, more susceptible to pests and diseases |
| Transplanting | Head start on growing season, better control over growing conditions | Requires extra step of transplanting, potential for transplant shock |
| Onion Sets | Quick and easy, good for beginners | Can be more expensive, limited variety selection |
No matter which method you choose, remember to give your onions plenty of sunlight, water, and nutrients. With a little care and attention, you’ll be harvesting a bumper crop in no time!
Caring for Your Growing Onion Plant

Okay, so you’ve got your onion plants in the ground – awesome! Now comes the part where we make sure they actually thrive. It’s not just about sticking them in the dirt and hoping for the best. Onions need a little TLC to really reach their full potential. Let’s talk about how we can give them exactly what they need.
Watering Wisdom for Onions
Watering is super important, especially when those bulbs are starting to swell. Onions are thirsty plants, so consistent moisture is key. We’re aiming for about an inch of water per week, and that includes rainfall. If it’s been a dry week, we definitely need to get out there with the hose or sprinkler.
- Use drip irrigation or soaker hoses to get water right to the roots. This helps avoid wetting the leaves, which can lead to disease.
- Mulching around the plants helps retain moisture in the soil. Plus, it keeps the weeds down – double win!
- Pay attention to the weather! Adjust our watering schedule based on rainfall and temperature. Hot, dry spells mean more water, while rainy periods mean less.
Overwatering can be just as bad as underwatering. Soggy soil can lead to bulb rot and other problems. We want the soil to be consistently moist, not waterlogged. Check the soil moisture before watering to make sure it’s actually needed.
Feeding Your Onions for Optimal Growth
Onions are heavy feeders, meaning they need a good supply of nutrients to grow big and strong. We like to give them a boost with some fertilizer throughout the growing season. A balanced fertilizer, or one that’s higher in nitrogen, is a good choice. Consider using organic fertilization options like compost or fish emulsion.
Here’s a simple feeding schedule we follow:
- At planting: Mix some compost or well-rotted manure into the soil.
- A few weeks after planting: Apply a nitrogen-rich fertilizer to encourage leafy growth.
- When bulbs start to form: Switch to a fertilizer that’s higher in phosphorus and potassium to support bulb development.
We also like to side-dress our onions with compost every few weeks. This provides a slow-release source of nutrients and helps improve soil health. Just sprinkle some compost around the base of the plants and gently work it into the soil.
Weed Control and Mulching Strategies
Weeds are the enemy! They compete with our onions for water, nutrients, and sunlight. Plus, they can harbor pests and diseases. That’s why weed control is a must. Mulching is our first line of defense. A good layer of mulch smothers weeds and keeps them from sprouting. We use straw, wood chips, or even shredded leaves.
If weeds do pop up, we get them out ASAP. Hand-pulling is best, especially when the weeds are small. Be careful not to disturb the onion roots while we’re weeding. Regular weeding is key to growing a healthy onion crop.
| Weed Control Method | Pros | Cons |
|---|---|---|
| Mulching | Suppresses weeds, retains moisture, improves soil health | Can be expensive, may need to be replenished |
| Hand-pulling | Effective for small weeds, avoids using chemicals | Time-consuming, can disturb soil if not done carefully |
| Hoeing | Quick and easy for larger areas, can be used between rows | Can damage onion roots if not careful, may bring weed seeds to surface |
Protecting Your Onion Harvest
Dealing with Common Onion Pests
Ugh, pests. They’re the bane of every gardener’s existence, and onions are no exception. We’ve found that staying vigilant is key. Regularly inspect your onion plants for any signs of trouble. Look for things like distorted leaves, tiny insects, or unusual spots. Catching problems early can make a huge difference.
Here’s a quick rundown of some common onion pests and how we deal with them:
- Onion Maggots: These little guys can tunnel into the bulbs, causing them to rot. We use row covers to prevent the adult flies from laying eggs near our onions. Diatomaceous earth around the base of the plants can also help.
- Thrips: These tiny insects suck the sap from onion leaves, leading to silvery streaks and stunted growth. A strong blast of water from the hose can knock them off. Insecticidal soap is another option if the infestation is severe.
- Onion Mites: Microscopic pests that cause white or yellow spots on leaves. Crop rotation and ensuring good soil health can help prevent infestations.
We also try to encourage beneficial insects like ladybugs and lacewings, which prey on many common onion pests. A healthy garden ecosystem is our best defense!
Recognizing and Preventing Onion Diseases
Just like pests, diseases can wreak havoc on our onion crop. Prevention is always better than cure, so we focus on creating a healthy growing environment for our onions. This means ensuring good air circulation, avoiding overhead watering (which can promote fungal growth), and practicing crop rotation.
Some common onion diseases to watch out for:
- Downy Mildew: This fungal disease causes yellow spots on the leaves, which eventually turn brown. We use copper-based fungicides as a preventative measure, especially during periods of wet weather.
- Onion Smut: This soilborne disease affects young seedlings, causing black blisters on the leaves and bulbs. We avoid planting onions in the same spot year after year and treat the soil with a fungicide before planting if we’ve had problems with onion smut in the past.
- Botrytis Leaf Blight: This fungal disease causes lesions on the leaves, which can eventually lead to bulb rot. We make sure to remove any infected leaves promptly and improve air circulation around the plants.
The Benefits of Companion Planting
Companion planting is one of our favorite ways to protect our onion harvest. Certain plants can help deter pests, attract beneficial insects, or even improve the flavor of our onions. It’s a win-win! We’ve found that planting carrots alongside onions is particularly effective, as the scent of carrots can repel onion flies, and the scent of onions can repel carrot flies. Other good companion plants for onions include:
- Marigolds: These cheerful flowers are known for their pest-repelling properties. They release a compound into the soil that can deter nematodes and other harmful insects.
- Chamomile: Chamomile attracts beneficial insects like ladybugs and hoverflies, which prey on aphids and other onion pests.
- Lettuce: Planting lettuce between rows of onions can help to suppress weeds and keep the soil cool and moist.
Here’s a table summarizing some of our favorite companion planting combinations:
| Companion Plant | Benefit |
|---|---|
| Carrots | Repels onion flies |
| Marigolds | Deters nematodes and other pests |
| Chamomile | Attracts beneficial insects |
| Lettuce | Suppresses weeds, keeps soil cool & moist |
By using these strategies, we can minimize the risk of pests and diseases and ensure a healthy, bountiful onion harvest. It takes a little extra effort, but it’s well worth it in the end!
Knowing When and How to Harvest Your Onions
It’s the moment we’ve all been waiting for – harvest time! Knowing when and how to harvest your onions is key to enjoying the fruits (or rather, vegetables) of your labor. Let’s dive into the signs of readiness and the best techniques for bringing in your onion crop.
Signs Your Onions Are Ready
The most obvious sign that your onions are ready to harvest is when the tops start to turn yellow and fall over. This usually happens in late summer or early fall, depending on when you planted them. Don’t panic if all the tops don’t fall over at once; they tend to mature at slightly different rates. Another clue is feeling the soil around the bulbs; if it feels loose, that’s another good indicator. We usually check a few onions to be sure before we start pulling them all up.
The Art of Harvesting Onions
Harvesting onions is pretty straightforward, but a little care goes a long way. Here’s our method:
- First, we gently loosen the soil around the onion bulbs with a garden fork. Be careful not to stab the bulbs!
- Then, we carefully pull the onions from the ground, trying not to bruise them. If the soil is really compacted, you might need to wiggle them a bit.
- After pulling, we cut off the roots and trim the tops, leaving about an inch or two of stem. This helps with curing.
Harvesting on a dry day is ideal. This helps prevent rot and ensures your onions will store better. If it’s been raining, wait a few days for the soil to dry out a bit.
Curing and Storing Your Bountiful Harvest
Curing is an important step that extends the storage life of your onions. We usually spread them out in a single layer on a screen or slatted surface in a dry, well-ventilated place. A garage or shed works well. The goal is to allow the outer layers to dry and toughen up, which protects the onion bulbs from rot.
Here’s a quick guide to curing times:
| Onion Type | Curing Time | Storage Life |
|---|---|---|
| Yellow | 2-3 weeks | 6-8 months |
| Red | 2 weeks | 4-6 months |
| White | 1-2 weeks | 1-3 months |
Once cured, we store our onions in a cool, dry, and dark place. Mesh bags or old pantyhose work great because they allow for good air circulation. Avoid storing them near potatoes, as they can cause each other to spoil faster. With proper curing and storage, you can enjoy your homegrown onions for months!
Wrapping Things Up
So, there you have it! Growing onions from seed might seem like a bit of a project at first, but honestly, it’s super rewarding. We’ve gone through everything from getting those tiny seeds started indoors to finally pulling up those big, beautiful bulbs. It’s all about giving them a good start, picking the right kind for your area, and making sure the soil is happy. Once you get the hang of it, you’ll be amazed at how many onions you can grow. Plus, there’s nothing quite like cooking with something you grew yourself, right? Happy gardening!
Frequently Asked Questions
When should we start our onion seeds inside?
We usually start our onion seeds indoors about 8 to 12 weeks before the last expected frost date in our area. This gives them a good head start and makes sure they’re strong enough to go outside when the weather is right.
What kind of soil do onions like best?
Onions love soil that drains well and has a pH level between 6.0 and 7.0. We always make sure to add plenty of rich compost or aged manure to our garden beds. This gives the onions all the food they need to grow big and healthy.
Can we grow onions in pots?
Yes, we can definitely grow onions in containers! We just need to pick pots that are at least 10 inches deep and have good drainage. We fill them with a good quality potting mix that’s rich in organic stuff, and our onions do great.
How far apart should we plant our onion seedlings?
When we move our little onion plants outside, we make sure to space them about 4 to 5 inches apart. This gives each onion enough room to grow to its full size without fighting for space or food.
How often should we water our onion plants?
We water our onions regularly, especially when they’re first growing and when the weather is dry. The soil should stay moist but not soaking wet. We try to avoid getting the leaves too wet to prevent problems.
How do we know when our onions are ready to harvest?
We know our onions are ready to pick when their tops start to fall over and turn yellow. This usually happens in late summer. After we pull them up, we let them dry out for a few weeks in a cool, dry spot before we store them away.


