August Preserving Guide: Canning, Fermenting, and Freezing Tips
August is a fantastic time to get our harvest preserved. We’ve been busy in the garden, and now it’s time to make sure all that goodness lasts. This august preserving guide is all about making the most of our bounty, whether we’re canning, fermenting, or freezing. We want to share some of our favorite ways to keep summer flavors around for the colder months.
Key Takeaways
- Choosing the right preservation method depends on the food, your family’s preferences, and available resources like time and equipment.
- Canning can be done outdoors to avoid heating up the kitchen, and it’s important to know when to use water bath versus pressure canning.
- Fermenting offers a way to add unique flavors and health benefits to your produce, with simple options like jalapeños to start.
- Freezing is a great way to ‘pause’ produce, especially fruits like berries and some vegetables, for later use.
- Planning and organization are key to a successful august preserving guide, helping us maximize our harvest and avoid overwhelm.
Your August Preserving Guide: Getting Started

August is a busy month for us in the garden and kitchen! It feels like everything is ripening all at once, and we want to make sure we capture as much of that summer goodness as possible before it’s gone. If you’re new to preserving, it can feel a little overwhelming at first. Don’t worry, we’ve all been there! The key is to start simple and choose methods that fit your lifestyle and what you’re growing.
Choosing the Right Preservation Method for Your Bounty
When you’re looking at a mountain of tomatoes or a bushel of peaches, figuring out the best way to save them can be tricky. Not every fruit or vegetable is suited for every method. For example, delicate berries are fantastic for freezing, but they don’t always fare well with long-term canning. Leafy greens, on the other hand, are better suited for dehydrating than canning or fermenting.
Here are a few things to consider:
- What are you preserving? Some produce holds up better to heat (canning), some thrives on cold (freezing), and others develop amazing flavors through fermentation.
- How will you use it later? Think about how you typically eat these foods. Do you want whole tomatoes for sauces, or dried tomatoes for snacks? Applesauce is versatile, while apple jelly is more specific.
- What’s your climate like? If you have a short growing season, you might need to prioritize methods that work quickly. Also, if it’s scorching hot outside, you might want to avoid canning indoors.
- What equipment do you have? Some methods require specialized gear, while others are pretty basic.
Tips to Avoid Preservation Overwhelm
It’s easy to get excited and want to preserve everything, but that can lead to burnout. We’ve learned a few tricks over the years to keep things manageable:
- Get Organized: Before the harvest really hits, make a plan. Figure out what your family eats most and decide which preservation methods you’ll use for each item. We aim to preserve enough of our staples, like tomato sauce and green beans, to last us all year.
- Start Small: Don’t try to do every single preservation method at once. Pick one or two that appeal to you and focus on those first. Maybe this year it’s just freezing berries and making a few jars of jam.
- Use What You Have: Look at what’s abundant and what you enjoy. If you have a ton of zucchini, think about how you like to eat it and choose a preservation method that suits that. The goal is to save food you’ll actually use and enjoy later.
Essential Tools for Your Preserving Journey
While you can get by with very little, having a few key tools can make the process much smoother and safer. You don’t need to buy everything at once, but here are some things that have been game-changers for us:
- Canning Jars and Lids: You’ll need these for water bath and pressure canning. Make sure you get proper canning lids, as reusable ones aren’t recommended for safety reasons.
- Large Stockpots: For water bath canning, you need a pot deep enough to cover your jars with water, plus a rack to keep them from rattling.
- Food Mill or Blender: If you’re making sauces or purees, a food mill or a good blender makes the job much easier and results in a smoother product.
- Freezer Bags or Containers: For freezing, good quality freezer bags or airtight containers are a must to prevent freezer burn.
Preserving food is a rewarding way to extend the harvest, save money, and have delicious, homegrown flavors available year-round. It connects us to the seasons and the food we eat in a really special way.
Mastering Canning Techniques This August

August is prime time for canning, and we’re here to help you get the most out of your harvest. Canning is a fantastic way to preserve food for the long haul, making it shelf-stable and ready whenever you need it. The biggest hurdle for many of us is the heat that comes with canning, especially when the summer sun is blazing. That’s why we love canning outdoors whenever possible. It keeps the heat out of the kitchen and makes the whole process much more enjoyable. You can set up a portable burner, your canner, and all your supplies on a patio or even in the backyard. It really makes a difference!
When it comes to canning, we usually think of two main methods: water bath canning and pressure canning. Water bath canning is perfect for high-acid foods like fruits, jams, jellies, pickles, and most tomatoes (with added acid). It’s pretty straightforward: you fill your jars, put them in a big pot of boiling water, and process them for a set amount of time. It’s a reliable method for those acidic foods.
Canning Outdoors: Beat the Heat
Canning outside is a game-changer during hot August days. It means you can process large batches of food without turning your kitchen into a sauna. We’ve found that setting up a dedicated outdoor canning station, even a simple one with a propane burner and a table, makes the process so much more pleasant. Just make sure you have a stable surface and are away from anything flammable.
Water Bath Canning Essentials
For water bath canning, you’ll need a large pot with a rack at the bottom to keep jars off the direct heat. You’ll also need jar lifters, a funnel, and headspace tools. The key to successful water bath canning is ensuring your food is properly acidified and processed for the correct amount of time. This method works best for:
- Fruits and fruit juices
- Jams, jellies, and preserves
- Pickles and relishes
- Salsas and tomato products (with added acid)
When to Reach for Pressure Canning
Now, if you’re dealing with low-acid foods, pressure canning is the way to go. This method reaches higher temperatures than a water bath, which is necessary to kill off any harmful bacteria like Clostridium botulinum. Low-acid foods include:
- Most vegetables (like green beans, corn, carrots)
- Meats, poultry, and fish
- Broths and stocks
Pressure canning requires a special pressure canner, which is different from a pressure cooker. It has a dial gauge or a weighted gauge to maintain the correct pressure. It might seem a bit more intimidating at first, but once you get the hang of it, it’s just as manageable as water bath canning. Always follow tested recipes and guidelines for pressure canning to ensure safety.
Safety is paramount when canning. Always use up-to-date, tested recipes from reliable sources like the National Center for Home Food Preservation or reputable canning books. Don’t guess or improvise on processing times or methods, especially with low-acid foods.
Embrace Fermentation for Flavor and Health
We’re diving into the wonderful world of fermentation this August! It might sound a little intimidating, but trust us, it’s a fantastic way to add some zing to your food and boost its health benefits. Think of it as a natural preservation method that uses good bacteria to transform simple ingredients into something truly special.
Fermenting Jalapeños: A Simple Start
If you’re new to fermenting, jalapeños are a great place to begin. They’re readily available, and the process is pretty straightforward. You’ll need fresh jalapeños, salt, and some clean jars. The salt helps draw out moisture from the peppers, creating a brine that encourages the right kind of bacteria to grow. This is what gives fermented foods their characteristic tangy flavor and makes them last longer.
Here’s a basic rundown:
- Wash and thinly slice your jalapeños. You can leave the seeds in if you like it hotter!
- Weigh your jalapeños and calculate 2% of that weight in salt. For example, if you have 100 grams of jalapeños, you’ll need 2 grams of salt.
- Mix the salt with the jalapeños and let them sit for about 15 minutes. You’ll see them start to release their liquid.
- Pack the jalapeños tightly into a clean glass jar. Press down to remove air pockets.
- If the jalapeños aren’t fully submerged in their own liquid, you can add a little extra brine (water mixed with salt at the same 2% ratio).
- Make sure the peppers stay below the brine. You can use a fermentation weight or a smaller jar filled with water to keep them submerged.
- Loosely cap the jar and let it sit at room temperature for about 5-7 days. You might see some bubbles – that’s a good sign!
- Once it tastes good to you, tighten the lid and store it in the fridge. It’ll keep for months!
Lacto-Fermentation for Veggies
Lacto-fermentation, or ‘lacto-fermenting’ as we call it, is the process where lactic acid bacteria convert sugars in vegetables into lactic acid. This not only preserves the veggies but also creates that wonderful sour taste we love. It’s amazing how many different vegetables can be transformed this way – think cabbage for sauerkraut, cucumbers for pickles, carrots, green beans, and even tomatoes!
The beauty of lacto-fermentation is that it doesn’t require fancy equipment. Just some good quality vegetables, salt, and jars. The bacteria are already present on the vegetables themselves, so we’re just giving them the right conditions to thrive and do their magic.
The Art of Fermented Salsa
Who knew salsa could be fermented? It’s true, and it’s a game-changer for flavor. You start with your favorite salsa ingredients – tomatoes, onions, peppers, garlic, cilantro – but instead of eating it fresh, you let it ferment. This process mellows out the raw onion bite and deepens all the flavors. It takes a bit longer than quick pickles, but the result is a complex, tangy salsa that’s incredibly satisfying. We like to make a big batch and keep it in the fridge, enjoying it over weeks. It’s a great way to use up those late-season tomatoes and peppers, turning them into something even more delicious.
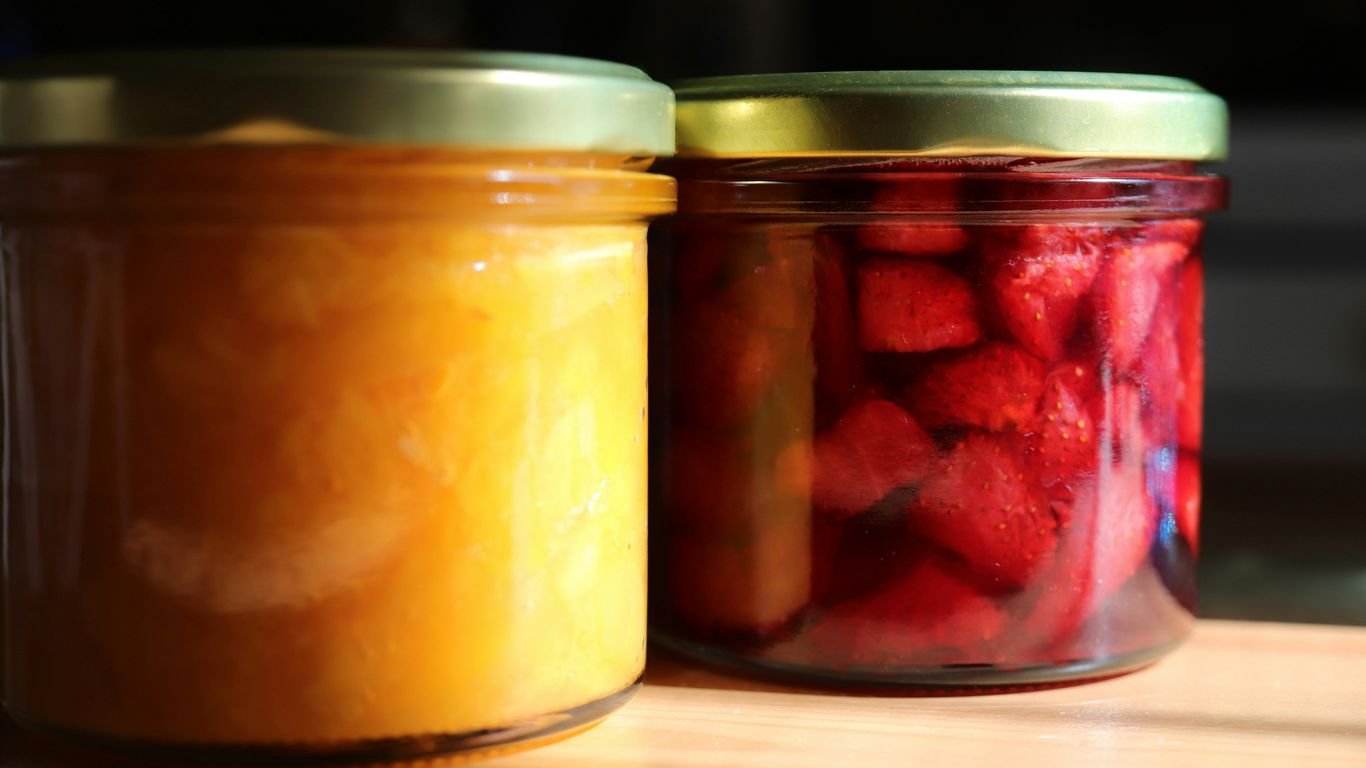
Freezing Fruits and Vegetables Like a Pro
Sometimes, we just need to hit the pause button on our produce. Freezing is a fantastic way to do just that, especially for items where a slightly softer texture after thawing isn’t a big deal. It’s a simple method that keeps produce fresh for later use, perfect for when you’re short on time or just want to preserve a bumper crop.
Putting Crops on Pause with Freezing
Freezing is our go-to for certain fruits and veggies that we know will be used in cooked dishes or smoothies. Think berries that will become jam or muffins, or tomatoes that will be turned into sauce. It’s a great way to avoid food waste and keep that summer flavor around. We find that it works best for things that will end up mushy or saucy anyway. For example, we often freeze berries and then later turn them into delicious treats like individual shortcakes or a low-sugar jam. Tomatoes are also super easy to freeze; just core them, score the bottoms, and toss them into a freezer bag. Once the weather cools, you can defrost them, slip off the skins, and make your own tomato sauce.
Freezing Berries for Future Treats
Berries are practically made for freezing! They’re so versatile. We pick them, wash them gently, and then spread them out on a baking sheet in a single layer to freeze them individually. This stops them from clumping together in the bag. Once they’re solid, we transfer them to freezer bags. This way, we can grab just the amount we need for smoothies, pancakes, or baking. It’s also a great way to get a head start on things like freeze-dried berries if that’s something you’re interested in.
Simple Ways to Freeze Tomatoes
Tomatoes are another one of those items that freeze beautifully. We usually just core them, maybe give them a quick score on the bottom, and then pop them into freezer bags or containers. They take up less space this way. When we’re ready to use them, we just pull them out, and the skins slip right off after a quick thaw. They’re perfect for making homemade tomato sauce, soups, or stews. It’s a really straightforward process that saves us a lot of time later on. For more tips on preserving your harvest, check out these vegetable preservation methods.
Freezing is a lifesaver for busy gardeners and cooks. It allows us to enjoy the taste of summer long after the season has passed. Just remember to label your bags with the contents and the date so you know what you’ve got!
Preserving Your Favorite August Produce

August is a fantastic month for harvesting, and we love making sure none of that goodness goes to waste. It’s the peak time for so many things, and we want to capture that summer flavor to enjoy later. Let’s talk about some of our favorite August stars: tomatoes, cucumbers, and sweet corn.
Tomatoes: From Garden to Jar
Tomatoes are practically synonymous with summer, aren’t they? We often find ourselves eating more fresh tomatoes straight from the garden than we can possibly use. While our own garden might not produce enough to preserve a huge surplus yet, we’ve found great ways to save them. Tomatoes are a bit tricky because they’re borderline high-acid, meaning you can water bath can them, but most recipes add a little something extra, like lemon juice, to be safe. If you’re adding meat to a sauce, like for spaghetti sauce, you absolutely need to use a pressure canner. We also love making fermented salsa with tomatoes; it doesn’t last as long as canned, but the flavor is amazing. Sometimes, we’ll freeze tomatoes and then ferment them later for that summer taste in the dead of winter.
Here are a few ways we like to preserve tomatoes:
- Freezing: Simply wash, core, and freeze whole tomatoes on a baking sheet before transferring them to bags. They’re perfect for sauces and soups later.
- Water Bath Canning: This is great for plain tomatoes, diced tomatoes, or sauces. Just remember to follow tested recipes carefully.
- Fermenting: Try a fermented salsa or even fermented cherry tomatoes for a probiotic boost.
Canning is a time-consuming but effective method for preserving garden produce, allowing you to enjoy fresh flavors for extended periods, even years after harvesting. Canning is a time-consuming
Cucumbers: Beyond Pickles
We admit, the idea of preserving cucumbers without making pickles seemed a little strange at first. Freezing cucumbers? It sounds odd, but it actually works really well for certain uses. Before we get to preserving, though, let’s talk about fresh cucumbers. A simple cucumber, cheese, and tomato sandwich is a summer dream, and a refreshing cucumber yogurt salad is perfect on a hot day. When it comes to preserving, beyond the classic dill or bread-and-butter pickles, we’ve had success with dehydrating them into chips or powder, and even making lacto-fermented cucumber relish.
- Pickling: Of course, this is the classic. Dill pickles, sweet pickles, relishes – we love them all.
- Freezing: Slice them and freeze them for use in smoothies or cold soups where a crisp texture isn’t needed.
- Dehydrating: Make crunchy chips or a versatile cucumber powder.
Sweet Corn: Capturing Summer’s Sweetness
We eagerly await the local farmer’s sweet corn stand each summer. Buying it by the dozen is a must, and while we eat a lot of it fresh, we always want to save some for later. Freezing corn is probably our favorite method. You can freeze it right on the cob or cut it off. Canning corn is also an option, and we enjoy making corn relish too. For a different kind of flavor, try lacto-fermented corn and onion relish.
Here’s a quick look at freezing corn:
- Blanching: Briefly boil the corn (on or off the cob) for a few minutes, then plunge it into ice water. This stops the enzymes that can degrade flavor and texture.
- Cutting (Optional): If freezing off the cob, cut the kernels off after blanching.
- Packaging: Pack the blanched corn into freezer bags or containers, removing as much air as possible.
We find that preserving these August favorites means we can enjoy a taste of summer all year long.
Smart Strategies for Your August Preserving Plan
August is a busy month for us in the garden and at the market. With so much bounty coming in, it’s easy to feel a little swamped. That’s why having a solid plan makes all the difference. We’ve learned that getting organized before the peak harvest hits saves us a lot of stress and helps us make sure none of that delicious produce goes to waste.
Get Organized for Harvest Season
First things first, we take stock of what we actually eat throughout the year. It’s no use preserving a ton of something your family won’t touch come January. We make a list of our family’s favorites – think tomato sauce, green beans, and maybe some berry jams. Then, we figure out how much we need to preserve to last us until the next harvest. For us, this means aiming for enough to cover our needs for about a year.
- Assess Your Family’s Favorites: What do you eat most often? What are your must-have preserved items?
- Estimate Quantities: How much of each item do you need to last a full year?
- Choose Your Methods: Decide which preservation techniques you’ll use for each item based on your equipment and preferences.
Maximizing Natural Pectins in Fruits
When we’re dealing with fruits for jams and jellies, understanding pectin is key. Pectin is what makes jams and jellies set. Some fruits are naturally high in pectin, while others need a little help. Knowing this helps us choose the right fruits and sometimes combine them to get that perfect set without relying on commercial pectin.
Here’s a general idea of pectin levels:
| High Pectin Fruits | Medium Pectin Fruits | Low Pectin Fruits |
|---|---|---|
| Apples (unripe) | Cherries | Strawberries |
| Cranberries | Grapes (concord) | Peaches |
| Gooseberries | Plums | Apricots |
| Lemons (peel/juice) | Raspberries | Pears |
We often combine a low-pectin fruit, like strawberries, with a high-pectin fruit, like apples or lemon juice, to achieve a good set. It’s a simple trick that makes a big difference in the final product.
Planning for a Year’s Worth of Food
This is where the real strategy comes in. It’s not just about preserving what’s abundant now; it’s about building a pantry that sustains us. We look at our harvest calendar and our frost dates. Knowing when our first frost is expected helps us prioritize what needs to be preserved quickly. We also think about how we’ll use the preserved foods. For example, applesauce is incredibly versatile – we can eat it plain, put it on pancakes, or use it in baking. This makes it a more valuable preserve than, say, a very specific apple jelly that only gets used one way.
We try to preserve items that can be used in multiple ways throughout the year. This approach stretches our harvest further and provides flexibility in our meals. It’s about creating a food supply that’s both abundant and adaptable to our needs.
By planning ahead, we can make sure we have a good variety of preserved foods ready to go, reducing our reliance on store-bought items and enjoying the fruits (and vegetables!) of our labor all year long. It’s a rewarding process that connects us more deeply to our food and the seasons.
Wrapping Up Our August Preserving
So there you have it! We’ve covered a bunch of ways to keep all that late summer goodness from going to waste. Whether you’re into the satisfying heat of canning, the tangy goodness of fermenting, or the simple ease of freezing, there’s a method out there for everyone. Don’t get too overwhelmed by all the options. Just pick a few things that your family loves to eat and start there. We’ve found that planning ahead and knowing what works best for us makes all the difference. Happy preserving, everyone!
Frequently Asked Questions
What’s the best way to preserve a lot of food quickly?
Canning is usually our top pick for preserving large amounts of food all at once. It makes food last a long time on the shelf, so we don’t have to worry about it until we’re ready to eat it. Just remember, canning can get pretty warm in the kitchen, so we often do it outside when it’s hot!
Why do some foods get mushy when frozen?
Some foods, like green beans, can lose their crispness when frozen and thawed. We find that pressure-canning them works better for us because we prefer them not to be mushy. It really depends on what your family likes best!
How can we avoid feeling overwhelmed during harvest season?
To avoid feeling swamped, we suggest making a plan. Figure out what your family eats the most and decide how you’ll preserve it. For us, that means making sure we have enough tomato sauce, green beans, and pickles for the whole year. It’s also smart to choose foods that can be used in different ways, like applesauce, which is great on its own, in baking, or even in BBQ sauce.
When should we use water bath canning versus pressure canning?
For most fruits and foods with added acid, like jams and pickles, water bath canning is great. However, for low-acid foods like vegetables (carrots, beans) and meats, we absolutely need to use a pressure canner. This is super important for safety!
What are some simple ways to start fermenting?
Fermenting jalapeños is a really easy way to begin! We also love lacto-fermenting other veggies like carrots or onions. It’s a fantastic way to add flavor and good bacteria to our meals.
How do we choose the right preservation method for our harvest?
We look at a few things: what the food is, how our family likes to eat it, how much time we have, and what equipment we have. For example, leafy greens aren’t great for canning, but they’re perfect for drying. We also think about the weather – sometimes it’s just too hot to can!


