How to Start Composting at Home: Step-by-Step Guide
Starting a compost pile at home is one of those projects we’ve all thought about, but maybe put off because it seems tricky or messy. The truth is, it’s a lot easier than it sounds, and it’s actually pretty satisfying to see kitchen scraps and yard waste turn into something useful for our gardens. Plus, every bit of composting we do helps cut down on landfill waste and gives our plants a real boost. In this guide, we’ll walk through how to start composting at home, breaking it down into simple steps that anyone can follow, no matter the size of your space.
Key Takeaways
- Anyone can start composting at home, even with limited space or no backyard.
- Picking the right composting method depends on how much space and time we have.
- It’s important to know what can go in the compost pile and what should stay out.
- Keeping a good balance of green and brown materials helps avoid bad smells and pests.
- Finished compost is a free, natural boost for our gardens and houseplants.
Choosing the Right Composting Method for Your Home

When we start thinking about composting, one of the first things to consider is which method will actually work for our living situation and daily habits. It’s all about fitting composting into our lives, not the other way around. Let’s talk through the main options, from classic backyard piles to smaller-scale indoor setups and even community programs for those of us with limited space.
Backyard Piles and Bins Explained
So, if we’re lucky enough to have a yard, this is a great place to start. Backyard composting is pretty flexible—we can go as simple as a heap in a corner, or buy (or build) an enclosed bin to keep things tidy and animals out. Here’s a quick breakdown:
- Open Pile: Just a heap of organic waste. Easiest, but can be messy and may attract critters.
- Compost Bin: Enclosed container, either purchased or DIY. Helps with heat retention, odor, and pest control.
- Tumbler: Sealed bin on a frame that spins. Makes turning the compost easy, which speeds things up and keeps animals out, but usually only holds a small amount.
| Method | Pros | Cons |
|---|---|---|
| Open Pile | Cheapest, simple | Can be messy, attracts pests |
| Compost Bin | Tidy, hold heat better | Slower without turning |
| Tumbler | Easy to turn, cleaner | More expensive, limited size |
For those of us who want less hassle and don’t mind regular turning, a simple bin or tumbler really works well. If you’re totally hands-off, a basic pile in a hidden spot is fine—just expect slower results and maybe a curious raccoon or two.
Indoor and Small-Space Options
Not everyone has a yard (or wants to deal with one), so indoor composting might be where we land. These options are surprisingly doable—even in apartments:
- Vermicomposting (Worm Bin): Uses special worms to break down food scraps inside a small bin. Great for kids and science geeks; just don’t overfeed or you’ll have fruit flies.
- Bokashi Buckets: Ferments food scraps using a special mix—yes, even meat and dairy. No odor if used right, but you’ll want to bury the finished stuff in soil or bring it to a collection point.
- Indoor Electric Composters: Plug-in devices that dry and grind food scraps. These don’t make real compost, but the output can still go into a larger compost pile or city green-bin (if you have one).
Some starter tips for small space composting:
- Choose a spot away from direct sun and heavy foot traffic.
- Empty bins often to keep smells at bay.
- Let everyone in the household know what goes in—and what doesn’t.
Community Composting Programs
If space just isn’t working for us (or if we just prefer not to DIY), community composting programs are a great backup plan. Here’s how these usually work:
- Some cities or local farmers’ markets have drop-off sites for kitchen scraps.
- Others have curbside collection programs, similar to trash or recycling pickup.
- A few neighborhoods work together and share the duty of managing a central compost bin—great for apartment dwellers or those who travel frequently.
Sometimes, joining a community program turns the chore of composting into an easy habit; we toss scraps in a bucket, and somewhere down the line, they become garden gold—without a pile in the backyard.
We all have different living spaces and routines, so picking the right method is what’ll keep us at it long-term. Whether we go solo in the yard, try worms in the laundry room, or share the work with neighbors, all that kitchen and garden waste has somewhere better to go.
Setting Up Your Composting Space
So we’re ready to start composting at home, but before we chuck any veggie scraps in a pile, we need to actually set things up. It doesn’t have to cost a ton, and you don’t need a sprawling backyard to get going. Let’s break down exactly how we get our space ready, so we’ll have the best shot at an easy, low-maintenance compost routine.
Picking the Perfect Location
First off, location matters way more than you’d think. We want our compost bin or pile somewhere that’s easy to reach—trust me, you don’t want to trek across the yard every time you peel a carrot. Ideally, pick a spot that gets some sunlight (like three or four hours a day) but also has good airflow. That airflow keeps things from turning into a stinky, soggy mess. Also, steer clear of putting the bin right up against fences or walls; leave at least a couple feet of space so air can circulate and you can get behind it if you need to do some occasional mixing (or, let’s be honest, rescue a lost garden tool).
If you’re curious about how others set up their backyard composting spaces, collecting materials and storing compost in an accessible area works best for most homes.
Selecting or Building Your Compost Bin
Now, we need something to actually hold all those scraps. You can buy a fancy bin, build one from stuff like old pallets, or just start with a simple pile. Main thing to keep in mind: your compost needs air. Look for designs with lots of slots or gaps, or drill a few holes yourself if you’re going the DIY route. Here are the common options:
- Open Piles: Cheapest method. Just pick a corner, start a pile, and let nature handle it. Downside? Piles can get messy and might not keep critters out.
- Store-bought Bins: Neat, often animal-proof, and sometimes come with turning handles. Great for people who want less mess.
- Homemade Bins: Versatile. Repurpose wooden pallets or wire mesh. For most families, a bin that’s around 3 feet by 3 feet by 3 feet is just about perfect.
| Bin Type | Difficulty | Pest Resistant | Cost |
|---|---|---|---|
| Open Pile | Easy | Low | $ |
| Store-bought Bin | Easy | Good | $$$ |
| DIY Pallet Bin | Moderate | Fair | $ |
Pick whatever fits your space and your style—no need to overthink it. The best bin is the one you’ll actually use.
Gathering the Right Tools
We’re almost ready. Let’s grab some basic tools so we don’t have to hunt them down later. Here’s what we’ve found helpful over the years:
- A small kitchen container: For catching food scraps before they go outside.
- A pitchfork or sturdy shovel: Makes turning the pile way less frustrating.
- Gloves: Not required, but honestly, compost can get pretty gross sometimes.
- Watering can or hose: Compost needs moisture. Not soaking, but kind of like a wrung-out sponge.
- Rake: To gather dry leaves and spread out finished compost.
One last thing—don’t buy fancy stuff unless you want to. Most people just use what they already have. Getting started is a lot easier (and cheaper) than it looks from the outside. Once you’re set up, adding scraps becomes part of your routine, and you’ll be amazed how much stuff you can compost instead of tossing in the trash.
Understanding What to Compost (And What Not To)

Getting the hang of what can and can’t go into our compost can feel a bit messy at first. We all want to toss in every scrap, but honestly, not everything belongs. Let’s unpack how to recognize the good stuff, steer clear of the wrong things, and set ourselves up for a pile that won’t turn into a soggy science experiment.
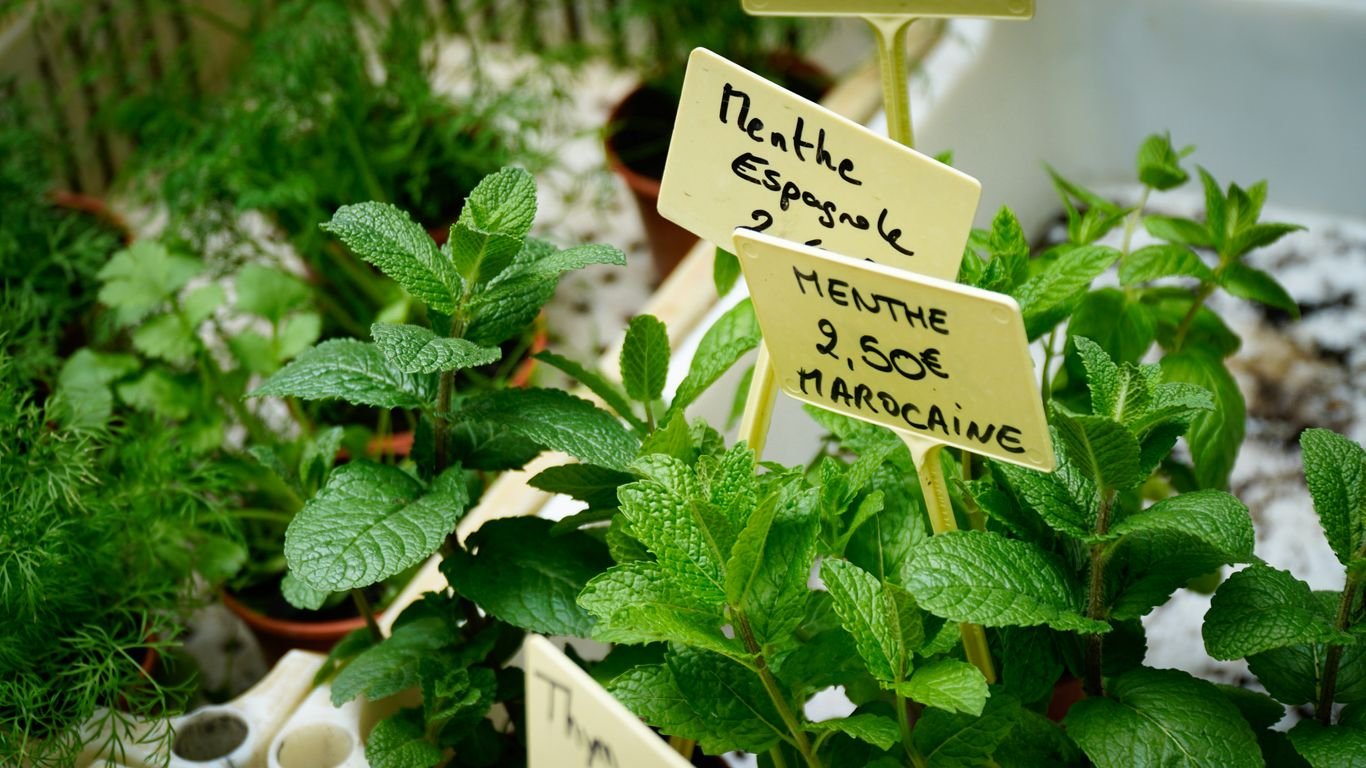
Identifying Greens and Browns
We hear a lot about ‘greens’ and ‘browns.’ It’s not just a color thing—these are shorthand for key materials we need for healthy compost.
- ‘Greens’ are nitrogen-rich materials: Fruit and veggie scraps, coffee grounds, tea bags (the paper kind), fresh grass clippings, and even things like fresh plant trimmings.
- ‘Browns’ are carbon-rich: Dried leaves, straw, small twigs, cardboard (rip off sticky tape and plastic bits first), shredded paper, eggshells, and untreated wood chips all fit in this group.
- The sweet spot is about a 3:1 ratio of browns to greens, which helps avoid bad smells and keeps pests away.
Here’s a basic table of what goes where:
| Material | Type | Advice |
|---|---|---|
| Vegetable peels and fruit | Green | Add anytime |
| Coffee grounds & filters | Green | Use paper filters only |
| Grass clippings | Green | Mix with browns to balance |
| Dead leaves | Brown | Shred for faster breakdown |
| Cardboard & paper | Brown | No glossy or colored finishes |
| Tea bags | Green | Choose plastic-free varieties |
List of Items to Avoid
Not everything breaks down safely or easily at home. Some stuff simply attracts the wrong crowd or just lingers for months without breaking down.
Skip these in your home compost:
- Meat, bones, and fish (pests! and won’t break down well)
- Dairy (a tiny bit of cheese is ok, but more means stink)
- Oils and fats (messy, slow, smelly)
- Glossy paper, stickers, plastic
- Weeds gone to seed or diseased plants
- Pet poop from cats and dogs (too risky)
Long story short: If you wouldn’t grow a vegetable in the pile, don’t put that item in it. This little gut check will save a lot of hassle.
How to Store and Prepare Materials
If you don’t have quite enough scraps to start, it’s fine to collect them over a few days—it actually helps to store food scraps in a sealed container (we just use an old ice cream tub under the sink).
Here’s how we handle our compost bits before tossing them in:
- Cut or tear everything into smallish pieces — less than 2 inches is just right.
- Alternate layers of green and brown to keep things balanced.
- Cover kitchen scraps with dry leaves or cardboard to mask smells and deter critters.
Keeping scraps small and covered with plenty of dry material is the trick behind a healthy, happy compost pile.
Composting isn’t just a way to handle waste; it’s also a cool, practical way to turn our kitchen throwaways into something our gardens will love. For tips about better composting and what to grow after, check out simple steps to enrich your garden by improving your soil.
Building and Maintaining Your Compost Pile

Getting our compost pile going is actually easier than most people think. We just need to focus on a few key things from the start. Once we get the hang of it, it’s mostly about keeping up with the routine and making small adjustments when things seem off. Let’s break down the whole process.
Layering Materials For Success
We always kick things off by creating layers—a bit like making lasagna, just less delicious. Here’s our usual layering method:
- Start with a base layer of bulky browns. Woody sticks or coarse twigs work great for this. They keep things from getting soggy by helping air move around the pile.
- Add greens next—fruit scraps, veggie peels, coffee grounds.
- Alternate layers of browns (dry leaves, shredded cardboard) and greens (fresh lawn clippings, kitchen scraps).
- Finish with a covering layer of browns. This keeps smells in and pests out.
It’s important to bury fresh food scraps under a few inches of brown material to avoid attracting animals and limit odors.
Balancing Carbon and Nitrogen
Balancing our carbon (browns) and nitrogen (greens) is where the magic really happens. If we get this right, our compost is more likely to break down fast and not get smelly. Here’s a handy table:
| Material | Type | Carbon/Nitrogen |
|---|---|---|
| Dry leaves | Browns | High carbon |
| Fruit scraps | Greens | High nitrogen |
| Shredded paper | Browns | High carbon |
| Coffee grounds | Greens | High nitrogen |
| Sawdust | Browns | High carbon |
| Grass clippings | Greens | High nitrogen |
A simple trick we use: go for two to three parts browns for every one part green. If the pile smells a bit off, we know we need more browns. If it’s just sitting there and not breaking down, we’ll toss in some extra greens.
Ensuring Proper Moisture and Aeration
Air and water are what keep our compost breathing and breaking down. We aim for the pile to feel like a wrung-out sponge—not too dry and not dripping wet. Here’s how we keep our pile just right:
- Water it lightly, especially during dry spells.
- Turn or mix it every couple of weeks with a pitchfork or shovel.
- If it starts smelling bad, that usually means too little air—so we grab the fork and give it a good mix.
Sometimes, after a heavy rain, the pile turns soggy and starts to get slimy. We just add more dry browns, mix it all up, and it usually bounces back.
Building up a healthy compost pile is a step towards building living soil for future plants, which is perfect for anyone into sustainable gardening (cultivating healthy soil).
Troubleshooting Common Composting Challenges
Even the most dedicated among us run into problems with compost. The good news is, most issues are easily fixed once we know what’s causing them. Here’s how we can handle the classic hiccups that crop up during our composting journey.
Preventing Odor and Pests
If our compost starts smelling worse than the garbage can, something’s off. Usually, this means an imbalance of materials or too much moisture. To keep smells and curious critters away, we can:
- Use more dry ‘brown’ materials like leaves or cardboard
- Bury kitchen scraps under a thick layer of browns
- Avoid adding meat, oils, or dairy, since those draw pests
- Keep the bin or pile covered if possible
- Regularly turn the pile so it gets enough air
We learned the hard way that a smelly compost pile can make neighbors unhappy fast. Turning the heap and adding browns makes a real difference.
Dealing With Excess Moisture or Dryness
A compost pile hates being soggy or bone dry. Here’s a quick guide:
| Problem | Sign | How to Fix |
|---|---|---|
| Too Wet | Slimy, bad smell, mushy | Add more browns; stir; take off any covers |
| Too Dry | Pile not breaking down | Sprinkle water; add more green materials |
We keep a stash of browns handy and check moisture by squeezing a handful — like a wrung-out sponge is what we’re aiming for.
Speeding Up the Decomposition Process
Sometimes it feels like our compost just sits there forever. If we’re getting impatient, consider these tips:
- Cut or shred bigger items before tossing them in
- Mix or turn the pile at least every few weeks
- Balance greens and browns, aiming for at least 2-3 parts brown for every green
- Monitor the moisture level
- Make sure there’s enough air—don’t pack it too tight
Don’t worry if things like avocado pits or eggshells take longer. That’s normal. We just dig them into the garden, and they’ll finish breaking down out there.
If we stick to these basics, most compost troubles clear up without any special equipment or mystery ingredients. It’s all about keeping things balanced, airy, and just moist enough to keep the microbes happy.
Harvesting and Using Finished Compost

After months of waiting, it’s finally time for the fun part — pulling out that rich, earthy compost from your bin and putting it to good use. There’s something super satisfying about seeing the results of all those banana peels and coffee grounds transformed into what gardeners like to call “black gold.” So let’s get into how we know it’s ready, how to get it out, and the best ways to use it in our gardens.
Knowing When Your Compost is Ready
It can be tricky to tell if the compost is finished, especially if you’ve been adding scraps consistently. Here’s what we look for:
- The compost looks dark, almost like chocolate cake, and crumbles easily in your hand.
- It smells earthy, not like rotting food or ammonia.
- We don’t see big recognizable bits of food scraps or leaves anymore.
- The pile has shrunk a lot, maybe down to one-third its original size.
If you notice some larger pieces (like stubborn twigs or eggshells), just sift them out. We toss those back in for another round.
If we’re patient and let the pile "cure"—sit without adding new materials—for at least four weeks, the compost will be even better. Rushing it means risking unfinished, chunky material that doesn’t blend in as nicely with garden beds.
How to Harvest Compost from Your Bin
Getting the finished product out can be a bit messy, but it’s pretty straightforward. Here’s how we usually go about it:
- Open the access panel or lift the bin off, if possible, to get to the bottom layer. That’s where the finished compost settles.
- Use a rake or a shovel to scoop out the dark, crumbly compost.
- Pass it through a simple mesh screen or old colander to remove any bits that haven’t broken down (like avocado pits).
- Put those leftover chunks back in the pile to keep working.
If you’re into soil science or just want to experiment, making compost tea is a cool next step for feeding plants boosting your garden’s health.
Best Ways to Use Compost in Your Garden
We’ve hauled our homegrown compost—now what? There are several ways we can use it to make our plants happy:
- Mix into garden beds: Work about two to four inches of compost into the top six inches of soil.
- Use as a mulch: Layer it on the surface to help retain moisture and block weeds.
- Potting mix boost: Mix a little into potting soil for houseplants or container gardens.
- Top-dress around plants: Spread compost around the base of veggies, flowers, or shrubs—just keep it a few inches away from stems and trunks.
Here’s a quick table on where and how much compost we usually add:
| Use | How Much Compost? |
|---|---|
| Garden beds | 2-4 inches, mixed in |
| Mulch for perennials | 1-3 inch layer |
| Lawn top-dressing | 1/4 to 1/2 inch |
| Potting soil mix | ~20% of total volume |
A final thought: it’s wild how this process keeps scraps out of the landfill, gives us free fertilizer, and helps roots grow stronger. Composting isn’t just good for the garden—it’s good for everything around us.
Wrapping It Up: Our Composting Adventure
So, that’s pretty much it—composting at home isn’t rocket science, and honestly, it’s kind of fun once you get into the groove. We’ve all got kitchen scraps and yard waste piling up, so why not put it to good use? By starting a compost bin, we’re not just cutting down on trash, we’re making something our gardens will love. Sure, it takes a bit of patience and some trial and error (we’ve all had a smelly pile at least once), but the payoff is worth it. Let’s keep it simple: toss in your greens and browns, give it a turn now and then, and let nature do its thing. Before you know it, we’ll be spreading rich, homemade compost in our gardens and feeling pretty good about doing our part for the planet. Happy composting, everyone!
Frequently Asked Questions
Why should we start composting at home?
Composting at home helps us cut down on the amount of trash we send to the landfill. It also gives us free, nutrient-rich compost to use in our gardens, which helps our plants grow better. Plus, it’s a simple way to help the environment and reduce our carbon footprint.
What can we put in our compost bin?
We can add things like fruit and vegetable scraps, coffee grounds, eggshells, grass clippings, and dry leaves. It’s important to mix both ‘greens’ (like food scraps) and ‘browns’ (like dried leaves or paper) to keep the compost healthy.
What should we avoid putting in the compost pile?
We should not add meat, fish, dairy, oily foods, pet waste, or diseased plants. These items can attract pests or make the compost smell bad.
How often should we turn or mix the compost?
It’s a good idea to turn or mix the compost pile about once a month. This helps add air and speeds up the breakdown of materials.
How do we know when our compost is ready to use?
Finished compost looks like dark, crumbly soil and smells earthy. If we can’t see any of the original food scraps or leaves, it’s probably ready to use in our garden.
What if our compost pile starts to smell bad or attract bugs?
If our compost smells bad, it might be too wet or have too many food scraps. We can fix this by adding more dry ‘brown’ materials and mixing the pile. To keep bugs and animals away, always cover new food scraps with a layer of leaves or paper and make sure the pile isn’t too wet.