Rainwater Harvesting 101: Safe Storage and Filtration Tips
We all know the feeling of watching the rain fall, but have you ever thought about actually collecting it? It turns out, rainwater harvesting is a practical way to get extra water for your home and garden. It’s not just for people in dry places anymore; more and more of us are looking into it. If you’re curious about how to set up a system and keep the water clean, you’ve come to the right spot. We’ll walk through some simple rainwater harvesting tips to help you get started.
Key Takeaways
- Rainwater harvesting involves collecting and storing rain, often from your roof, for later use.
- Systems can range from simple rain barrels to more complex setups with larger tanks.
- Proper storage tanks and methods are needed to keep pests and debris out of your collected water.
- Filtration is important, especially if you plan to use the water for drinking or cooking.
- Regular maintenance, like cleaning gutters and tanks, is necessary for a functional system.
Understanding Your Rainwater Harvesting System

So, you’re thinking about collecting rainwater? That’s awesome! It’s a fantastic way to conserve water and can even lower your water bills. But before we get into the nitty-gritty of tanks and filters, let’s get a handle on what a rainwater harvesting system actually is and how it works. It’s not as complicated as it might sound, and understanding the basics is key to setting up a system that works for you.
What is Rainwater Harvesting?
Basically, rainwater harvesting is just collecting and storing rain for later use. Think of it as nature’s way of giving us free water, and we’re just setting up a system to catch it. This collected water can be used for all sorts of things, from watering your garden to, with the right treatment, even for drinking and bathing. The water typically comes from the runoff of a structure, like your roof, and is then channeled into a storage container. It’s a practice that’s been around for ages, and it’s becoming more popular as we all look for ways to be more water-wise. The amount of water you can collect really depends on your roof size and how much rain you get in your area. For example, even a moderately sized roof in a place with just an inch of rain per month can collect thousands of gallons a year! It’s pretty amazing when you crunch the numbers.
Types of Rainwater Harvesting Systems
When we talk about rainwater harvesting systems, they can range from super simple to quite complex. The most common and easiest way to start is with a rain barrel. This is usually a single barrel placed under a downspout, holding around 50 gallons. You can draw water directly from it or attach a hose. Then there are what we call ‘dry systems’. These are a bit more involved than a simple rain barrel. The collection pipe empties directly into a larger storage tank, and the pipe itself dries out after each rain event. These are great if you get less frequent but heavier rainfall. We’ll get into more advanced systems later, but for now, know that there’s a setup for pretty much every need and budget.
How Much Water Can You Collect?
This is where things get interesting. You might be surprised at how much water your roof can capture. The basic idea is to multiply your roof’s surface area by the average rainfall in your region, and then by a factor (around 0.623) to account for losses. So, if you have a 1,200-square-foot roof and get an average of 1 inch of rain per month, you could potentially collect nearly 750 gallons each month, which adds up to almost 9,000 gallons a year! It really highlights the potential of rainwater harvesting as a water source. Of course, this is a theoretical maximum, and actual collection will depend on your system’s efficiency and how much rain actually hits your collection surfaces.
The quality of the water you collect is influenced by your roofing material. Some materials, like those with lead or certain paints, can leach harmful substances. It’s generally best to stick with materials like unpainted metal or rubber membranes for better water quality.
Essential Components for Safe Storage
Alright, so we’ve got our water collected, and now it’s time to think about where it’s going to hang out. Storing rainwater safely is super important, not just for keeping it clean but also for making sure your system works well long-term. We need to pay attention to a few key things here.
Roof Surface Considerations
First off, what’s your roof made of? Not all roofing materials are created equal when it comes to rainwater harvesting. Some materials can leach stuff into the water that we really don’t want, especially if we’re thinking about using the water for anything beyond just watering the garden. We want to avoid materials that break down easily or contain heavy metals. Generally, metal roofs, tiles, and certain types of asphalt shingles are pretty good choices. The goal is to have a catchment surface that doesn’t contaminate the water before it even gets to your tank.
Gutter Protection and First-Flush Diverters
Once the rain hits your roof, it’s got to go somewhere, right? That’s where gutters come in. But leaves, twigs, and all sorts of debris love to clog them up. Installing gutter guards or screens is a simple step that makes a big difference. Even more important is a first-flush diverter. This clever little device sends the first bit of rain – the stuff that washes all the gunk off your roof – away from your storage tank. It’s a really effective way to keep your stored water cleaner from the get-go.
Choosing the Right Storage Tank
This is a big one. We’ve got a few options when it comes to tanks:
- Above-Ground Tanks: These are often easier and cheaper to install since you don’t need to dig. Materials like high-density polyethylene (HDPE), fiberglass, or even steel with a liner are common. Crucially, these tanks need to be opaque – meaning no light gets in. Sunlight encourages algae growth, and nobody wants slimy green water.
- Below-Ground Tanks (Cisterns): These are usually made of concrete, HDPE, or fiberglass. They take up less visual space and can keep water cooler, but they require excavation and can be more expensive to install. Site preparation is key here to prevent shifting or damage.
When picking a tank, think about how much water you expect to collect and what you’ll use it for. A simple rain barrel might be fine for a small garden, but a larger system will need a bigger, more robust tank. You can find tanks ranging from 50 gallons all the way up to 10,000 gallons or more.
Keeping Pests Out of Your System
Nobody wants mosquitoes breeding in their water supply, or critters getting into the tank. This ties back to choosing the right tank and making sure it’s sealed properly. Screens on all inlets and overflows are a must. If you have an above-ground tank, make sure the lid fits snugly. For below-ground tanks, the access points need to be secure. A well-maintained system with no easy entry points is the best defense against unwanted visitors.
We’ve found that nature actually does a pretty good job of cleaning rainwater in storage. Biofilms can form on the tank walls, and settling happens naturally. The trick is to not disturb the bottom layer where sediment can build up and to keep light out. It’s like a mini ecosystem working to keep our water usable.
Filtration and Water Quality

So, we’ve got our water collected, and it’s sitting pretty in the tank. But what’s actually in that water? It’s a good question, and one we need to think about, especially if we’re considering using it for anything beyond just watering the garden. While rainwater starts out pretty clean up in the atmosphere, it picks up all sorts of things on its journey down. Think dust, pollen, maybe some bird droppings, and even bits of roofing material. These can all end up in your tank.
Natural Water Treatment in Storage
Interestingly, your storage tank itself does a bit of natural filtering. As water sits, heavier particles tend to settle to the bottom, and a sort of natural biofilm can develop on the tank walls. This process, sometimes called sedimentation and bio-reaction, can actually improve the water quality a bit over time. We just need to be mindful not to draw water from the very bottom of the tank where all that settled gunk hangs out. Most of the time, if we’ve done a decent job keeping debris out before it even gets to the tank, the water quality inside is pretty good for many uses.
Recommended Roofing Materials
What your roof is made of really matters when it comes to water quality. Some materials are better than others. Metal roofs, for instance, tend to be pretty inert and don’t leach much into the water. Asphalt shingles can sometimes release granules, and older roofs might have coatings that aren’t ideal. We generally want to avoid materials that might break down easily or contain chemicals that could wash into our water supply. If you’re installing a new system or replacing an old roof, it’s worth looking into roofing options specifically recommended for rainwater harvesting.
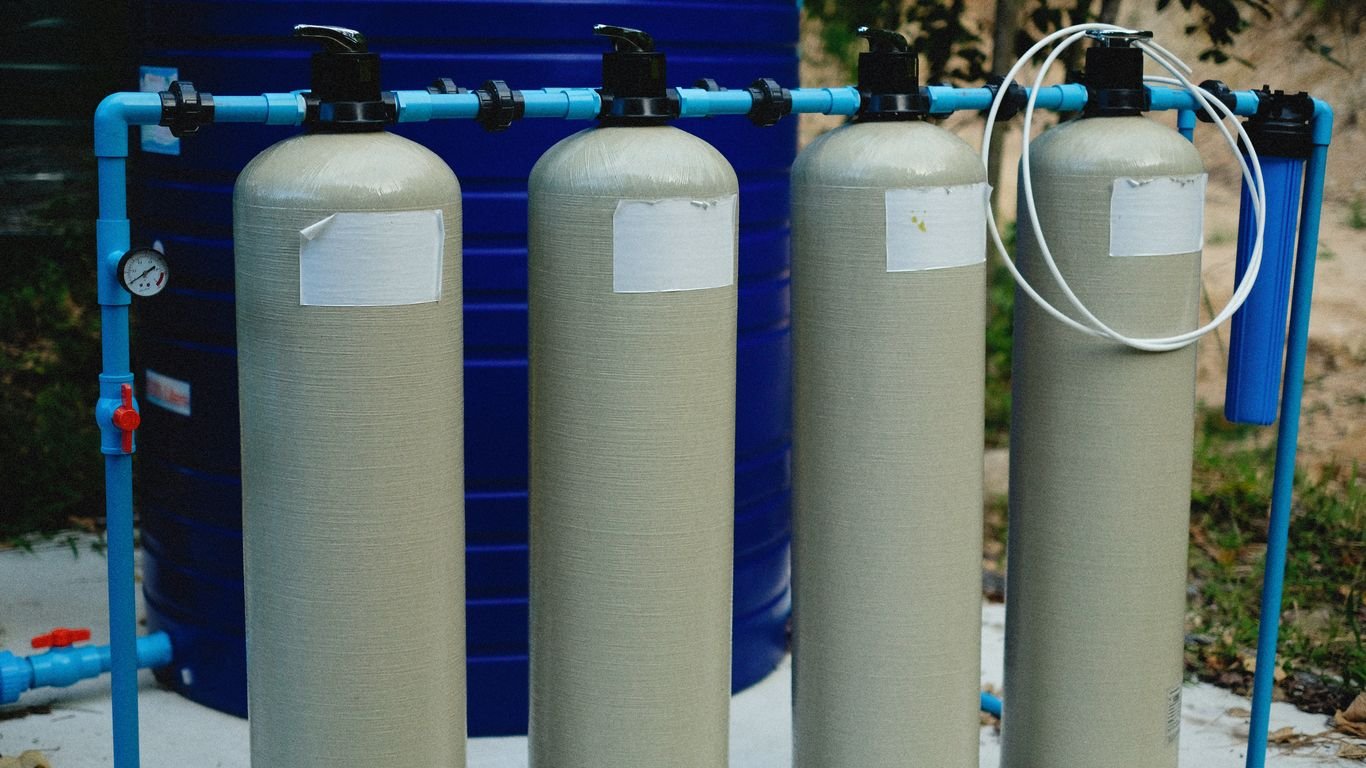
Filtration Opportunities Beyond the Tank
While the tank does some work, we often need more filtration, especially if we’re thinking about using the water for drinking or cooking. There are a few ways we can go about this. A common setup involves a series of filters. First, we might use a sediment filter to catch any remaining small particles. Then, an activated carbon filter can help remove chemicals and improve taste and odor. For drinking water, many people also add a UV (ultraviolet) purification system. This zaps any bacteria or viruses that might be present. Combining these different types of filters gives us the best chance of getting clean, safe water. We can also get more advanced systems, like reverse osmosis, which takes out a very wide range of contaminants. It’s a good idea to test your water periodically to see what’s in it and decide which filters are most important for your needs.
Installation and Placement Options

So, you’ve got your collection system figured out, and you’re ready to store that precious rainwater. But where do you put the tank? This is a big decision, and it affects how your system works and how easy it is to manage. We’ve got a couple of main ways to go: above-ground or below-ground.
Above-Grade Storage Solutions
These are tanks that sit on top of the ground. They’re usually the more budget-friendly option because you don’t have to dig up your yard. You’ve got a few material choices here:
- Corrugated steel or aluminum: These often come as kits with a heavy-duty plastic liner inside. They can be pretty big.
- High-density polyethylene (HDPE): These are sturdy plastic tanks, common for water storage.
- Fiberglass: Another durable option, often used for larger systems.
- Rainwater Pillows: These are flexible bladders made of composite material. They’re pretty neat because you can tuck them away in crawl spaces or under porches, and they can hold a surprising amount of water, sometimes up to 50,000 gallons!
The main thing to remember with above-ground tanks is that they need to be opaque. That means no sunlight getting in. If light hits the water, it can encourage algae and bacteria to grow, which is exactly what we don’t want.
Below-Grade Storage Benefits
Putting your tank underground has its own set of advantages. For starters, they’re pretty much hidden from view, which can be a big plus for how your yard looks. They also tend to fill up using gravity, which is nice and simple. Materials for these tanks are often HDPE, concrete, or fiberglass.
However, there’s more work involved upfront. You’ll need to excavate, which means digging a hole. Plus, you’ve got to make sure the site is prepped right to avoid any issues down the line. We’re talking about a good base, usually about 4 to 6 inches of gravel, to stop erosion or the ground shifting (heaving).
No matter if you choose above or below ground, proper site preparation is super important. You don’t want your tank to get damaged or have water lines messed up because the ground wasn’t ready for it.
Considering Your System’s Location
When you’re figuring out where to put your tank, think about a few things. How far is it from your roof’s downspouts? Will gravity be enough to get the water to the tank, or will you need a pump? If you’re planning to use the water for things like drinking or cooking, you’ll definitely need a good filtration system, and that might influence where you place the tank for easier access.
Also, check your local rules. Some places have regulations about where you can put tanks or how big they can be. It’s always a good idea to look into this before you buy anything. You might even find out about local programs or incentives that can help you save some money on your setup!
Maintaining Your System for Optimal Use
So, you’ve got your rainwater harvesting system up and running – awesome! But just like anything else, it needs a little TLC to keep it working its best. Think of it like owning a car; you wouldn’t just drive it forever without an oil change, right? Your rainwater system needs regular check-ups too. We’re talking about keeping those filters clean, making sure the tank is in good shape, and generally just giving it a once-over every so often. It’s not a ton of work, but it makes a big difference in the long run.
Regular Cleaning and Inspections
We like to give our system a good look-see at least twice a year, usually in the spring and fall. This is when we check out the gutters and downspouts. We’re looking for any leaves, twigs, or other gunk that might have piled up. If you have gutter guards, give those a clean too. It’s also a good time to check your first-flush diverter to make sure it’s working properly and hasn’t gotten clogged. For the storage tank itself, a quick inspection every couple of years is usually enough, especially if you’ve got good filters in place. You want to make sure there’s no weird buildup at the bottom, but as long as you’re filtering out the big stuff, it should stay pretty clean.
Preventing Algae and Mosquitoes
Nobody wants slimy green water or a swarm of mosquitoes buzzing around their water source. Algae can pop up if sunlight gets into the tank, so making sure your tank is opaque and sealed is key. We also make sure any openings, like the overflow pipe, have screens or flaps on them. This is a super simple step that keeps mosquitoes and other critters from getting in and setting up shop. It’s amazing how effective a simple mesh screen can be!
Understanding System Maintenance Needs
Different parts of the system will need attention at different times. Here’s a quick rundown:
- Gutters and Downspouts: Clean these at least twice a year, or more often if you have a lot of trees nearby.
- First-Flush Diverter: Check and clean this whenever you clean your gutters. Make sure it’s draining properly.
- Tank Inlet Screen: Keep this clear of debris so water can flow in smoothly.
- Storage Tank: Inspect the inside every couple of years. If you notice sediment buildup, you might need to drain and clean it, but this is rare with good pre-filtration.
- Pump and Filters (if applicable): Follow the manufacturer’s recommendations for cleaning or replacing filters and checking the pump.
Keeping up with these small maintenance tasks means your system will be more reliable and the water quality will stay higher. It’s all about preventing bigger problems down the road by taking care of the little things now.
Using Your Harvested Rainwater
Potable vs. Non-Potable Uses
So, you’ve got this awesome rainwater harvesting system set up, and you’re collecting a good amount of water. Now, what can you actually do with it? It really boils down to two main categories: potable and non-potable uses. Potable water is basically water that’s safe to drink, cook with, and use for things like washing produce. Non-potable water, on the other hand, is for everything else – think flushing toilets, watering the garden, washing your car, or even doing laundry. The big difference between the two is treatment and filtration. If you want to drink your collected rainwater, you absolutely have to make sure it’s been properly treated and filtered to remove any yucky stuff like bacteria, viruses, or chemical contaminants. For non-potable uses, the requirements are much less strict, but you still want to keep things reasonably clean.
Here’s a quick rundown:
- Potable Uses (Requires Treatment & Filtration):
- Drinking
- Cooking
- Brushing teeth
- Washing fruits and vegetables
- Non-Potable Uses (Minimal or No Treatment Needed):
- Toilet flushing
- Laundry
- Watering plants and gardens
- Washing cars and outdoor equipment
- Filling swimming pools or ponds
- General cleaning around the house
When a Pump is Necessary
Sometimes, gravity is all you need to get your harvested rainwater where it needs to go. If your storage tank is higher than the point of use, gravity can do the work. However, more often than not, we need a little help. This is where a pump comes in. If you want to use your rainwater for things like your home’s plumbing system (showers, sinks, toilets) or for irrigation systems that need a certain pressure, you’ll likely need a pump. Pumps push the water from your storage tank through your pipes and out to where you need it. There are different types of pumps, like submersible pumps that go right into the tank, or external pumps that sit outside. The best choice for you depends on your system’s setup, how much water you need to move, and the pressure required.
Ensuring Water Safety for Consumption
Using harvested rainwater for drinking or cooking is totally doable, but it’s not something to take lightly. We’ve already touched on filtration and treatment, but let’s get a bit more specific. Your filtration system is the first line of defense. This usually involves a series of filters, starting with coarser ones to catch leaves and debris, and moving to finer filters to remove smaller particles. After filtration, disinfection is often the next step to kill any remaining microorganisms. Common methods include UV (ultraviolet) sterilization, which uses UV light to inactivate bacteria and viruses, or chlorination, though UV is generally preferred for taste and odor. Regular testing of your water is also a really good idea, especially if you’re relying on it for potable uses. This helps you catch any issues early on and make sure your treatment methods are working effectively. Don’t skip these steps if you plan to drink your rainwater – your health is worth it!
Wrapping Up Our Rainwater Chat
So, we’ve gone over how to collect and store rainwater safely. It’s pretty neat how much water we can actually catch from our roofs! Remember, keeping things clean is key, whether you’re using the water for your garden or thinking about drinking it after proper filtering. Always check local rules too, because they can be a bit different everywhere. We hope this helps you get started with your own rainwater setup. Happy harvesting!
Frequently Asked Questions
What exactly is rainwater harvesting?
Rainwater harvesting is basically collecting rain that falls on our roofs and storing it for later use. Think of it like catching water in buckets, but on a bigger scale. We can use this stored water for things like watering our gardens, flushing toilets, or even for drinking if we clean and filter it properly.
Can we really collect a lot of water from our roof?
Yes, we can collect a surprising amount! If we know the size of our roof and how much rain usually falls in our area, we can figure out how many gallons we might be able to gather each year. It’s more than you might think, even in places that don’t get a ton of rain.
What are the main parts of a rainwater system?
We need a roof to catch the rain, gutters to guide it, and a storage tank to hold it. We also use things like screens on the gutters to keep out leaves and a special filter called a first-flush diverter to get rid of the initial dirty water. Keeping pests out is important too, so we add screens to the tank openings and overflow pipes.
Is the water we collect safe to drink?
Harvested rainwater can be safe to drink, but only if we treat and filter it really well. Natural processes in the storage tank can help clean the water a bit, but it’s best to use extra filters. We should also avoid drinking water that might have picked up yucky stuff from the roof or storage tank.
Do we need a pump to use the collected water?
It depends on how we want to use the water. If we just want to water the garden with a hose connected directly to the tank, gravity might be enough. But if we want to use the water inside our house for things like sinks or showers, we’ll definitely need a pump to give it enough pressure.
What kind of roof is best for collecting rainwater?
Most roof types work fine for collecting rainwater. However, some materials like wood or roofs with certain types of flashing might add unwanted things to the water. Generally, unpainted metal roofs or rubber membranes are considered good choices for keeping the water clean.


