Rustic Holiday DIYs: 15 Zero-Waste Christmas Decorations from Your Homestead
We love getting our homestead ready for the holidays. This year, we decided to focus on making our own homestead Christmas decor, using things we already have or can easily find around the property. It’s amazing what you can create from wood scraps, dried fruit, and even old fabric! We’ve put together a list of 15 zero-waste Christmas decorations that will bring that perfect rustic charm to our home this season. It’s all about making our Christmas feel special and sustainable.
Key Takeaways
- We can make beautiful homestead Christmas decor using natural and repurposed materials found right on our property.
- Zero-waste DIY projects like wooden slice ornaments and dried fruit decorations are perfect for a sustainable holiday.
- Simple crafts such as cranberry garlands and fabric stars are easy for the whole family to make together.
- Homemade gifts like beeswax candles, honey spoons, and bath salts are thoughtful and eco-friendly options.
- Using items like wood blocks, pallet wood, and wine corks allows us to create unique and charming holiday pieces.
1. Wooden Slice Ornaments
We love bringing a bit of the outdoors in for the holidays, and wooden slice ornaments are a perfect way to do that. They give our Christmas tree that cozy, rustic feel we’re always aiming for. Plus, they’re surprisingly simple to make, even if you don’t have a lot of fancy tools.
The best part is that you can often make these from branches you find right on your property. It’s a fantastic way to use what nature provides and keep things zero-waste. We usually gather a few fallen branches after a good storm, or trim back some overgrown areas. Just make sure the wood is dry before you start working with it.
Here’s a quick rundown of how we put them together:
- Gather Your Wood: Look for fallen branches or trim back any deadwood. Pine, cedar, or even fruitwoods work well.
- Slice Them Up: Using a saw (a hand saw works, but a miter saw makes it quicker and more uniform), cut slices about 1/4 to 1/2 inch thick. Try to get them as even as possible.
- Dry Them Out: Let the slices air dry for a few days to a week to prevent cracking. You can speed this up in a very low oven (around 200°F or 95°C) for a couple of hours, checking frequently.
- Smooth Them: Once dry, give them a light sanding to smooth out any rough edges. A fine-grit sandpaper is usually enough.
- Decorate! This is where the fun really begins. We like to keep it simple, maybe just adding a bit of twine for hanging. But you can also paint designs, wood-burn patterns, or even decoupage them with festive paper.
We found that the thickness of the slice really affects how they dry. Thicker slices tend to crack more, so we aim for around 3/8 of an inch for a good balance of sturdiness and drying time.
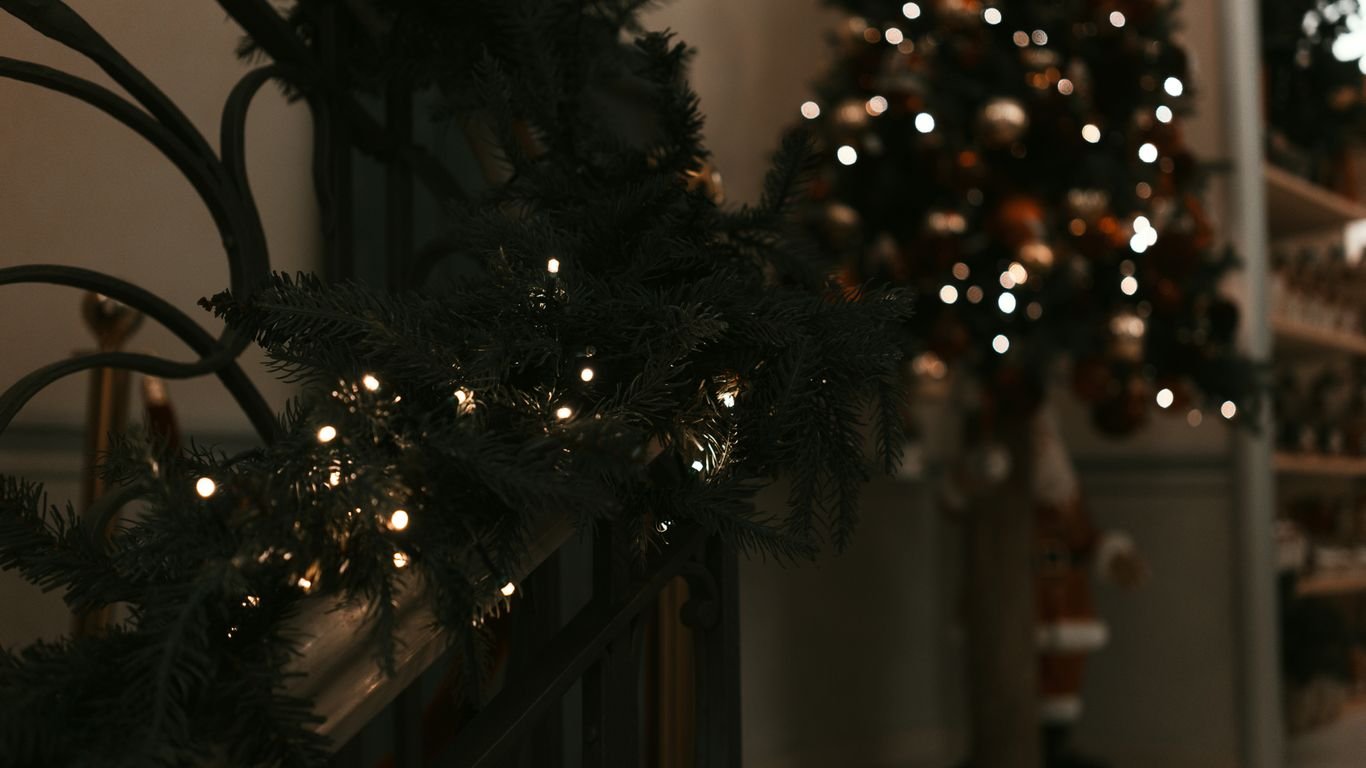
For hanging, we usually drill a small hole near the top before decorating. Then, we thread some natural twine or jute through it. It’s a simple touch that really completes the rustic look. These ornaments are so versatile; they look great on the tree, tied onto gifts, or even strung together as a garland.
2. Cranberry Garland
We love a good, natural decoration, and cranberry garlands are just that. They’re super simple to make and add a beautiful pop of color to your tree or mantel. Plus, they smell amazing!
Here’s how we put ours together:
- Gather your cranberries. Make sure they’re fresh and firm. Any that look a bit sad can go into the compost bin.
- Grab a sturdy needle and some strong thread or dental floss. We like using a thicker thread for a more rustic look.
- Start threading the cranberries onto the string. Don’t worry about making them perfectly spaced; a little variation looks more natural.
- Keep going until you have a garland that’s the length you need. This is a fantastic project to do while watching holiday movies.
We often string ours with popcorn too, for a classic look. It’s a simple way to bring a bit of the outdoors in and create a festive atmosphere without buying new decorations. You can drape these garlands across your tree branches, hang them on the kitchen shelving, or even weave them into a centerpiece. They’re a charming, old-fashioned touch that feels just right for a homestead Christmas.
3. Fabric Star Ornaments
We love finding ways to use up fabric scraps, and these fabric star ornaments are a perfect project for just that. They’re surprisingly simple to make, even if you’re not a whiz with a sewing machine. You can hand-stitch them together, which makes them a great activity for a cozy afternoon.
These little stars add a soft, handmade touch to any Christmas tree. They’re also a wonderful idea if you have little ones around. Soft ornaments are much less stressful when you’re worried about tiny hands pulling things down. Plus, they look super cute hanging on branches or even strung together as a garland.
Here’s a basic idea of how we put them together:
- Cut your fabric: You’ll need two identical star shapes for each ornament. We like to use a template, but you can freehand them too.
- Sew them up: Place the two fabric stars right sides together and sew around the edges, leaving a small opening for turning.
- Turn and stuff: Turn the star right side out through the opening, then gently stuff it with a bit of fiberfill or even more fabric scraps. Don’t overstuff, you want them to be a bit floppy.
- Close it up: Hand-stitch the opening closed.
- Add a hanger: Loop a piece of twine or ribbon through one of the points to create a hanger.
We found that using different patterns and textures of fabric really makes them pop. Think about old quilting scraps, bits of linen, or even some festive holiday prints. It’s a fantastic way to give old materials new life for the holidays.
4. Evergreen Simmer Pot

There’s nothing quite like the smell of Christmas filling your home, and we’ve found a wonderfully natural way to achieve it. Forget those artificial air fresheners; we’re talking about a simple, fragrant simmer pot using things you might even find right in your own backyard.
This is such an easy project, and it makes your whole house smell amazing. We like to gather a few sprigs of evergreen – pine, fir, or spruce work great. Then, we add a few other bits and bobs to really round out the scent.
Here’s what we usually toss in:
- Fresh evergreen sprigs (pine, fir, spruce, cedar)
- Orange peels or slices (dried or fresh)
- Cinnamon sticks
- Whole cloves
- A few star anise pods (optional, but they look pretty!)
Just fill a pot with water, add your chosen ingredients, and let it simmer gently on the stove. Keep an eye on the water level and add more as needed. The gentle heat releases all those lovely, natural aromas, creating a cozy atmosphere. It’s a fantastic way to bring the scent of the woods inside without any harsh chemicals. Plus, it’s a great way to use up leftover citrus peels instead of tossing them.
5. Dried Fruit Christmas Ornaments
We love adding natural touches to our holiday decor, and dried fruit ornaments are a fantastic way to do just that. They bring a beautiful, rustic charm to the Christmas tree and smell amazing too! Plus, they’re incredibly simple to make, using ingredients you might already have in your kitchen.
These ornaments look like stained glass when the tree lights shine through them. It’s a simple trick that adds a lot of sparkle and warmth to your decorations. We’ve found that citrus fruits like oranges, lemons, and grapefruit work wonderfully, but don’t stop there! Apples, pears, and even cranberries can be dried and used for a unique look.
Here’s a basic rundown of how we prepare them:
- Slice: Thinly slice your chosen fruits. Aim for about 1/4 inch thickness for even drying.
- Dry: Lay the slices on a baking rack and bake at a low temperature (around 200°F or 93°C) for several hours, flipping them occasionally. You can also use a dehydrator if you have one. They’re ready when they feel dry and slightly leathery, not sticky.
- Decorate: Once cooled, you can add a touch of sparkle with cinnamon sticks, star anise, or a sprinkle of glitter. Poke a hole near the edge for hanging before they fully harden.
We like to mix and match different fruits and spices for a varied look. It’s a great way to use up fruit that’s past its prime for eating but still perfect for decorating. These handmade citrus holiday decorations offer a natural and sustainable choice for festive decor. You can find more ideas for natural decorations on our homestead.
Making these ornaments is a wonderful activity to do with the family. It’s a chance to slow down, create something beautiful together, and fill your home with festive scents. The process itself is quite therapeutic, and the end result is so rewarding.
We usually make a big batch and use them not only on our tree but also to tie onto gifts or hang around the house for a subtle holiday aroma. They truly add a special, homemade touch to everything.
6. Wood Block Snowman
We love finding new ways to use up scrap wood around the homestead, and these little wood block snowmen are just too cute to pass up. They’re a simple project that can add a lot of charm to your holiday decor without costing much at all.
These little guys are surprisingly versatile. You can paint them, add accessories, or even make them reversible for a different look. We found that using standard 4×4 lumber scraps works perfectly for the main body.
Here’s a basic idea of how we put ours together:
- Gather your wood blocks: We used 4×4 pieces, cutting them to different heights for a varied look. Think about stacking them or just using single blocks.
- Paint them white: This is your snowman’s base coat. Let it dry completely.
- Add facial features: Use black paint or permanent markers for the eyes and mouth. Small orange paint for the nose, and maybe some red for rosy cheeks.
- Accessorize: A small scrap of fabric for a scarf, some twigs for arms, or even a little painted hat can really bring them to life.
We found that a little bit of twine tied around the neck after painting the scarf looked really effective. It adds a nice rustic touch that fits right in with our homestead theme.
This is a great project to do with kids, too. They can help with the painting and decorating, and it’s a fun way to get them involved in making holiday decorations.
7. Pallet Wood Christmas Tree
We love finding new ways to use old materials, and pallet wood is perfect for that. This project turns discarded pallet boards into a charming, rustic Christmas tree decoration. It’s a fantastic way to add a unique, handmade touch to your holiday display without buying new.
Here’s how we put ours together:
- Gather your wood: Find some old pallet boards. Make sure they’re clean and free of any splinters or rough edges. We usually sand ours down a bit.
- Cut your pieces: You’ll need several pieces of wood cut to varying lengths. Think of them as layers for your tree. We cut ours into lengths like 12 inches, 10 inches, 8 inches, 6 inches, and 4 inches.
- Assemble the tree: We like to attach these pieces to a central support, like a thicker piece of wood or even a sturdy branch. Start with the longest piece at the bottom and work your way up, stacking the shorter pieces on top to create a triangular shape.
- Decorate: Once the basic tree shape is assembled, you can get creative! We often wrap it with a string of fairy lights for a warm glow, or you could add small ornaments, pinecones, or even some painted details.
This pallet wood tree looks great on a mantel, a side table, or even on the porch. It’s a simple build that makes a big impact, and it’s a great way to give old wood a festive new life.
8. Air-Dry Clay Ornaments
We love how versatile air-dry clay is for holiday crafting. It’s super simple to work with, and you don’t need a kiln or any fancy equipment to make some really charming ornaments. Plus, it’s a fantastic way to get the kids involved in making decorations that feel truly personal.
Here’s a basic rundown of how we like to make them:
- Prep Your Clay: Start with a good quality air-dry clay. Knead it a bit to make it pliable, just like you would with play-doh. Roll it out to about 1/4 inch thickness using a rolling pin. We like to do this between two sheets of parchment paper to keep it from sticking.
- Cut Your Shapes: Use cookie cutters in festive shapes – stars, trees, gingerbread men, or even simple circles and hearts. If you don’t have cutters, a knife works too, just be careful.
- Add Details: Before the clay dries, use a skewer or toothpick to poke a hole near the top for hanging. You can also press textures into the clay using stamps, lace, or even leaves from the yard. This is where you can really get creative!
- Drying Time: Let the ornaments dry completely. This can take 24-72 hours, depending on the thickness and humidity. Flip them over halfway through to ensure even drying.
- Decorate: Once dry, we like to paint them with acrylic paints. You can go for classic Christmas colors, metallics, or even a simple white wash. Seal them with a clear sealant if you want them to last longer.
These ornaments are surprisingly durable once dry and painted. They offer a lovely, handmade feel to our tree that store-bought decorations just can’t match. We’ve found that keeping the designs simple often looks best, letting the natural texture of the clay shine through.
9. Wine Cork Snowflake Ornament
We’ve all got a collection of wine corks lying around, right? Instead of tossing them, let’s turn them into something festive! These wine cork snowflake ornaments are surprisingly easy to make and add a charming, rustic touch to our holiday decor. They’re a great way to use up something we’d normally discard, making them a perfect zero-waste craft.
Here’s what you’ll need:
- Wine corks (about 5-6 per snowflake)
- Hot glue gun and glue sticks
- Craft knife or a very sharp kitchen knife
- Twine or ribbon for hanging
- Optional: Glitter, paint, or small beads for embellishment
First, we need to prepare the corks. If you want a flatter snowflake, you can carefully slice the corks in half lengthwise using a craft knife. Be cautious with this step! Alternatively, you can use whole corks for a more dimensional look. For a classic snowflake shape, we’ll arrange six corks (or half-corks) in a star pattern. Apply a generous amount of hot glue to the ends where the corks meet to secure them together. Let the glue cool completely before moving on.
Once your snowflake shape is solid, you can add a hanger. Cut a piece of twine or ribbon, loop it, and glue the ends to the back of the snowflake. If you’re feeling fancy, now’s the time to add a little sparkle with some glitter or a dab of paint. We found that a light dusting of white glitter really makes them pop!
These ornaments are so simple, they’re perfect for a quick craft session. Plus, they look fantastic clustered together on the tree or even used as unique gift toppers. We love how each one turns out a little bit different, adding to their handmade charm.
10. Beeswax Candles

We love filling our home with the warm glow and gentle scent of candles, especially during the holidays. But many store-bought candles can have some pretty harsh chemicals. That’s why we’ve turned to making our own beeswax candles! They burn so cleanly and actually help purify the air, which is a big win for us, especially if anyone in the house has sensitivities. Plus, the natural, subtle honey aroma is just lovely.
Making them is surprisingly straightforward. We usually gather up old jars or tins – thrift stores are fantastic for this! Then, we melt down some beeswax (you can often find blocks at local farmers’ markets or online) and pour it into our containers with a wick. It’s a simple process that yields beautiful, natural candles.
Here’s a basic rundown of what you’ll need:
- Beeswax (pellets or a block)
- Candle wicks (with tabs)
- Heat-safe containers (jars, tins, old teacups)
- A double boiler or a makeshift one (a heat-safe bowl over a pot of simmering water)
- A way to secure the wick (like a wick sticker or a dab of hot glue)
- Something to hold the wick centered while the wax cools (like pencils or chopsticks)
The natural color of beeswax can vary from a pale yellow to a deep golden brown, depending on the source. We find this variation adds to their rustic charm.
It’s a really satisfying project, and the finished candles make wonderful, thoughtful gifts that feel extra special because we made them ourselves.
11. Honey Spoons
We love finding ways to share the sweetness from our homestead, and while a jar of honey is always a hit, sometimes it’s not the most practical gift to transport. That’s where these adorable honey spoons come in! They’re a super simple, zero-waste way to give the gift of your delicious honey, especially perfect for anyone who enjoys a warm cup of tea.
Making them is straightforward:
- Gather some sturdy wooden spoons. You can often find these in bulk or even repurpose ones you might have lying around.
- Gently melt down some of your own harvested honey. We like to warm it just enough so it’s pourable but not too hot.
- Carefully spoon the warm honey onto the bowl of each wooden spoon, creating a nice, thick coating. You want enough to make a good dollop.
- Let them cool completely. This might take a few hours, so patience is key!
- Once hardened, you can wrap them individually in beeswax wrap or a small cloth bag for a truly rustic, eco-friendly presentation.
These honey spoons are a thoughtful, edible gift that truly comes from the heart of our home. They’re a delightful little treat that brings a taste of our homestead right to someone else’s kitchen. Plus, they look so charming tied with a bit of twine!
These are fantastic for last-minute gifts or even as sweet additions to a larger gift basket. They require minimal effort but offer a big impact in terms of thoughtfulness and presentation.
12. Peppermint Scrub
We love finding ways to use what we have around the homestead, and that includes making our own body care products. This peppermint scrub is super simple to whip up and makes a great little gift or a treat for ourselves.
It’s a fantastic way to use up any leftover sugar or salt you might have. Plus, the peppermint scent is so refreshing, especially during the holidays. It leaves your skin feeling incredibly soft and smelling amazing.
Here’s what you’ll need:
- 1 cup sugar (granulated or brown sugar works well)
- 1/2 cup carrier oil (like almond, coconut, or olive oil)
- 10-15 drops peppermint essential oil (adjust to your preference)
Just mix all the ingredients together in a bowl until well combined. If you want a finer scrub, you can use finer sugar. For a coarser scrub, use a coarser sugar or even some Epsom salts.
We like to store ours in small mason jars. They look so cute on the bathroom counter, and they’re perfect for gifting. Just tie a ribbon around the jar and maybe add a little tag with the ingredients. It’s a thoughtful, handmade present that doesn’t cost much at all.
This scrub is a wonderful way to pamper ourselves without using harsh chemicals. The natural ingredients are gentle on the skin, and the invigorating scent of peppermint is a real mood booster. We find it’s especially nice after a long day of working around the farm.
13. Evergreen Bath Salts
We love a good soak, especially when the weather outside is frightful. Making your own bath salts is super simple and a fantastic way to use up those bits of evergreen you might have lying around after decorating. Plus, it makes for a really thoughtful, zero-waste gift!
Here’s what you’ll need:
- Epsom salts (about 2 cups)
- Baking soda (about 1 cup)
- Fresh evergreen sprigs (like pine, fir, or spruce – make sure they’re safe and non-toxic!)
- Optional: A few drops of your favorite essential oil (like fir needle or cedarwood)
First, we like to chop up the evergreen sprigs pretty finely. You can do this with scissors or a knife. Then, we mix the Epsom salts and baking soda together in a bowl. Add the chopped evergreen pieces and any essential oils you’re using. Stir it all up really well. The key is to get everything evenly distributed.
We find that letting the mixture sit in a sealed jar for a few days before using it really helps the scents meld together. It’s like a little spa treatment waiting to happen.
To use, just scoop a generous amount into your warm bathwater. It’s a wonderful way to relax and unwind, and it smells amazing. It’s a great way to bring a bit of the outdoors in, and it’s so much better than buying something that comes with a lot of packaging. You can even make a "Snow Kissed Evergreens" soap to go along with it for the ultimate homemade spa experience.
14. Simmer Pot Gift Idea
We love finding ways to share the cozy vibes of the holidays with friends and family, and a simmer pot gift is such a thoughtful, zero-waste option. It’s basically a collection of dried fruits, spices, and sometimes evergreen sprigs that, when heated on the stove, fill your home with the most wonderful, festive scents. Think cinnamon, cloves, dried orange slices, and maybe a bit of pine – pure Christmas magic!
Putting one together is super simple. We usually gather our ingredients and layer them into a nice glass jar. It looks pretty and keeps everything contained. This makes for a consumable gift that’s both beautiful and practical.
Here’s a basic idea of what we like to include:
- Dried orange slices
- Cinnamon sticks
- Whole cloves
- Star anise
- A few sprigs of rosemary or pine (optional, but adds a lovely fresh scent)
The best part about these simmer pots is that once the ingredients have been used, they can be completely composted. It’s a gift that keeps on giving, without leaving any waste behind. Plus, it’s a gift that the recipient can actually use and enjoy, unlike so many other holiday trinkets.
We often add a little tag with simple instructions: "Add contents to a pot with water and simmer on low heat. Enjoy the festive aroma!" It’s a small touch that makes the gift even more special and easy for anyone to use. It’s a fantastic way to share a bit of homestead warmth during the holiday season.
15. Salt Dough Ornaments
Salt dough ornaments are a classic for a reason! They’re super simple to make, use basic pantry staples, and are a fantastic activity to do with the kids. We love that they’re completely customizable – you can cut them into any shape you like, stamp them with little messages, or paint them up however you envision.
Here’s a basic recipe we often use:
- 2 cups all-purpose flour
- 1 cup salt
- ¾ cup water (you might need a little more or less)
Just mix the flour and salt together, then gradually add the water until you get a firm dough. Roll it out and use cookie cutters for your shapes. Don’t forget to poke a hole for hanging before you bake them! We usually bake ours at around 250°F (120°C) until they’re hard, which can take a couple of hours depending on thickness. Let them cool completely before decorating.
These ornaments are surprisingly durable once baked and sealed, making them a great keepsake for years to come. Plus, the whole process, from mixing the dough to the final painted flourish, is just plain fun.
Once they’re baked and cooled, the real creativity begins. We like to paint them with acrylic paints and then seal them with a clear varnish to protect the design. You can also use stamps to press patterns or letters into the dough before baking for a different look. They make wonderful, personalized gifts too!
16. Snowman Handprint Ornament

Remember when your little ones’ hands seemed impossibly small? We can capture that fleeting moment with a charming snowman handprint ornament. It’s a simple craft that turns a child’s handprint into a whole family of snowmen, perfect for remembering how quickly they grow. This is a keepsake we treasure, and it makes a heartwarming gift for grandparents too.
Here’s what you’ll need:
- White non-toxic paint
- A small paintbrush
- A black permanent marker
- A small piece of orange paper or a dab of orange paint
- Glitter (optional)
- A small ribbon or twine for hanging
- A plain ornament disc or thick cardstock
Steps to create your snowman handprint ornament:
- Paint the Handprint: Carefully paint the palm and fingers of your child’s hand with white paint. Press their hand onto the ornament disc or cardstock, ensuring the fingers are spread slightly to form the snowmen’s bodies. Let it dry completely.
- Add Details: Once the paint is dry, use the black marker to draw the snowman’s eyes, nose (a small dot or triangle), and mouth. You can also draw buttons down the front of each snowman.
- Nose and Accessories: For the nose, either dab a small amount of orange paint or cut a tiny triangle from orange paper and glue it on. You can add a small ribbon or twine tied around the wrist area for a scarf, or even a bit of glitter for some sparkle.
- Hanging Loop: Punch a small hole at the top of the ornament (if using cardstock) and thread a ribbon or twine through it for hanging. If you used a disc ornament, you might already have a hole or can attach a ribbon with strong glue.
This project is a wonderful way to involve kids in holiday decorating. It’s not just about the final product, but the memories made while creating it. Plus, it’s a fantastic way to add a personal touch to your holiday decorations.
We love seeing these little snowmen appear on our tree year after year, a sweet reminder of tiny hands and big holiday cheer.
17. Quilted Table Runner
We all love a festive table setting, especially during the holidays. Instead of buying something new, why not make your own quilted table runner? It’s a fantastic way to use up fabric scraps and add a personal, handmade touch to your dining space. Quilting might sound intimidating, but it’s actually quite forgiving, and the results are always beautiful.
This project is perfect for adding some warmth and charm to your holiday meals. You can choose fabrics that match your existing decor or go for classic Christmas patterns. It’s a project that feels good to make and even better to display.
Here’s a general idea of what you might need:
- Assorted fabric scraps (cotton works best)
- Batting
- Backing fabric
- Thread
- Rotary cutter, mat, and ruler
- Sewing machine
Making a quilted table runner is a rewarding process. It allows us to be creative with colors and patterns, and the finished piece becomes a cherished part of our holiday traditions. Plus, it’s a great way to practice our sewing skills without the pressure of making something that needs to fit perfectly.
Think about the patterns you can create! Simple squares, strips, or even a sawtooth star pattern can make a big impact. It’s a project that can be as simple or as complex as you like, depending on your skill level and the time you have. We find that even a beginner can create a stunning runner with a little patience.
18. Grain Sack Ribbon

We love the rustic charm that grain sacks bring to holiday decor, but finding authentic ones can be tough and pricey. Good news! We can easily make our own grain sack ribbon using simple materials. It’s a fantastic way to get that farmhouse look without breaking the bank.
Here’s how we do it:
- Prep the Fabric: We start with an inexpensive drop cloth. Wash and dry it to give it a softer feel. Then, cut it into strips of your desired width. We usually aim for about 2-3 inches wide for a good ribbon size.
- Paint the Stripes: Using craft paint in a neutral color like black, dark gray, or even a deep barn red, we paint simple stripes down the length of the fabric strips. Don’t worry about perfection; a slightly imperfect, hand-painted look is part of the charm.
- Drying and Finishing: Let the paint dry completely. Once dry, you can fray the edges a bit for an even more authentic, worn look. This DIY ribbon adds instant character to gifts, wreaths, or even just tied around mason jars.
This ribbon is perfect for adding a touch of country to your Christmas gifts, tying around your zero-cost, sustainable DIY Christmas gifts, or even weaving into a garland. It’s a simple project that makes a big impact on our holiday decorating.
19. Fabric Angel Ornament
We can make some really sweet angel ornaments using fabric scraps. This is a fantastic way to use up those little bits of material left over from other projects, especially if you have some nice textured fabrics or even old lace. Think about using remnants from a wedding dress or a favorite old quilt for a truly special touch.
Here’s a simple way we can put them together:
- Cut your fabric: You’ll need a few pieces – one for the body, one for the wings, and maybe a little scrap for the halo.
- Shape the body: Roll or fold a piece of fabric into a cone shape for the angel’s body. You can secure it with a bit of glue or a few stitches.
- Add the wings: Cut out wing shapes from another fabric piece and attach them to the back of the body.
- Finishing touches: A small loop of thread or thin ribbon can be added for hanging, and a tiny wire or pipe cleaner can form a halo.
These fabric angels add a soft, handmade feel to any tree. They’re lightweight and won’t weigh down delicate branches. Plus, they’re a great project to do with kids, letting them choose their own fabric combinations. If you’re looking for ways to create unique paper decorations, you might find inspiration in how to cut traced designs.
We love how these little angels turn out. They feel so personal and bring a bit of warmth to our holiday display. It’s amazing what you can create with just a few scraps and a little imagination.
20. Glitter Ornaments
Who doesn’t love a bit of sparkle during the holidays? We certainly do! Making our own glitter ornaments is a fantastic way to add that festive shimmer to the tree without buying new ones every year. It’s a simple craft that can be done with kids, and the results are always dazzling.
The trick to getting glitter to stick permanently inside clear ornaments is using a liquid adhesive. We’ve found that products like Polycrylic or Mod Podge work wonders. You just pour a little inside, swirl it around to coat the interior, pour out the excess, and then fill it with your chosen glitter. It creates a vibrant and lasting decoration that won’t shed glitter all over your house.
Here’s a quick rundown of what you’ll need:
- Clear plastic or glass ornaments (the fillable kind are best)
- Clear liquid adhesive (like Polycrylic or Mod Podge)
- Fine glitter in your favorite holiday colors
- A funnel (optional, but helpful)
- A small cup or bowl for excess adhesive
We love how versatile this craft is. You can use different colors of glitter, mix in some small beads, or even add a tiny sprig of faux greenery before sealing the ornament. They also make wonderful personalized gifts for friends and family.
Making these is a great way to upcycle old ornaments too, especially if the outside is scratched or faded. Just clean them out, and give them a new, sparkly life! You can find more ideas for clear ornament crafts if you’re looking for more inspiration.
21. Boho Ornament Tree
We love the idea of a "Boho Ornament Tree" because it’s all about embracing a relaxed, eclectic style that feels super cozy and personal. Instead of a perfectly matched set of ornaments, we’re going for a mix of textures, natural elements, and maybe a few unexpected finds. Think of it as a curated collection that tells a story.
To achieve this look, we can gather a variety of ornaments that have a handmade feel. This could include things like:
- Wooden beads and slices
- Macrame or woven pieces
- Dried flowers or grasses
- Textured fabrics like felt or linen
- Hand-painted or stamped ornaments
- Anything with a natural, earthy vibe
The key is to mix and match, not to worry about perfection. We can even incorporate some of our other DIY creations from this list, like the air-dry clay ornaments or fabric stars, to really make it our own. It’s a style that’s forgiving and encourages creativity. We can also add in some simple string lights for a warm glow, and maybe even some natural elements like pinecones or small branches if our tree allows.
This approach allows us to use up bits and pieces we might already have, turning them into something beautiful and unique for our holiday display. It’s about the charm of imperfection and the warmth of handmade items.
22. Scrabble Tile Ornaments
Remember those old Scrabble tiles gathering dust in a forgotten box? We found a way to give them a new life this holiday season! These tiny tiles can be transformed into charming, personalized Christmas ornaments that add a unique touch to our tree. It’s a fantastic project for using up bits and bobs we already have around the homestead.
We love how these little ornaments can spell out holiday wishes or family names. It’s a simple craft, but the result feels so special. Plus, they’re lightweight, making them perfect for even the most delicate branches.
Here’s what we usually do:
- Gather old Scrabble tiles. Any letters will do!
- Find some strong craft glue or E6000.
- Grab small eye hooks or a sturdy string for hanging.
- Optional: a bit of paint or sealant if you want to give them a uniform look.
We often arrange the tiles to spell out words like "JOY," "NOEL," "PEACE," or even our family’s last name. Sometimes, we’ll glue them onto a small wooden block or a larger craft tile for a more substantial ornament. For a bit of sparkle, we might add a tiny dab of glitter glue to the edges. It’s amazing what you can create with such small pieces.
This project is a great way to involve everyone, even the little ones, in decorating. They can help pick out the letters and glue them down. It’s a fun, hands-on activity that results in keepsakes we can cherish for years to come.
23. DIY Stocking Hanger
Forget about cramming stockings onto the mantelpiece or having them lie around on the floor. We can create a simple, sturdy stocking hanger that adds a touch of rustic charm to any room. This project is surprisingly easy and uses materials we often have lying around the homestead.
We found that using scrap wood pieces works perfectly for this. You can use anything from old fence posts to leftover lumber from another project. The key is to find pieces that are strong enough to hold the weight of a full stocking.
Here’s a basic idea of what you might need:
- Scrap wood pieces (about 1-2 inches thick)
- Screws or strong wood glue
- Sandpaper
- Optional: Paint, stain, or sealant
- Hooks or sturdy nails for hanging the stockings
The process is straightforward: cut your wood to the desired size, sand down any rough edges, and then assemble the pieces. We like to create a simple shelf-like structure or even just a decorative bracket. If you’re feeling fancy, you can paint or stain the wood to match your decor. Once it’s dry, attach your hooks or nails securely. We found that using at least two screws per piece of wood makes it really solid.
This DIY stocking hanger is a fantastic way to keep your holiday stockings organized and on display, no matter where you decide to hang them. It’s a practical project that also looks great.
It’s a small project, but it makes a big difference in how our holiday space feels. Plus, it’s a great way to use up those leftover bits of wood before they end up in the compost pile.
24. Felt Garland
We love a good DIY project that we can use year after year, and a felt garland fits the bill perfectly. It’s a simple way to add a pop of color and handmade charm to your home without creating any waste. Plus, you can customize the colors and shapes to match your decor.
Making your own felt garland is surprisingly easy. You can cut out shapes like stars, trees, or even little gingerbread men from felt scraps. Then, all you need to do is string them together. We like to use a sturdy embroidery floss or twine for this.
Here’s a basic idea of how we put ours together:
- Gather your felt scraps. Any colors will do, but we often find ourselves reaching for reds, greens, whites, and maybe a bit of gold.
- Cut out your desired shapes. Simple shapes are best for a quick project. Think circles, squares, or even little hearts.
- Thread a needle with your string. A long piece of twine or sturdy thread works well.
- Start threading your felt shapes onto the string, spacing them out however you like. You can tie a knot on either side of each shape to keep them in place, or just let them slide.
- Hang your new garland wherever you want a festive touch! It looks great on a mantel, draped across a shelf, or even strung along a doorway.
This project is fantastic because it uses up small bits of felt that might otherwise be tossed. It’s a great way to get the kids involved too; they can help with the cutting and threading.
We find that using a variety of felt textures, like wool blends and plain craft felt, can add a nice dimension to the garland. Don’t be afraid to mix and match!
It’s a cozy, tactile decoration that feels just right for the holidays. We usually make a new one each year, adding to our collection and finding new places to hang them.
25. Bronze Bell Twine Garland and more
We love a good garland, and this one adds such a charming, rustic touch to any space. Imagine stringing up some twine and adding little bronze bells to it. It’s simple, but the sound they make when they jingle is just magical, especially when a breeze comes through. It really brings that cozy, vintage vibe we’re going for.
This kind of garland is perfect for a mantelpiece, draped over a bookshelf, or even hung on a wall. It’s a great way to add a bit of metallic shine without being too flashy. Plus, you can easily adjust the length to fit wherever you want to put it.
Here are a few ideas for how to use this kind of garland:
- Drape it along your fireplace mantel.
- Hang it on your Christmas tree for an unexpected touch.
- Use it to decorate a doorway or window frame.
- Wrap it around a gift box for an extra special presentation.
We found that using natural twine really makes the bronze bells pop. It gives it that authentic, homespun feel that’s hard to beat. Don’t be afraid to mix and match different sizes of bells for a bit of visual interest. It’s all about making it your own!
And the best part? This is just one idea. You can take this concept and run with it! Think about adding other small, rustic elements like dried orange slices, cinnamon sticks, or even small pinecones. The possibilities are really endless when you start thinking outside the box with materials you already have around the homestead.
Wrapping It All Up
So there you have it! We’ve walked through a bunch of ways to make your home feel extra festive this holiday season without buying a ton of new stuff. It’s pretty cool when you think about it – using what you already have, or what nature gives us, to create something beautiful. We hope these ideas have sparked some creativity and maybe even inspired a new family tradition. Happy crafting, and here’s to a wonderfully rustic and waste-free Christmas!
Frequently Asked Questions
What does “zero-waste” mean for our Christmas decorations?
When we talk about “zero-waste” decorations, we mean using things we already have or can easily find around our homestead, like wood scraps, old fabric, or even food items like cranberries and dried fruit. The goal is to avoid buying new things that create trash and instead reuse or repurpose what’s available to us.
Can I really make Christmas decorations from things on my homestead?
Absolutely! Our homestead provides so many wonderful materials. Think about fallen branches for wooden ornaments, extra fabric scraps from sewing projects, or even herbs and spices from our garden for simmer pots. It’s all about looking at what we have with a creative eye for the holidays.
Are these DIY projects difficult for beginners?
We’ve tried to pick projects that are pretty simple to follow. Many of them, like the cranberry garland or salt dough ornaments, are great for the whole family to do together. Even if you’re new to crafting, you should find most of these quite manageable.
How can I make my DIY ornaments last longer?
For things like wooden slice ornaments, sealing them with a clear coat can help protect them. For dried fruit, making sure they are fully dried before hanging is key. Storing them carefully in a box after the holidays will also help them stay nice for many Christmases to come.
What if I don’t have a specific item mentioned, like beeswax?
Don’t worry if you don’t have everything! The beauty of homesteading is adapting. If you don’t have beeswax, perhaps you have other natural waxes, or you could focus on other projects like the fabric stars or wooden ornaments. We encourage you to get creative with what you *do* have!
Can these zero-waste decorations be given as gifts?
Definitely! Many of these crafts make wonderful, thoughtful gifts. Things like simmer pots in a jar, honey spoons, or even a set of handmade ornaments are perfect for sharing the holiday spirit with friends and family. They show you put in extra care and thought.


