We’ve all been there, staring at a bubbling brew that’s suddenly gone quiet, or a jar that smells… well, not quite right. Fermentation troubleshooting is a skill we all develop as we get more into making our own fermented foods and drinks. It can be frustrating when things don’t go as planned, but don’t worry, most issues are pretty common and have simple fixes. We’ve put together some of the most frequent problems we run into and how we deal with them.
Key Takeaways
- Pay attention to temperature; it’s a big deal for yeast activity.
- Make sure your yeast is healthy and has what it needs to get started.
- Don’t forget salt – it’s not just for flavor, it helps keep the bad stuff out.
- Give your ferment a way to release gas, but keep the air out.
- Learn to spot the signs of spoilage early on, and don’t be afraid to start over if needed.
Oxygenation Issues
Okay, let’s talk about oxygen. It’s a bit of a double-edged sword when we’re fermenting. In the very beginning, when we’re getting our yeast ready to go, a little bit of oxygen is actually a good thing. It helps the yeast cells multiply and get strong. Think of it like giving them a good breakfast before a big day.
But here’s the catch: once fermentation really kicks off and the yeast starts doing its thing, turning sugars into alcohol and CO2, we want to keep oxygen out. Too much air at this stage can really mess things up. It can lead to some pretty unpleasant flavors, sometimes described as cardboard-like or even like wet paper. Plus, it can stress out our yeast, potentially causing the fermentation to slow down or even stop altogether.
So, how do we manage this? For starters, when we’re preparing our wort or mash, we need to make sure it has enough oxygen for that initial yeast growth. Some folks use fancy aeration systems, but for many of us, just splashing the liquid around vigorously while transferring it or using a sanitized aeration stone connected to an aquarium pump does the trick. We’re aiming for a good amount of dissolved oxygen at this point.
Once fermentation begins, our goal shifts entirely to minimizing oxygen exposure. This means being gentle when we move things around and trying to keep our fermenters sealed up tight. We want that CO2 produced by the yeast to create a protective blanket over our brew.
After fermentation is mostly done, and especially when we’re transferring our fermented product to a secondary vessel or packaging it, we need to be super careful. Splashing is the enemy here. Using a racking cane and trying to keep the liquid level in the receiving vessel as low as possible to minimize the fall can help. Some people even use a CO2 blanket to push out any air that might be lurking in the headspace. It might seem like a lot of fuss, but keeping oxygen away during these later stages is key to a clean-tasting final product.
Temperature Control
We all know yeast is a living thing, and like most living things, it has its preferred temperature range. Messing this up is one of the easiest ways to derail a batch. Too hot, and the yeast can get stressed, producing off-flavors or even dying off. Too cold, and they just get sluggish, slowing down fermentation to a crawl.
Think of it like this: during the active phase of fermentation, yeast can actually generate its own heat. If your ambient temperature is already on the high side, this extra heat can push things over the edge. We’ve seen batches go south because they were left in a warm garage during summer. On the flip side, if it’s too cool, the yeast might go dormant. It’s not dead, just taking a nap, but it means your fermentation stops.
Here’s a quick rundown of what can happen:
- Overheating: Can lead to fusel alcohols (hot, solvent-like flavors) and esters that smell like nail polish remover. It can also encourage the growth of unwanted bacteria.
- Chilling: Results in slow fermentation, potentially incomplete fermentation, and can leave you with a sweet, thin-bodied beer. Sometimes, the yeast might just need a gentle nudge to wake up.
So, what’s the fix? It really depends on your setup. For smaller batches, a simple mini-fridge can be a game-changer, allowing you to precisely control the temperature. For larger setups, you might need more advanced cooling systems. The key is to monitor your fermentation temperature regularly, not just the ambient room temperature. We’ve found that keeping things between 60-70°F (15-21°C) is a good general target for most ales, but always check the specific yeast strain’s recommendations.
Keeping your fermenter in a stable temperature environment is more important than you might think. Fluctuations can shock the yeast, leading to inconsistent results and potential flavor problems down the line. Aim for consistency above all else.
Yeast Health and Viability
We all know yeast is the star of the show when it comes to fermentation, right? But just like any performer, it needs to be in tip-top shape to give its best performance. If our yeast isn’t healthy or viable, our fermentation is going to suffer, plain and simple. This can happen for a few reasons. Maybe the yeast we pitched wasn’t the best quality to begin with, or perhaps it got contaminated somehow.
The fix here is pretty straightforward: if we suspect our yeast is weak, we need to get rid of it and pitch fresh, active yeast. Sometimes, we might need to filter the wort to avoid any funky flavors from dead yeast cells breaking down. And, of course, keeping everything super clean and sanitized is our first line of defense against contamination. We’ve got to be diligent about cleaning and sterilizing all our gear, especially anything that touches the yeast itself.
Here are a few things to keep in mind for happy yeast:
- Storage: Don’t store yeast under pressure. It really messes with its viability.
- Temperature: When we’re cooling things down after fermentation, we need to do it gradually. No sudden temperature shocks for our little yeasties!
- Maintenance: Regularly removing dead yeast cells helps keep the healthy ones happy and active.
Paying attention to yeast health isn’t just about avoiding problems; it’s about setting ourselves up for consistently great results batch after batch. It’s a bit of detective work, but totally worth it.
Stuck Fermentation

So, you’ve been watching your fermenter, expecting all that bubbly action, and… nothing. It’s like the yeast just decided to take an early vacation. This is what we call a stuck fermentation, and it can be a real head-scratcher.
First off, don’t panic. Sometimes, what looks like a stuck fermentation isn’t actually a problem. Certain yeast strains, especially those used for high-gravity brews or some Belgian styles, naturally slow down quite a bit towards the end. They’re just working hard to finish the job.
Another reason this might happen is if the mash temperature was a bit too high. This can affect how much sugar is available for the yeast to munch on, leading to a higher final gravity than you might expect. It’s not necessarily a failure, just a different outcome. You can check out how yeast works to get a better idea of what they’re up to.
If you’re sure it’s truly stuck and you want to get things moving again, here are a few things we can try:
- Check the Temperature: Make sure your fermenter is in the right temperature zone for your yeast. If it’s too cold, the yeast gets sluggish. If it’s too hot, they can get stressed. Adjusting the temperature is often the simplest fix.
- Give it a Gentle Swirl: Sometimes, just gently swirling the fermenter can rouse the yeast from the bottom and get them working again. Be careful not to introduce too much oxygen at this stage, though.
- Pitch More Yeast: If you suspect your original yeast pitched might have been weak or not viable enough, pitching a fresh, active yeast starter can give the fermentation a much-needed boost.
Remember, fermentation is a biological process, and sometimes things don’t go exactly according to plan. Patience and observation are key. If you’ve tried a few things and it’s still not budging, it might just be the nature of that particular brew or yeast strain. Don’t be afraid to let it ride and see what happens; you might be surprised by the result.
Not Enough Salt

We’ve all been there – you’re excited to get that first batch of sauerkraut or kimchi going, you toss in your veggies, and then you get to the salt. You might think, "How much salt do I really need?" and decide to go a little lighter, thinking you can always add more later or that less is more. Well, when it comes to fermentation, skimping on salt is a common pitfall that can lead to a less-than-ideal outcome.
Salt is your fermentation’s best friend; it’s the gatekeeper that keeps the bad guys out while letting the good guys thrive. It draws out water from the vegetables, creating a brine. This salty environment is perfect for the lactic acid bacteria we want to encourage, but it makes life really tough for spoilage microbes like mold and unwanted yeasts. Without enough salt, those undesirable organisms can get a head start, potentially ruining your entire batch before the good bacteria even have a chance to establish themselves.
So, how much is enough? A good rule of thumb is to aim for a salt concentration of about 2% to 3% of the total weight of your vegetables. This means if you have 1000 grams (about 2.2 pounds) of vegetables, you’ll want to add between 20 and 30 grams of salt. It’s really important to weigh both your vegetables and your salt for accuracy. Using measuring spoons can be misleading because different types of salt have different grain sizes and densities.
Here’s a quick guide:
- Weigh your produce: Start by knowing the exact weight of the vegetables you’re using.
- Calculate your salt: For a 2% brine, multiply the vegetable weight by 0.02. For a 3% brine, multiply by 0.03.
- Use the right salt: Opt for non-iodized salt, like sea salt or kosher salt. Iodine and anti-caking agents found in some table salts can interfere with fermentation.
Remember, the brine should taste pleasantly salty, like the sea, but not so salty that it makes you wince. If it tastes bland, you probably need more salt. If it’s too much, you can sometimes adjust by adding a bit more water, but it’s best to get it right from the start.
Getting this salt ratio right is key to a safe, successful, and delicious ferment. It might seem like a small detail, but trust us, it makes a huge difference in the long run.
No Pressure Relief
So, you’ve got a ferment bubbling away, which is awesome! But if you’re using a lid that’s screwed on tight, all that gas has to go somewhere. As the good bacteria do their thing, they release carbon dioxide. In a sealed container, this gas builds up, creating pressure.
This pressure can cause all sorts of messy problems, like brine leaking out around the lid, or even worse, potentially cracking your jar. We’ve definitely had a few jars overflow onto the counter, making a sticky mess that attracts fruit flies. It’s a clear sign that your ferment is active, but it needs a way to vent.
Here’s the deal:
- The Problem: Gas buildup in a sealed jar. This can lead to overflows, messy leaks, or even a compromised seal that lets unwanted air in.
- Why it Happens: Lactic acid bacteria consume sugars and release carbon dioxide as a byproduct. Think of it like a tiny, natural soda maker in your jar.
- The Fix: Give your ferment a way to breathe! Using an airlock is the gold standard. If you don’t have one, a simple lid that’s just slightly loosened can work, but be sure to place the jar on a small plate or towel to catch any potential overflow. We also like using those jars with the built-in rubber seals and clamp lids – just leave one clamp unfastened to allow gas to escape.
If you hear a hiss when you loosen the lid, that’s a good sign! It means your ferment is alive and kicking. Just remember to "burp" it daily if you’re not using an airlock, especially in the first few days of active fermentation.
Ignoring Spoilage Signs
We’ve all been there – staring at a fermenting jar, wondering if what we’re seeing is normal or a sign of trouble. It’s easy to get a little anxious, especially when you’re new to this. A bit of cloudiness in the brine or a harmless white film on top, often called kahm yeast, is usually nothing to worry about. You can just skim that off and keep going. But we really need to learn to trust our senses.
When in doubt, throw it out. It sounds harsh, but it’s the safest bet. If you spot fuzzy mold – and I mean fuzzy, not just a film – in colors like pink, blue, or black, that’s a clear sign your ferment has gone bad. The same goes for a smell that’s truly rotten or putrid, not just sour or yeasty. These aren’t signs of a healthy ferment; they’re indicators that spoilage organisms have taken over, and it’s no longer safe to eat. Eating something that’s spoiled can lead to some pretty unpleasant foodborne illnesses.
Here’s a quick rundown of what’s usually okay versus what’s not:
- Okay: Slightly cloudy brine, a thin white film (kahm yeast), a sour or yeasty smell, a tangy taste.
- Not Okay: Fuzzy mold (any color other than white), slimy texture, a rotten or putrid smell, an upset stomach after tasting.
If you do have to toss a batch, don’t beat yourself up. Clean your jar thoroughly and start fresh. Every spoiled batch is a learning opportunity, teaching us more about what to look for next time. It’s better to lose a batch than to risk your health. Remember, a healthy ferment should smell and taste pleasantly sour, not repulsive. If you’re unsure, it’s always best to err on the side of caution and compost the ferment or feed it to the chickens if you have them.
Funny Smell

Okay, let’s talk about smells. When we first started fermenting, we were super paranoid about any whiff that wasn’t, well, pleasant. But here’s the thing: fermentation isn’t supposed to smell like a rose garden. Most ferments develop a unique aroma that can range from a bit yeasty to something that reminds us of hard-boiled eggs, especially with things like cauliflower.
Don’t panic just because it smells a little ‘off’ – that’s often totally normal. The key is to differentiate between a ‘fermenty’ smell and a truly rotten one. If it smells sour, acidic, or a little yeasty, you’re probably on the right track. That’s the smell of good bacteria doing their thing. We’ve found that after opening the jar, the initial puff of gas can be stronger than the rest, so give it a moment to dissipate before making a judgment.
However, if your ferment smells putrid, like something has genuinely gone bad, then it’s time to say goodbye. Trust your nose here; if it’s a smell that repels you completely, it’s usually a sign that something’s wrong and it’s best to toss the batch. We learned this the hard way with a batch of kimchi that went nuclear.
Here’s a quick rundown:
- Normal Ferment Smells: Sour, acidic, yeasty, slightly pungent (like cauliflower or cabbage).
- Concerning Smells: Overly alcoholic, metallic, like paint thinner (often a sign of too much heat).
- Bad Smells (Toss It): Rotten, putrid, truly disgusting.
If you’re unsure, it’s always better to err on the side of caution. A spoiled ferment isn’t worth the risk of getting sick. We’ve composted a few questionable batches, and honestly, it’s better than dealing with a stomach ache later. Learning to identify these smells is part of the fermenting vegetables journey.
Remember, temperature plays a big role here too. If your ferment smells a bit too alcoholic or like solvent, it might just be too warm. Try moving it to a cooler spot. But if it’s just that funky, sour smell, you’re likely in good shape.
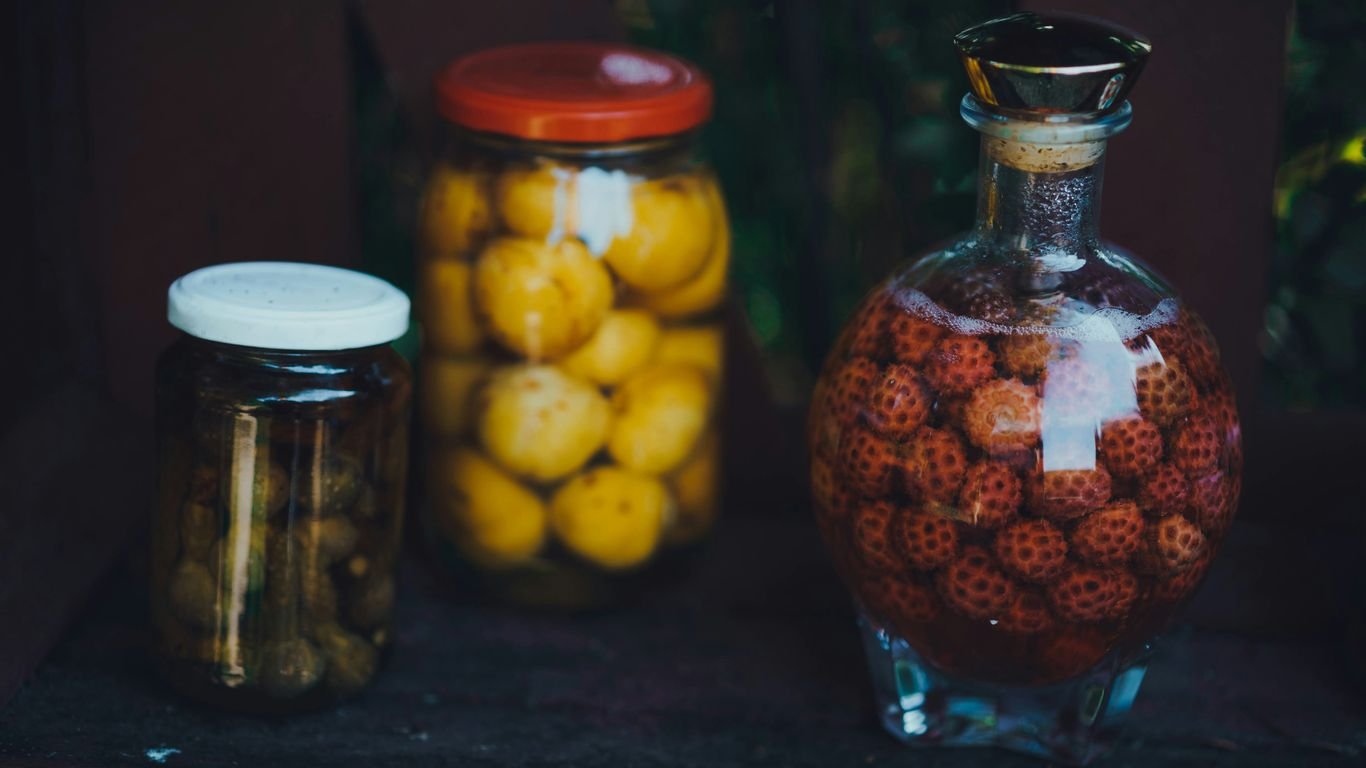
Change In Color
We’ve all been there – you peek into your fermenting jar, expecting that familiar vibrant hue, only to find something… different. Don’t panic just yet! A change in color is often a normal part of the fermentation process. Think about how beets can turn everything pink or how turmeric can give a golden glow. Even plain old sauerkraut can shift from a bright green to a more muted yellow-green.
The key is to use your senses, especially your nose and eyes, to tell the difference between a natural color shift and a sign of spoilage.
Here’s what you might notice:
- Natural Color Changes: Many vegetables will naturally change color as they ferment. This is usually a gradual shift. For example, leafy greens might darken slightly, or root vegetables might bleed their color into the brine.
- Color from Additives: If you’ve added ingredients like beets, turmeric, or certain spices, expect those colors to infuse your ferment. This is totally expected and usually desirable!
- Signs of Trouble: A truly rotten ferment will often look obviously unappetizing. Think brown, slimy textures, or a generally ‘off’ appearance that doesn’t match the expected outcome for your specific ferment. If it looks rotten, it probably smells rotten too.
If you see a white, dusty-looking layer on top, it’s likely kahm yeast. While not harmful, it can affect the flavor, and it’s usually a sign that too much oxygen is getting into your ferment. You can skim it off, but it’s worth investigating why it formed in the first place.
Remember, fermentation is a living process. Colors will change, and that’s usually a good thing, indicating microbial activity. Trust your gut – if it looks and smells wrong, it probably is. But don’t mistake a natural color evolution for spoilage!
Giving Up After One Bad Batch

We’ve all been there. You follow the recipe, you’re excited about your creation, and then… it’s just not right. Maybe it’s mushy, maybe it smells weird, or maybe it just tastes off. It’s easy to feel discouraged, especially after putting in the effort. Don’t let one less-than-perfect batch be the end of your fermentation journey.
Fermentation is a bit of a dance between science and art. So many things can influence the outcome: the temperature in your kitchen, the quality of your water, even the specific vegetables you’re using. It really takes a few tries to get a feel for how these variables play out in your own space. That’s why we always suggest keeping notes on your batches – what was the temperature, how much salt did you use, what did you notice?
Think of that "bad" batch not as a failure, but as a learning opportunity. It’s a rite of passage for most fermenters! Instead of tossing your equipment, try again with a smaller batch. Focus on one potential issue at a time. Did you maybe use a little too much salt? Was the temperature a bit too high? Addressing these common problems can often lead to success on your next attempt. Remember, even experienced fermenters have batches that don’t turn out as planned.
It’s important to remember that fermentation is a living process. Sometimes, despite our best efforts, things don’t go as planned. Instead of seeing it as a setback, view it as a chance to learn and refine your technique. Every batch, good or bad, contributes to your growing understanding.
Here are a few things to consider when a batch goes sideways:
- Salt Content: Too little salt can allow spoilage organisms to grow, while too much can inhibit the good bacteria. Aim for a consistent brine percentage, usually between 1.5% and 2.5% for most vegetables. If you’re unsure, check out resources on proper salt levels.
- Temperature: Fermentation happens best within a specific temperature range. Too hot, and you risk off-flavors or spoilage. Too cold, and the process can slow to a crawl or stall.
- Oxygen Exposure: While some initial bubbling is normal, prolonged exposure to air can lead to mold or other undesirable growths. Ensure your ferments are properly submerged.
Don’t give up! The next batch is often the one where things really click. Happy fermenting!
Wrapping Up Our Fermentation Fixes
So, we’ve gone through a bunch of common fermentation hiccups, right? From weird smells to slow bubbling, it feels like a lot can go wrong. But honestly, most of these issues are pretty straightforward to sort out once you know what to look for. We’ve seen how temperature, salt levels, and even just giving your ferment enough space can make a huge difference. Don’t get discouraged if a batch doesn’t turn out perfectly the first time – that’s part of the learning process! Keep experimenting, keep tasting, and you’ll get the hang of it. Happy fermenting!
Frequently Asked Questions
Why isn’t my ferment bubbling like I expected?
It’s pretty common for ferments not to bubble much, especially at first or if the temperature is a bit cool. Sometimes, the yeast might just be working slowly. Don’t worry too much if you don’t see a lot of action right away. We just need to be patient and let the good microbes do their thing.
What if my ferment smells a little weird?
Most ferments have a unique smell, and it can sometimes be a bit surprising, maybe even a little like eggs or yeast. Just because it smells different doesn’t mean it’s bad. Usually, if it’s truly spoiled, it will smell really, really awful, and you wouldn’t even think about eating it. If it smells rotten, then it’s time to toss it.
I see some mold on my ferment. Should I just scoop it off?
Unfortunately, if you see mold, it’s best to throw the whole batch away. Mold can spread deeper than you can see, and it’s not worth the risk. It’s better to be safe and start over with a fresh batch.
My ferment changed color. Is that okay?
It’s totally normal for ferments to change color as they work. Think about how sauerkraut goes from bright green to a paler shade. If you added things like beets or turmeric, the color change is even more obvious. A bad ferment usually looks brown and smells terrible, so a color change alone isn’t usually a problem.
How can we tell when our ferment is actually done?
The best way to know is to taste it! Most vegetable ferments need at least a week at room temperature. If it tastes nicely sour and not just salty anymore, it’s likely ready. Sometimes, if the pieces are big or it’s cooler, it might take a bit longer. Just keep tasting until you like the flavor.
We had one batch go wrong. Should we give up?
Absolutely not! Every single person who ferments has had a batch go bad at some point. It’s a normal part of learning. Instead of quitting, try to figure out what might have happened – maybe the salt was off, or the temperature wasn’t right. Take notes, adjust, and try again with a smaller batch. You’ll get the hang of it!