DIY Chicken Coop Plans: A Step-by-Step Guide for Your Homestead

Picture this: you step out onto your homestead, coffee in hand, and are greeted by the cheerful clucking of your beloved flock. As you make your way to the coop, you can’t help but feel a surge of pride, knowing that you built this charming, custom-designed abode with your own two hands. Welcome to the wonderful world of DIY chicken coops – where the only limit is your imagination (and maybe a few basic carpentry skills).
But I know what you might be thinking – building a chicken coop from scratch sounds like a daunting task, right? Well, fear not, my fellow homesteading enthusiasts. In this comprehensive, step-by-step guide, I’m going to walk you through the entire process of designing and constructing your very own DIY chicken coop.
By the time you’re done reading, you’ll have all the knowledge and confidence you need to build a safe, functional, and aesthetically pleasing home for your beloved chickens. So, let’s dive in and get those power tools revved up!

Choosing the Right Coop Design
The first step in building your DIY chicken coop is to decide on the right design. There are countless coop styles and configurations out there, each with its own unique benefits and considerations. As you’re evaluating your options, here are a few key factors to keep in mind:
Flock Size: Determine how many chickens you plan to house in your coop, and choose a design that provides adequate space for your feathered friends to move around comfortably. As a general rule of thumb, you’ll want at least 4 square feet of floor space per standard-sized chicken.
Mobility: Do you want a stationary coop that will remain in one spot, or a mobile “chicken tractor” that you can move around your property? Stationary coops tend to be more substantial and long-lasting, while mobile coops offer the flexibility to rotate your flock’s grazing area.
Predator Protection: Ensure that your coop design includes robust, predator-proof features like sturdy walls, secure doors and windows, and a covered run. This will keep your chickens safe from hungry foxes, raccoons, and other critters.
Ventilation: Proper airflow is essential for maintaining a healthy, odor-free environment inside the coop. Look for designs that incorporate vents, windows, or even a cupola to promote natural air circulation.
Accessibility: Consider how easy it will be to access the coop for tasks like collecting eggs, cleaning, and performing routine checks on your chickens. Opt for a design with convenient doors and nesting box access.
Once you’ve weighed these factors and settled on your ideal coop design, it’s time to start planning the construction.

Gathering Your Materials and Tools
Before you can start building your DIY chicken coop, you’ll need to gather all the necessary materials and tools. Here’s a comprehensive list to get you started:
Materials:
- Pressure-treated lumber (for the frame)
- Plywood or tongue-and-groove boards (for the walls and roof)
- Galvanized hardware cloth or wire mesh (for the run)
- Roofing material (such as asphalt shingles or metal panels)
- Hinges, latches, and other hardware
- Nesting boxes and roosting bars
- Paint or sealant (optional)
Tools:
- Circular saw or miter saw
- Drill and drill bits
- Hammer or nail gun
- Screwdriver set
- Measuring tape and pencil
- Level
- Safety gear (goggles, gloves, etc.)
With all your materials and tools assembled, you’re ready to start the construction process.

Step-by-Step Chicken Coop Construction
Now, let’s dive into the nitty-gritty of building your DIY chicken coop. I’ll walk you through the process step-by-step, complete with helpful illustrations and diagrams.
Step 1: Prepare the Foundation
Begin by selecting a level, well-drained location for your coop. Lay down a sturdy foundation, such as a wooden frame or concrete blocks, to ensure your structure remains stable and secure.
Step 2: Construct the Frame
Using your pressure-treated lumber, build the basic frame of your coop. This will include the floor, walls, and roof supports. Ensure that all joints are securely fastened with screws or nails.
Step 3: Add the Walls and Roof
Attach the plywood or tongue-and-groove boards to the frame to create the walls and roof. Make sure to leave openings for windows, vents, and doors as needed.
Step 4: Install the Run
Attach the galvanized hardware cloth or wire mesh to the frame to enclose the run area. This will allow your chickens to enjoy the great outdoors while keeping them safe from predators.
Step 5: Add the Finishing Touches
Install the nesting boxes, roosting bars, and any other desired features like a pop-hole door or ramp. Don’t forget to add a secure latch to the main door.
Step 6: Paint and Seal (Optional)
If desired, apply a coat of paint or sealant to the exterior of your coop to protect the wood and give it a polished, finished look.
And there you have it – your very own DIY chicken coop, custom-built to meet the unique needs of your feathered flock! To help visualize the process, here’s a simple chicken coop plan by EasyCoops you can use as a starting point
Tips and Tricks for Coop Success
As you embark on your chicken coop construction journey, here are a few additional tips and tricks to help ensure your project is a resounding success:
- Ventilation is Key: Proper airflow is essential for maintaining a healthy, odor-free coop environment. Incorporate features like windows, vents, and a cupola to promote natural air circulation.
- Predator-Proof Design: Prioritize sturdy, predator-resistant materials and secure closures to keep your chickens safe from hungry critters.
- Maximize Space Efficiently: Utilize vertical space by adding nesting boxes and roosting bars, and consider incorporating a mobile “chicken tractor” design for added flexibility.
- Incorporate Automation: Consider adding features like automatic doors or feeders to simplify your daily chicken-keeping tasks.
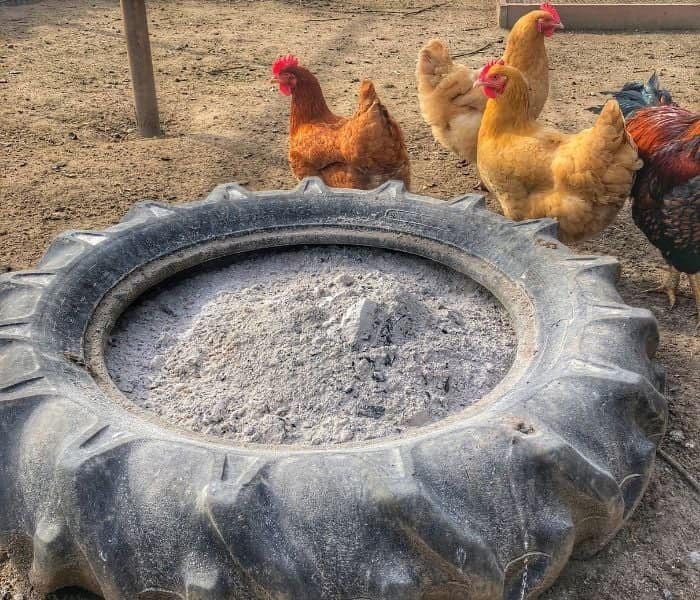
- Customize for Comfort: Pay attention to your chickens’ needs, such as providing adequate perching space and a dust bath area.
- Plan for Easy Cleaning: Design the coop with convenient access points and incorporate features that make routine maintenance a breeze.
- Start Small and Expand: If you’re new to chicken-keeping, consider building a smaller coop first, then gradually expanding as your flock grows.
By following these tips and tricks, you’ll be well on your way to creating a thriving, functional, and aesthetically pleasing DIY chicken coop that your feathered friends will love to call home.


